Ultimate Guide to Photographing Sea Lions Up Close
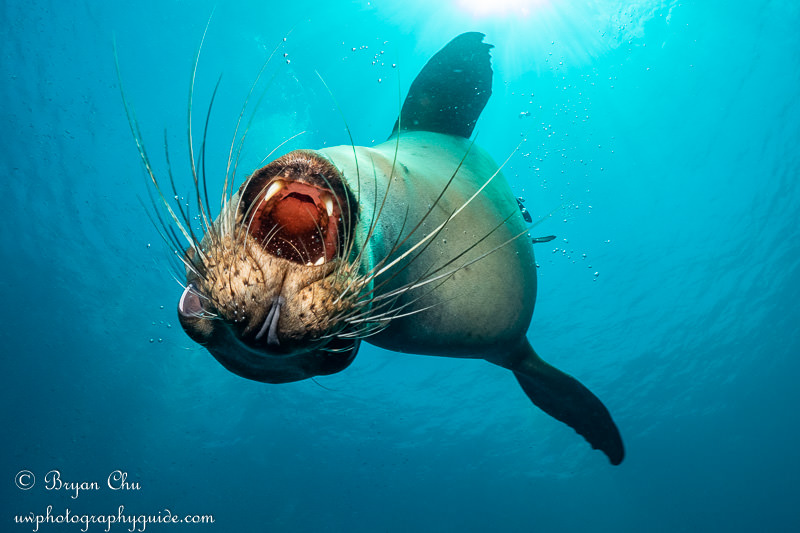
My first couple of times trying to photograph sea lions, I didn’t quite get things right. In fact, I got quite a few things wrong. Fortunately, though, I learned a lot along the way. Now with a lot of experience under my belt, I’ve put together everything I’ve learned about how to make the most of any encounters you get with sea lions, or other super fast underwater animals that come really close.
As with all underwater photography, you need to get the basics right; with really fast subjects, though, there are some additional challenges. So I’ve broken this down into the main things to figure out, and how to do so when you only have a split second to catch the perfect moment.
- The right lens for the job
- Sharp focus on the right part of the animal
- Nice lighting
- The right settings
- Composition
- Editing/Post-Processing
I had to put them into order for the purpose of this article, but that doesn’t mean any one of these is more important than the others. You need to get all of these right to really nail your shots.
1. The Right Lens for the Job
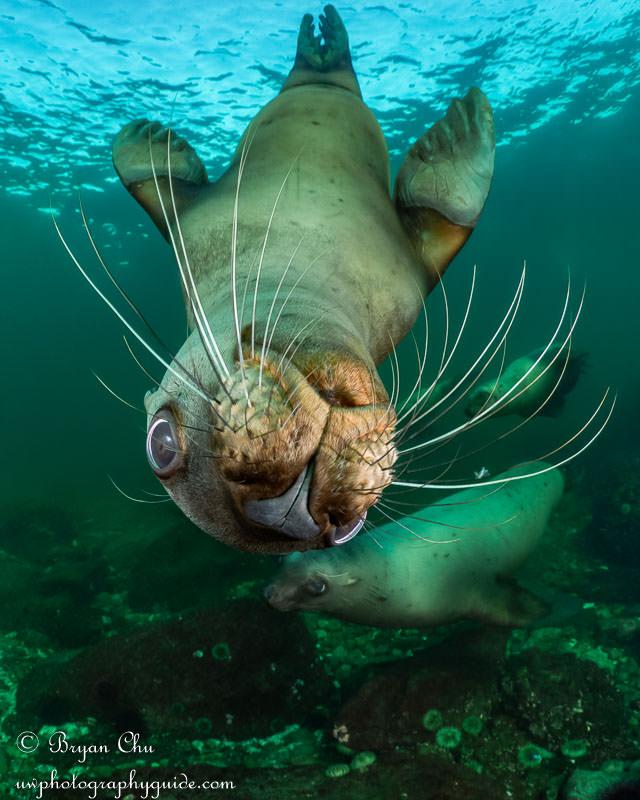
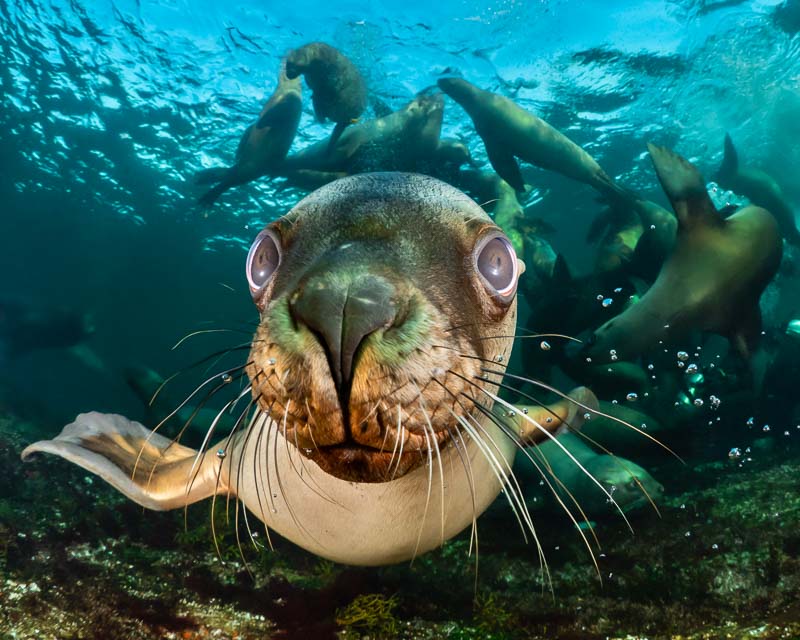
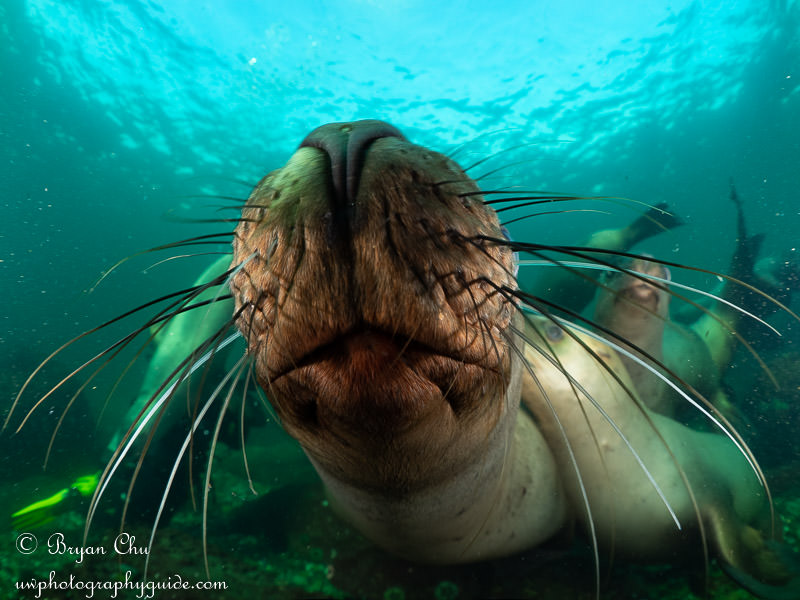
A fisheye lens is my favourite choice for sea lions, as it lets me get super close, giving me the sharpest images. Second choice would be a rectilinear wide angle, like the Olympus 7-14 or a 14-28mm range full frame equivalent lens. The wider the lens, the more cute features like sea lion whiskers are accentuated. With that said, sometimes the fisheye lens does lead to disappointment – if your sea lions don’t get as close as you hope, you might come away with nothing good. But that’s always the case with fisheyes, and just something you need to think about when choosing your lens (here’s a blog post I wrote about why I love fisheyes so much).
(FYI – you can’t equate the field of view of a fisheye lens with its focal length. The Olympus 8mm fisheye lens has a field of view of 180 degrees. The Olympus 7-14mm rectilinear wide lens has a field of view of 110 degrees when fully zoomed out at 7 mm. Even though 7 is less than 8, the 7mm has a much, much narrower field of view than the fisheye. Same goes for equivalent full frame lenses).
The other advantage of the fisheye lens is that it gives you crazily deep depth of field. For example, if I am at f/8, and focusing at a distance of about 2 ft, then everything between 1 ft and infinity is in focus! (Here’s a spec sheet for the Olympus fisheye with more of this info).
If you are a compact camera shooter, then you’ll want a wet wide angle lens if you can, otherwise you will have more difficulty framing your subject with the narrower “native” compact camera field of view. And you won’t be able to get those dramatic close-up shots. However, you can still get good photos; you just need to wait for the right opportunity, because it will be very hard to get anything good when your subject is too close or too far away.
Bottom line: if you are photographing sea lions and want really dramatic super-close whisker shots, a fisheye is the best choice!
2. Getting Sharp Focus (on the Right Part)!
This is one of the most difficult pieces, and something I see lots of people struggle with. Most people use underwater cameras which are a few years old, which may not have the sharpest auto-focus (especially non-dSLRs). My camera, the Olympus OM-D E-M1 (the original Mark I), falls into that category. It has a solid autofocus, better than many options out there, but not close to something like a Nikon D850 or a Canon 1DX Mark III.
And what I find with sea lions and dolphins, is that they rush right at me, and when I judge they are at the right distance, I hit the shutter… then for a split second, nothing happens, and the creature turns… and then my autofocus locks, sometimes only a split second late, sometimes quite a bit too late… and I get a picture of the side or the back of the animal, instead of the head-on shot I was looking for. It sucks, because I know how good of a shot it could have been, but all I have is a poor photo.
To get around this, I pre-set my focus at a set distance, using back button focus. (Back button focus is where you assign a separate button from the shutter for focusing the camera. So you focus the camera by hitting the back-button focus button, and then it holds the focus distance you’ve set no matter how many times you hit the shutter. Then, to refocus at a different distance, you press the back-button focus button again).
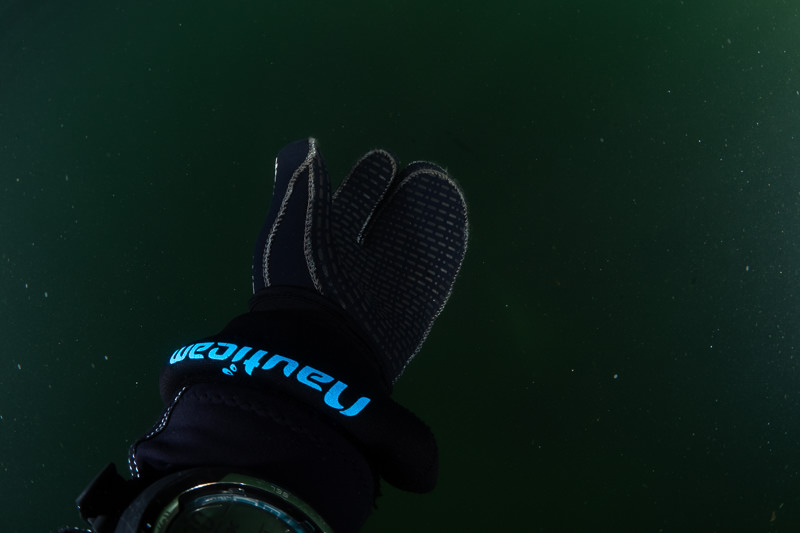
Once I put my camera in back-button focus mode, I hold my hand out about 12 to 18 inches in front of my dome port, and lock my focus on my fingers (usually I just reach around with my left hand and stretch it out as far as I can, that seems to work pretty well). Now I can take as many photos as I want with my focus set to about 12-18 inches from my dome, with no time lag at all between me pressing the shutter and the camera taking a photo!
So as that sea lion comes in really close, I keep an eye on it, and when I judge it to be my pre-focused distance off my dome port, I hit the shutter. After some practice, I almost always nail my focus with this method! And if my subjects are only coming to 3 ft away instead of 1 then I adjust my focus point to be 3 ft away, and then fire away. The closer you are focusing on your subject, the harder it is to nail the focus in the right place, and the further away, the easier. So if I am focusing really closely, I will typically bump up my f-stop to get more depth of field.
This brings up another consideration for autofocus vs back-button focus. Back-button focus, I have full control of exactly how far my focus point is from the camera. Autofocus, it depends where your focus box is, and where the animal is in the field of view. I almost always am trying to get focus on the sea lion’s eyes, because they are just so incredibly cute. But when a sea lion is rushing at you, your autofocus is likely going to lock on its mouth or nose. So by pre-setting your focus, then you just have to wait until the sea lion’s eyes are the right distance from your camera, and then hit the shutter.
If you are thinking to yourself “my autofocus is pretty good, I don’t need to do this” then I’ll ask you this – when there’s a sea lion speeeding right at your dome, and you hit the shutter, does it lock focus and immediately fire (and get the eyes sharp)? Or is there any amount of delay, even the smallest? Because when your subject is coming in at full speed, all it takes is a split second to miss your shot.
3. Nice Lighting
The first choice around lighting is whether you are going to use strobes or not. With sea lions, I always have my strobes with me. But for subjects like dolphins or marlin, where you may need to swim really quickly to get in the right position for a fly-by, or to follow a baitball, strobes can be a major hindrance. Strobes are also less necessary for snorkeling, if you are staying on the surface. But if you are planning on diving down and want to shoot up, without getting a silhouette, then strobes can be useful. So it depends what you are doing.
Ambient Light
If you decide to go with ambient light, unless you are going for silhouettes, you typically want the sun at your back. You can nail your focus and freeze the action perfectly on your speedy sea lion, but if the sun is behind your subject you’ll get a dark blob and your photo won’t have the connection that makes it really pop. As you will typically be on the surface when shooting ambient light, it can often work to shoot straight at the subject or even at a downwards angle, as that will give the nicest lighting.
Strobes
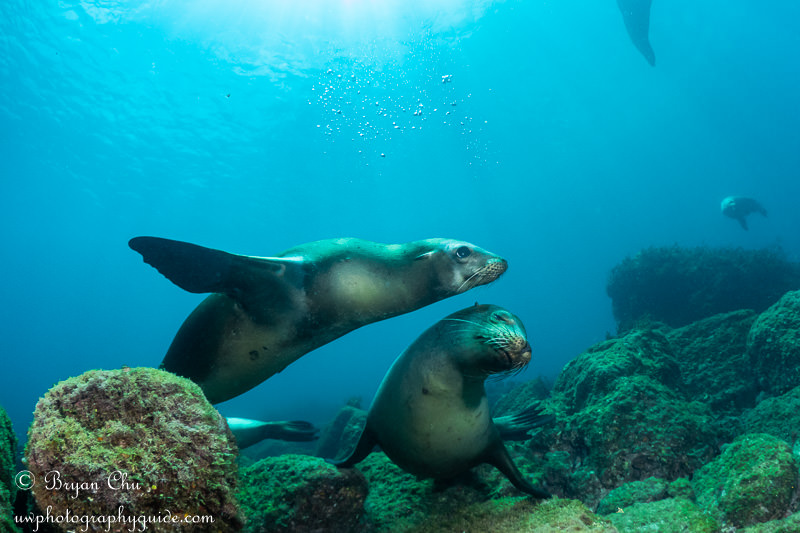
As mentioned, I always use strobes with sea lions – they really bring out the details in the fur, and the facial expressions, as well as providing fill light when shooting up towards the surface. Additionally, since strobe light discharges faster than 1/500th of a second (can be 1/1000th of a second or faster), strobes help freeze the motion of your speeding subject.
For people wondering about video lights vs strobes – for taking photos, video lights are a lot less useful, as they are much less powerful than strobes, and they also don’t freeze the action at all. Though they are still better than nothing, and of course if you primarily take video, then it won’t hurt for photos. But strobes are best for anyone who wants to get the very best photos they can.
Sea lions present unique challenges with strobes, because they require you to be spinning and contorting yourself to capture the action. All this spinning around, not to mention your subjects bumping into you, can move your strobes around, bump the dials so they don’t fire, or even unplug the fiber optic cables. (I have even had sea lions that like to play with the cables, grabbing them in their mouths and pulling them out!)
To get around this, you need to have a good rhythm. Shoot a few photos, check the LCD to see how the lighting is, make sure it’s even and it’s coming from both sides. When you’re taking your photos, watch your subject, make sure they are flashing with strobe light every click of the shutter. In between subject fly-bys, do a quick visual check – are my strobes in the right place, are my cables plugged in, are my dials in the right places? Shoot – check – shoot- check – shoot – check. The check is the most important step, don’t forget to do it regularly!
Along with checking that your subject is lit well, you also need to make sure you’re not blowing any part of them out. Since you are trying to photograph your subject really close, there is a very high potential for hotspots. So I recommend always using your blown highlights warning (blown highlights will flash red on your LCD when reviewing photos).
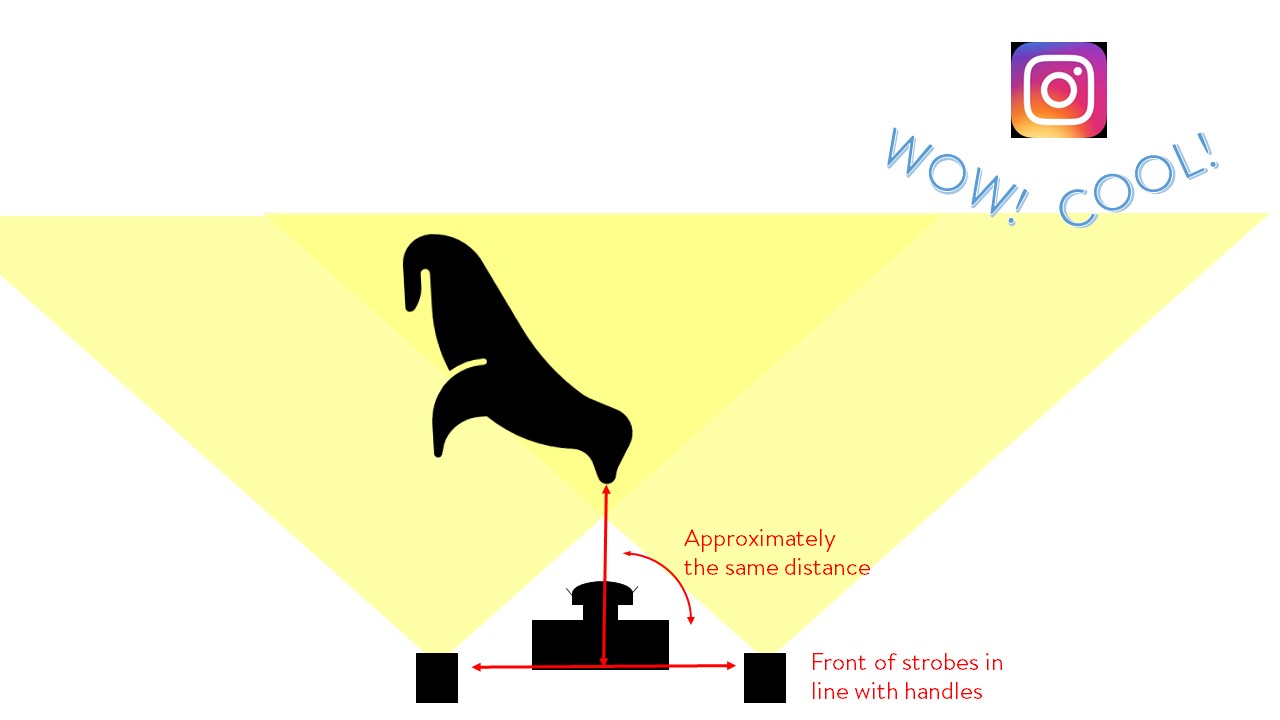
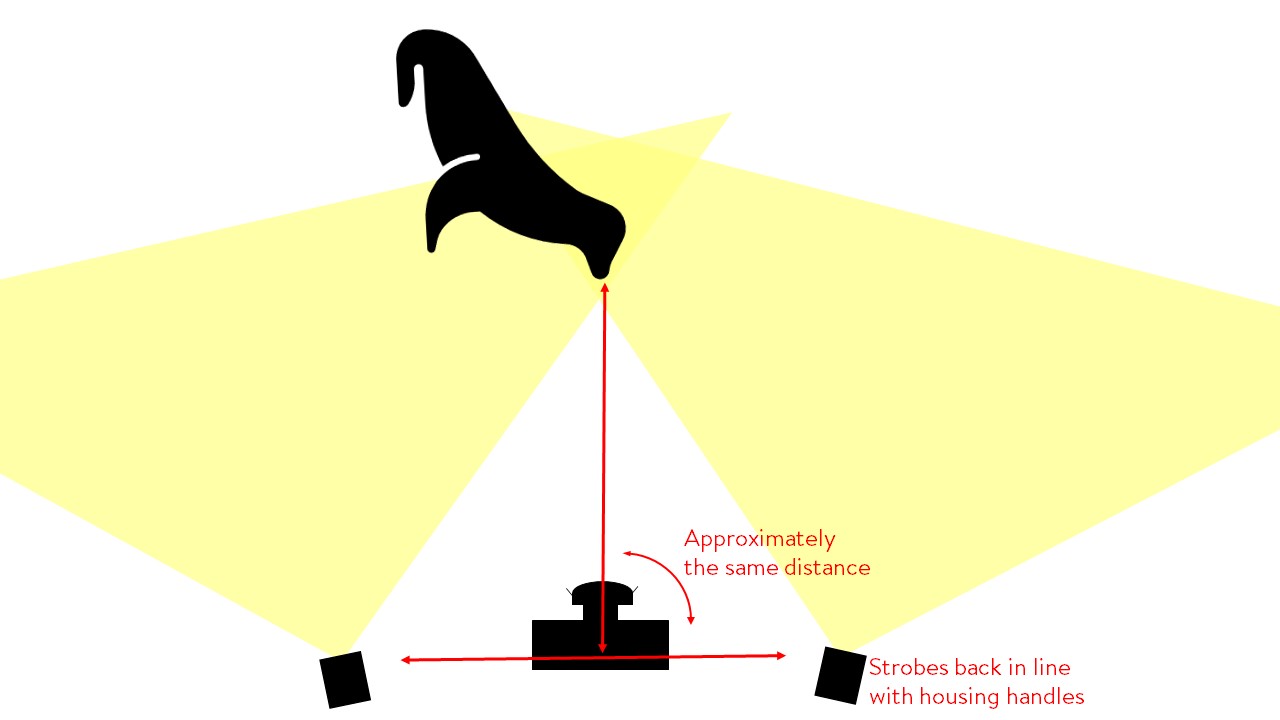
How about strobe position? Well it depends on what kind of images you are trying to get. If you are trying to get the animal with a reef, then you might want your strobes up above the camera. But what I find with sea lions is that I am almost always trying to photograph them in mid-water, while shooting at an upwards angle. Or even just straight head-on. In those situations, I always keep my strobes level with my dome port. If I am trying to shoot a subject really close to the dome port, I move my strobes in close against the handles, but pulled back so the front of the strobe is in line with my housing handles. Pulling them back reduces backscatter, while also giving a more even spread of light, with fewer hotspots.
If I am photographing a subject a few feet away, I still keep my strobes pulled back so the front is in line with the handles, but I move them out away from the housing so they are the same distance apart as my subject is from the camera. For example, if I am photographing a subject 3 ft away, I move my strobes so they are 3 ft apart, as below.
Close-up sea lion photography is some of the most demanding underwater photography out there. The main thing to try to keep in mind is what distance you are setting up your shot for. If you set your focus at 1 ft away, set your strobes for that distance. If you set your focus at 3 ft away, set your strobes for that distance. Then try to stick to that distance until you get some nice shots. Once you’re happy with what you’ve got, adjust the strobes, adjust the focus point, and go for the next distance of shot.
While you’re getting used to this, you will screw up. A lot. It’s easy to get excited with a lot of action going on, and then you’ll get some poorly lit and/or blurry and/or snowstorm shots. That’s normal, and part of the process. But if you do it right, you should also be able to get the best closeup sea lion shots you’ve ever gotten. At least, that is how it’s worked for me!
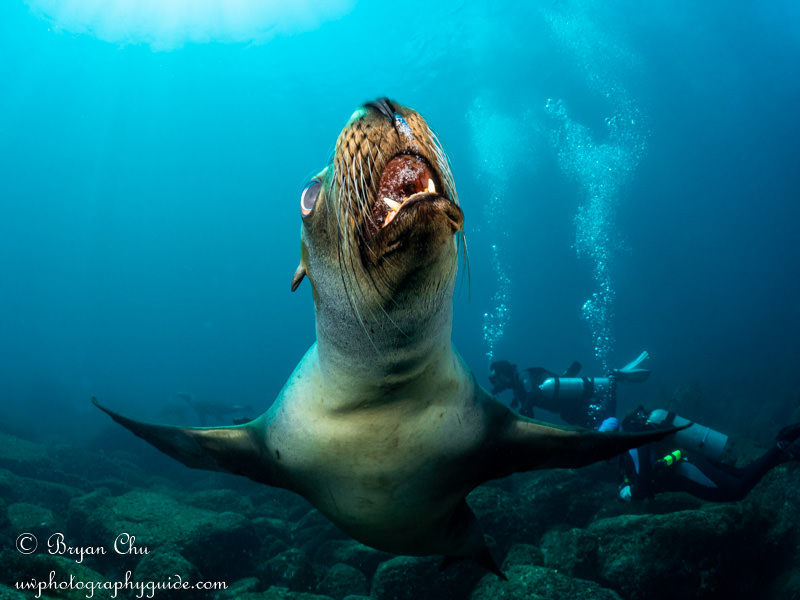
Here’s a shot that I thought I nailed, until I looked really closely at it. See if you can spot the issue.
Yes, it is a pretty good photo, but the lighting isn’t quite right. You can see I had my strobes up, and it looks like only the left strobe fired. Or else, my right strobe was high enough up it didn’t light the sea lion’s right eye. So the top of its head is dark. This is why I recommend keeping the strobes down, and level with your dome port. And this is why your shoot-check rhythm is so important. If I had that rhythm going, I would have noticed this on a prior shot, and could have adjusted.
Continuous Shooting
I don’t have a flash trigger, so I am using my camera’s flash to trigger my strobes. Because my camera flash takes a while to recycle, if I go on continuous mode I just get a flash at maybe 1 fps, or even slower. So I have to pick my shots and take singles to get my strobes to fire. If you have continuous mode with a flash trigger, by all means, give that a go. You may need to turn your strobes down so that they can recycle fast enough, though even if they don’t recycle in time for every shot, even if you get 2 or 3 fps that can still be pretty good.
Overall though, I can’t say I see a big need for it. I tend to have my strobes on at a fairly decent power level, so I’d only be able to get maybe 2 or 3 quick shots anyway before they needed time to recycle. And I find that with practice I can time my shots right, so I get them the first time, and don’t need the machine gun fire of a really high-end camera setup!
Now if you are using video lights, here is where you can take advantage of the continuous light source. If that is what you’re working with, then no need to worry about recycle time. Continuous shooting won’t disrupt anything, just make sure you still focus on getting the best composition, rather than just shooting as many frames as possible!
4. The Right Settings
With sea lions, dolphins, and so on, the faster the shutter speed, the better. This means that if you are using strobes, you should be at the max shutter sync speed (typically around 1/250 sec). Now this isn’t always needed – sometimes sea lions or dolphins will slow down and give you lots of time to take their photos. But if they are really pumped up and zipping around at top speed, you need every bit of shutter speed you can get.
Aperture, it’s tempting to cheat, but don’t cheat too much. Even with a forgiving lens like a fisheye, where you may be used to opening the aperture and sacrificing some corner sharpness for a good exposure, be very careful. When you are trying to photograph a speeding sea lion that is 1 foot away from your dome port, you need some depth of field, more than an f/4 will give you. It’s best if you can get up to an f/7.1, f/8 kind of range, which will also be the sweet spot for your lens’ image quality.
Going back to the depth of field table for the Olympus 8mm fisheye, if I’m focusing at a distance of 1.6 ft/0.5 m, then here’s my in-focus range for a few apertures:
- f/2.8: 0.4 to 0.69 m (1.3 to 2.3 ft) = 12″ total
- f/4: 0.37 to 0.84 m (1.2 ft to 2.8 ft) = 18.5″ total
- f/5.6: 0.34 to 1.22 m (1.1 to 4 ft) = 35″ total
- f/8: 0.30 to 4.1 m (1 to 13.4 ft) = 149″ total!!
*Note: if you are using a full-frame camera, then your fisheye depths of field will follow a similar pattern, but will be narrower than these values. Look them up, it’s a good thing to know about your equipment!*
f/8 gives over 10x the depth of field that f/2.8 gets me, so as you can imagine this makes it much easier to get those adorable sea lion eyes sharply in focus!
If you’re going to use a high shutter speed and you can’t open your aperture up too much, then you have to pay the price with your ISO. This is where you need to know your camera’s noise performance. For my OM-D E-M1, I try to stay at ISO 400 or below. Sometimes that is not good enough, but I have enough experience to know that once I go over ISO 640, things get quite grainy, and over ISO 800, I’m likely not going to keep many images. If you have a full frame sensor, lucky you, you can push the ISO higher, and buy yourself more depth of field.
Overall this means I’m typically trying to shoot around 1/320 sec, f/7.1, ISO 400. Keep in mind this does change with ambient light conditions, especially shooting into the sun… but it’s a good starting point. If the water is clear and there’s bright sunlight, let’s say in Mexico, then I may be able to turn down my ISO to 200 and bump up my f-stop while still getting a nice bright blue background. In BC especially, where the water is often somewhat dark and murky, then I have a couple of options. I can either do a combination of increasing the ISO, cheating on my aperture, and cheating on my shutter speed… or I can go to a really shallow depth, where the light is better.
My first choice is usually to go shallow, as I find my best shots have mostly been taken very close to the surface anyway. If I do have to adjust my settings to let in more light, then I’ll try to make small tweaks to each lever to spread out the pain. So I’ll bump up the ISO to maybe 500, bump open my aperture to f/6.3, and, depending on how fast the sea lions are moving, I might drop down to 1/250 sec. Usually this works, as long as I am shooting up. If I am shooting down at or level with the sea lions, then this may not be enough… but I am rarely doing that anyway.
If you’re still wrapping your head around manual settings, and this is too much task loading for you, then you can always let your camera do some of the work, and use shutter priority instead of manual mode. This allows you to still make sure your shutter speed is fast enough to freeze the motion, but means you don’t have to fiddle as much with your ISO or aperture. I always recommend manual once you are comfortable enough to use it effectively, but until then, shutter priority will still let you get some great shots. Here’s a tutorial I wrote on using shutter priority.
5. Composition
OK, now you’ve got the right settings, you’re prefocused for cute close-up shots, you’re in a good rhythm of shooting and checking your strobes/lighting, and you’re getting some sharp, in-focus, well-lit shots. Great. Now’s the time to leverage this technical foundation to get some really great sea lion shots.
The first thing you have to do is shift your mindset. If your plan is to just respond to the sea lions in the moment and take the best shots when they present themselves, you’ll find you’re scrambling a lot to change your settings, and you’re missing great photo opportunities.
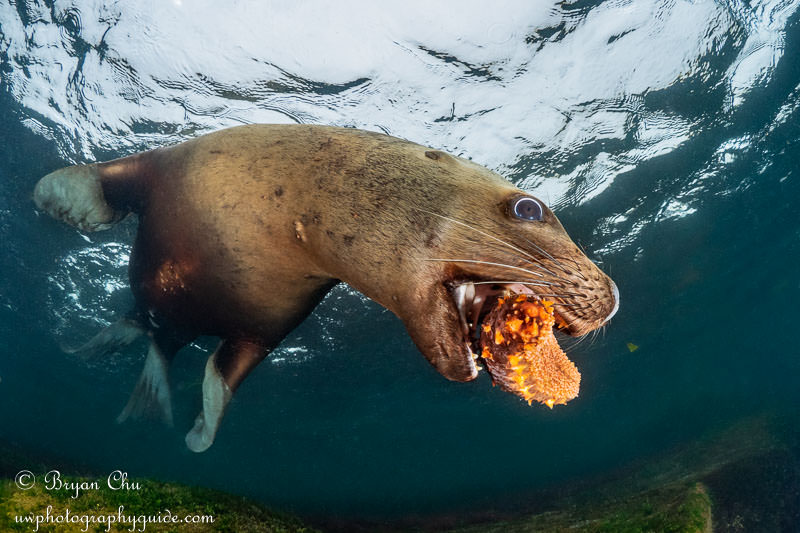
You need to visualize the shot you’re going for, adjust all your settings for that scenario, and then doggedly pursue it without being distracted by too many other things. (The exception to this is if you see really cool behaviours like a sea lion playing with a starfish or a sea cucumber. In that case, drop everything and go for it!)
What I would recommend is that you do some research and create a shot list of the sea lion photos you want. Once you’re in the water, observe the sea lions and figure out what shot on your list is the best to try based on how they are behaving.
Get all your settings dialed in for your chosen shot, and then stick with it! Sea lions are really distracting. You may see them playing and having fun with each other, so you decide you want to do a sea lion interaction shot. So you get all set up, maybe you pre-focus 3 ft away and put your strobes out… and then a sea lion comes up to your dome port and nibbles on it, then swims away. Well, missed opportunity. But stick to your plan. Keep the set-up for an interaction shot, and keep looking for it. Because as soon as you adjust for that close-up nibbling shot, then you’ll see the interaction you were looking for… and you’ll miss it because you’re not set up for it.
General Composition Tips
Before getting to shot list specifics, here are a few basic considerations for sea lion photos…
- Get low, get close, shoot up
- Get the eyes in focus!
- Capture behaviours
- Get the sea lions coming at you, before they turn away
- Sharp eye contact with both eyes is almost always better than one eye
- Whiskers are super cute
- Photograph them as shallow as you can
- Try to get their flippers along with their face – disembodied heads look weird!
- Get low, get close, shoot up!
- But don’t have them so close that you just get a frame full of whiskers
I can’t emphasize enough that you need to get low, get close and shoot up. Shooting up gives you nice clean, sharp, bright backgrounds, either green, grey or blue (depending on water and sky), with much less backscatter. Shooting down gives you messy, dark, noisy backgrounds with lots of backscatter.
Shoot Blind
I have seen lots of people using their viewfinders when photographing sea lions. When I am photographing sea lions I never use mine, and the only thing I typically use my LCD screen for is to review my images after I’ve taken them. Instead, I shoot blind (note – best done with a fisheye due to the extra wide field of view). This gives me a lot of advantages…
- I can see everything going on in realtime, and be ready for the sea lion speeding in from above, or coming in from the side, without having to react to it suddenly showing up in my viewfinder
- It is easier to judge the distance, and tell if the sea lion is right in the sweet spot for my preset focal range
- I can easily move my camera forwards, backwards, up or down to fine-tune the position and angle of my shot
- I can easily maneuver myself up, down, forwards, backwards to get in the right position
- It’s easier to be in the rhythm of shoot-check-shoot-check when I’m not attached to my viewfinder/LCD
- I can visually see my strobe lights hitting my subject (or not)
- I can better anticipate behaviors to capture, like blowing bubbles
It may seem hard at first, but with practice it becomes second nature, I promise!
Sea Lions Love to Play!
Now I’m not saying you should chase sea lions around and try to get them to play with you. And I’m also not saying to flail around and smash up the bottom with your fins. Also note that the suggestions are not scientifically proven – no double blind testing was done to confirm sea lions react more to one thing over another. But I have observed people interacting with sea lions, and seen which people the sea lions find the most interesting. Here’s a list of things which might help…
- Having a camera (they love chewing on cameras!)
- Wiggling your camera around, trying to catch their attention with your dome port
- Flipping or rolling around in midwater
- Flapping your arms around/doing your sea lion dance
- Having lots of sea lions around (the more there are, the bolder they seem)
- Wearing bright colours
- Making noises?? (this one is especially suspect. But it worked with dusky dolphins so I still try it from time to time, making barking or squealing sounds)
- Going to the surface – this didn’t work too well in the Sea of Cortez, but in BC it can throw them into a frenzy, with them dogpiling you in their eagerness to check you out
Small Camera Movements Can Make All the Difference
If sea lions are being really interactive, they will get too close, and then you get messy photos of just their noses or whiskers. One or two of those are fun, but if they are that close I will usually push my camera gently forward, and then quickly pull it camera back as far as I can and take the shot, while there is a 12-18″ gap between their nose and my dome port! On the other hand, if they are 3 feet away, and I want them to be more like 18″, then I will quickly push the camera towards them to close the gap, and then take the shot.
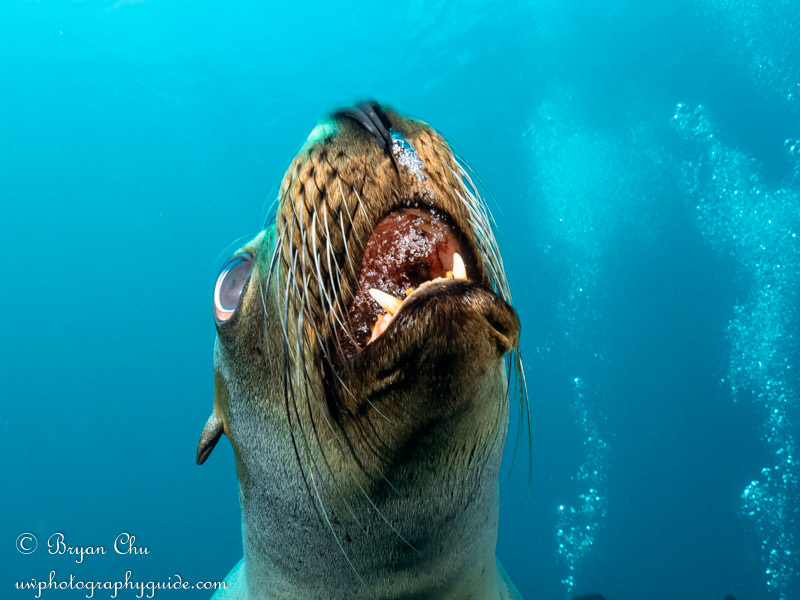
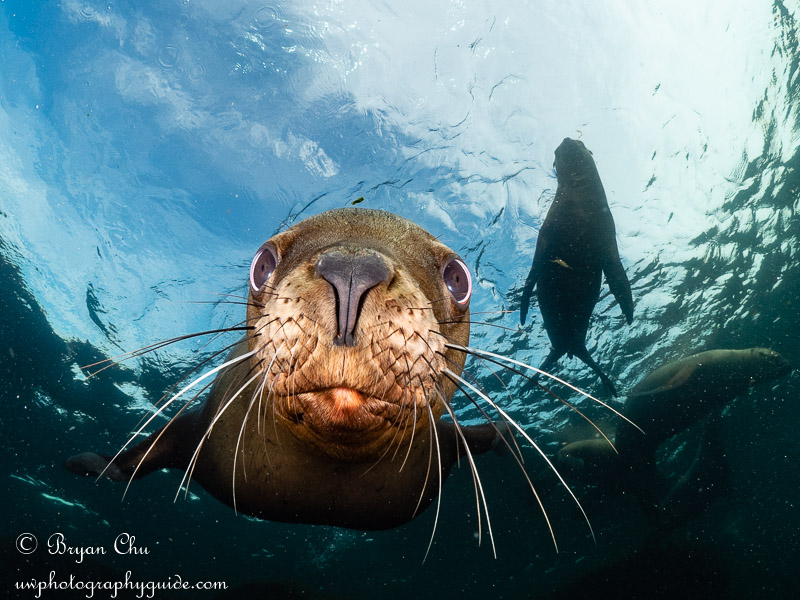
When working within the 12″-18″ distance, small changes make huge differences to the photo. You need to get the camera up a bit so that the sea lion is looking right into the lens. Getting it up by a couple of inches makes the difference between really strong eye contact…
…and not quite eye contact…
…which brings me to the final piece of composition advice. If you have a great sea lion interaction and they are whipping all around you, you have to choose your moments very carefully. Firing willy-nilly can mean that you miss your opportunity. The window for taking the optimal photo can open and close in less than a second! Whether a sea lion is looking at your fin or at your dome port, whether you have one eye or two eye contact, makes all the difference for your photo quality. So have patience, and wait until you get that two eye contact, or that bubble blowing, or whatever it is you’re going for, before hitting that trigger.
Sometimes that means having a sea lion come right in, and start chewing on my camera, without me taking a single photo. Then he pauses, I maneuver, get back, pull my camera back, bring it up a little bit… and take the shot to get the eye contact!
Sample Shot List
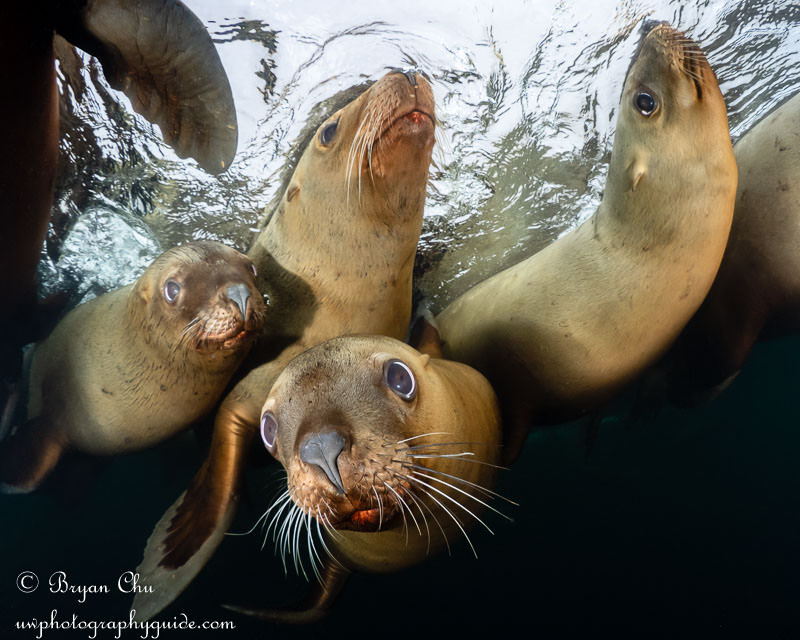
- Multiple sea lions playing together/interacting/looking at you
- Sea lions breathing at the surface
- Sea lion playing with something
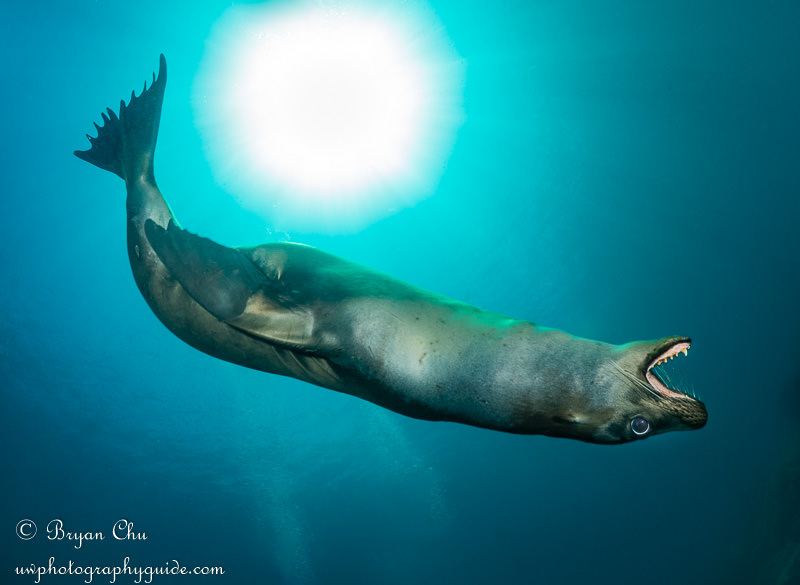
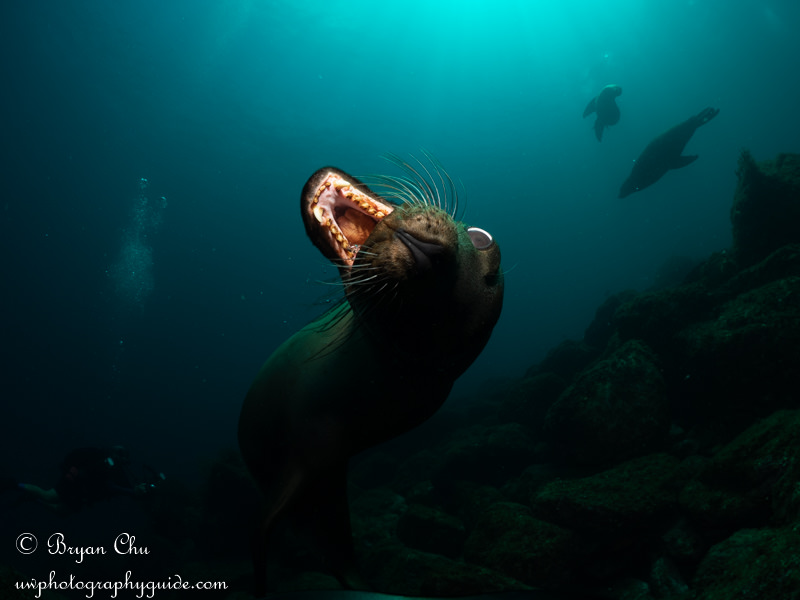
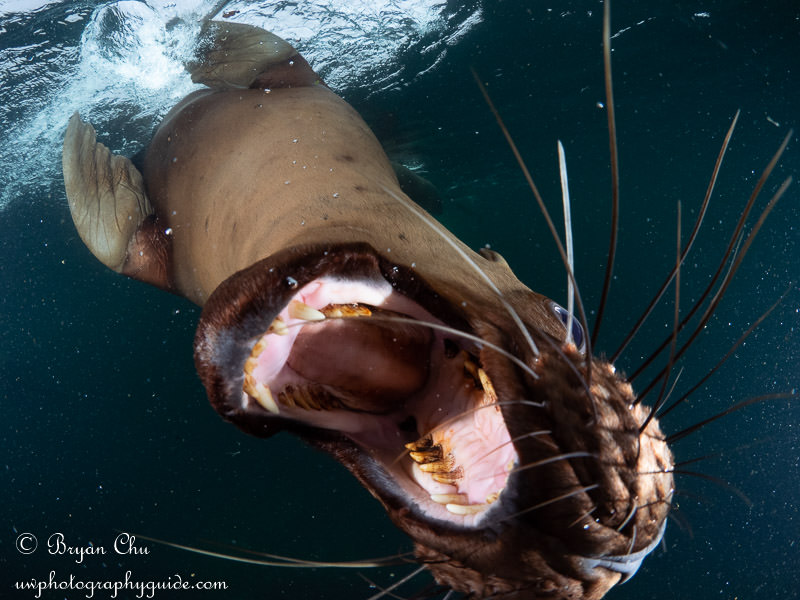
- Sea lion with mouth open/blowing bubbles
- Sea lion really close, looking right into dome port
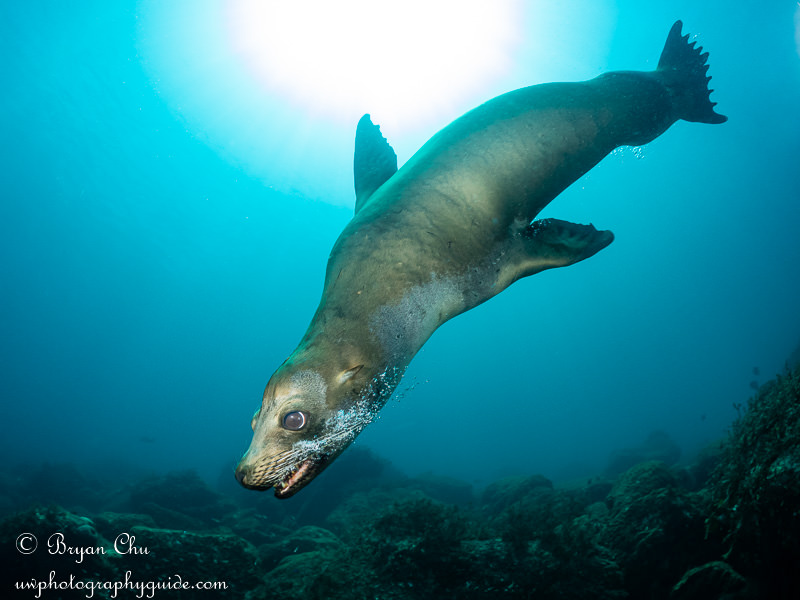
- Sea lion “dive bombing” you from the surface (typically shot straight up)
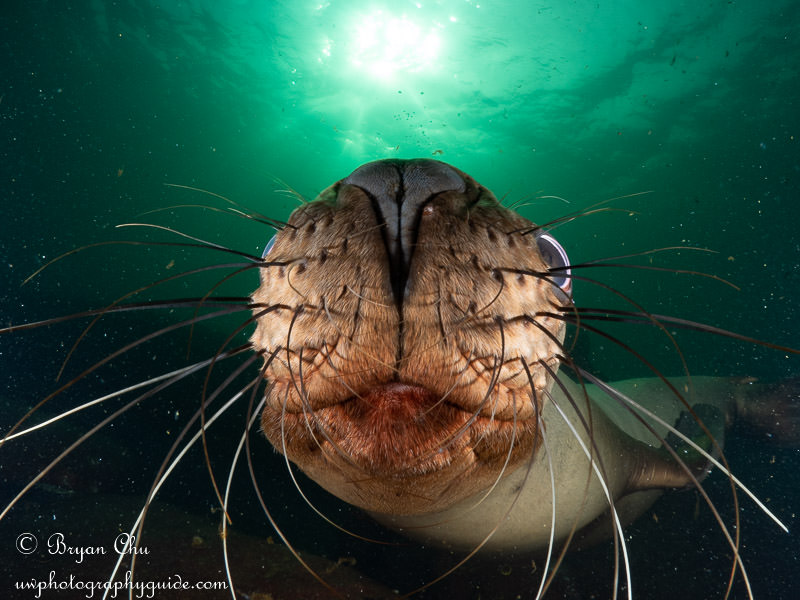
- Sea lion with sunburst behind it (not easy!)
- Motion blur sea lion
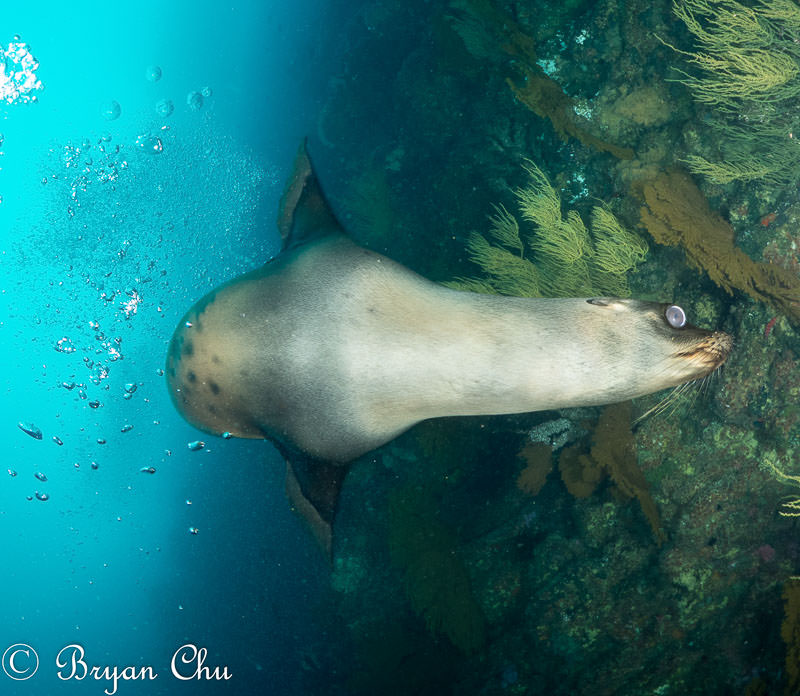
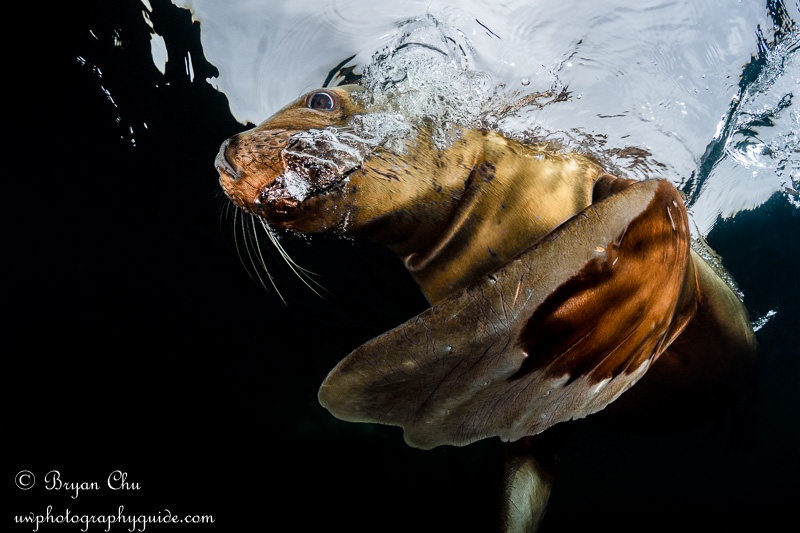
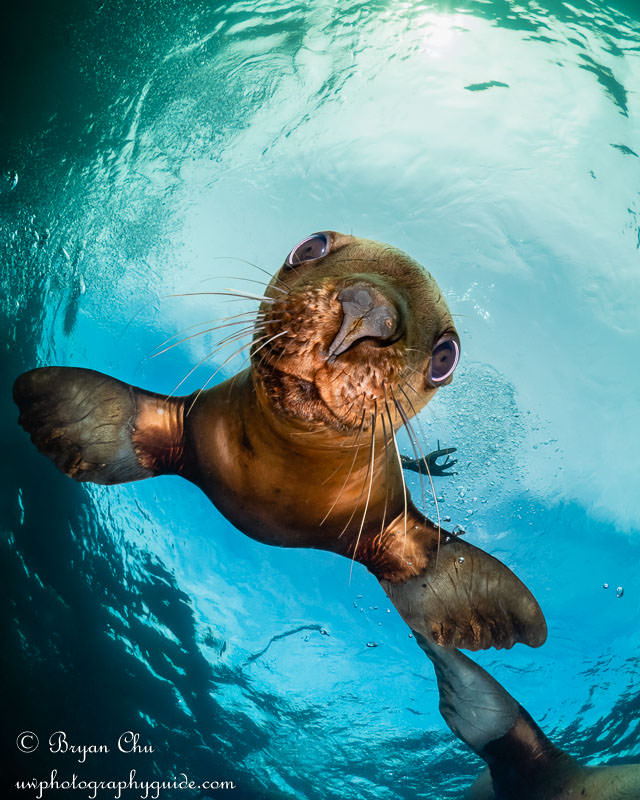
This article contains images of most of these compositions in some form or another. So I’ll finish off with my favourite sea lion image I have taken – it was done very shallow, with my ideal settings, with a sea lion coming straight down from the surface, and the blue sky in the background. I only took this after setting up for this shot, visualizing it, and missing it in one way or another for probably 10 or 15 minutes. Finally, on attempt number 999 (or at least it felt this way), everything lined up and I got the shot. A bit messy with the bubbles and the extra fin, yes, but the expression on the sea lion’s face really sums up what amazingly playful and curious animals they are!
Finally, among all the other tips and techniques I’ve thrown in here, you’ll need a really, really hefty dose of patience. I find that even spending an hour with quite interactive sea lions, I may only get a handful of photos I really like. But it sure is worth it!
Where to Dive with Sea Lions
There are lots of places to dive with sea lions, including California, Mexico, BC, and the Galapagos. My favourite place by far is Hornby Island, BC – I’ll be posting an article about that experience very soon, and will link to it here! The sea lions are so interactive that it can make you forget you’re in a dry suit in the cold North Pacific. (Note: I work with a local dive shop in Courtenay, UB Diving, offering some photo courses. They run tons of sea lion charters and know things really well – talk to them for more info).
The Sea of Cortez is also lots of fun, as the sea lions are very playful as well, but the water is clearer and much warmer! The interactions aren’t as crazy as in BC, but they can still be really good! Our sister company Bluewater Photo/Travel runs annual photo workshops there, which are a lot of fun – check out their trips page for more information.
As for other places to dive with sea lions, I am sure there are lots of great ones (which I’d love to hear about), I just haven’t had the opportunity to try them out (yet).
Whatever you choose, it takes a lot of time in the water to get things dialed in. So plan for lots of sea lion diving, to give yourself time to get tuned up. One day of diving isn’t enough!
Editing / Post-Processing Sea Lion Photos
Along with normal editing techniques, there are a few bits and pieces I find particularly useful for editing sea lion photos in particular.
Optimize Your Process for Photo Sorting/Culling in Lightroom
If you’ve had some good encounters, you’ll have a lot of photos to sort through. Lightroom has some very useful tools that make it much faster to sort and compare your photos, as compared to, say, using Windows Explorer. Here’s a tutorial about that.
Backscatter Removal
Since you are trying to photograph super close, and this means you’ll need to bring your strobes in… then you will have some backscatter. Especially if shooting in BC, though even somewhere like the Sea of Cortez has a fair amount of particulates in the water. Backscatter removal is painfully slow at the best of times when using Lightroom, so I would strongly recommend you use Photoshop, as it is a huge time-saver. I’ve put together a tutorial to walk you through the best way to quickly remove large amounts of backscatter.
Custom White Balance
Sometimes I find my sea lion shots are too warm – meaning the auto white balance in my camera is giving too high of a temperature. So my sea lions look yellow instead of brown. There is often not much to custom white balance on other than using the whites of the eyes, but I don’t find that works too well usually. So typically I manually adjust the white balance, dropping the colour temperature until the photo gets too blue, then bringing it back up to a happy medium. For example, let’s say my photo as-shot white balance is 6100, and my sea lion is too yellow. I drop it to 5000, and it’s too blue. So I work my way back to a happy medium, which works out to be about 5500.
For reference, here’s a tutorial I put together on custom white balancing, if this is a function you’re not too familiar with or one you want to use more (which you should)!
Hue/Saturation/Luminance
Often, sea lions will be found in green-ish water. In the Sea of Cortez, I found it very useful to use the Hue slider to shift the aqua around +20 to +30. This shifts aqua to blue, giving the water a nicer blue colour.
In BC waters, the water is very green. In this case, it can be useful to shift green to aqua or aqua to green, depending on what you’re going for. It can also be useful to partly desaturate the green or the aqua channels, again depending on what colour you’re going for. And luminance can also be useful. There are no hard-and-fast rules for this, but it’s worth it to spend some time playing around with these sliders to try to tweak the water color the way you’d like it!
The Final Step
This brings us to the final step of the process – be sure to have fun! You may or may not get great photos when diving with sea lions, but it should always be fun, because they are just such amazingly fun subjects to be in the water with!! Don’t let camera problems or concerns stop you from enjoying one of the most amazing underwater interactions you can have!
