Guide to Manual White Balance on the Sony a6500

We share our underwater photos with others in the hope of inspiring awe for what we see and experience in our dives. Personally, I hope that awe translates into respect which encourages ocean conservation. To that end, ambient light provides the ability to offer a more realistic view of what we actually see underwater. Colors fade out more naturally and subjects appear more part of their environment. It also offers the secondary benefit of making our rigs much smaller and more compact.
Read our Sony a6500 First Look or in-depth Sony a6300 Review, or buy one of the Fantasea A6500 housings.
Setting Ambient Light on the Sony a6500
Ambient light is completely dependent on sunlight. Bright days are wonderful and cloudy days are challenging. I find the key to shooting in natural light is adding custom white balance to the list of factors used in determining settings. I took a Sony a6300 on a recent trip to Roatan, Honduras. Both the a6300 and the a6500 support custom white balance and offer the ability save three different custom settings. You’ll need something white or gray as a reference for setting white balance. I carry a 5” X 7” piece of a white plastic cutting board on a lanyard with me to use a reference. The following steps are used to set Custom White Balance on the a6300 and a6500:
-
By default, the C1 button is set for White Balance adjustment. Press this to start the process. If you’ve changed the value for this custom button, you can use the Menu to choose another custom button for White Balance. If you have none to spare, the white balance is available from the Menu as well.
-
Use the dial to scroll down to the Set Option (You’ll pass the 1,2 and 3 settings to get there)
-
Push the middle dial button to Enter the setup. A small round circle will appear on the screen.
-
Point the camera so that the circle is on your reference slate or if you don’t have one, a patch of white sand will work in a pinch, and push the middle dial button again to accept the setting.
-
The camera will sound like it just took a picture and present you with the option to Select a Register. Whichever on you last selected will appear but you can use the dial again to change to 1,2 or 3. The camera may throw and error but this can be ignored. Not sure why it happens but it does not appear to impede the process.
-
The custom setting is now saved and ready for use. Since the setting is saved to one of the registers, you can return to that setting by pressing the C1 button again and scrolling to the Register you want to use. I use these registers to save setting at different depths, for example, 1 is at 15’, 2 at 30’ and 3 at 45’. More precise color balance adjustments can always be made in post processing.
Settings for using Manual White Balance
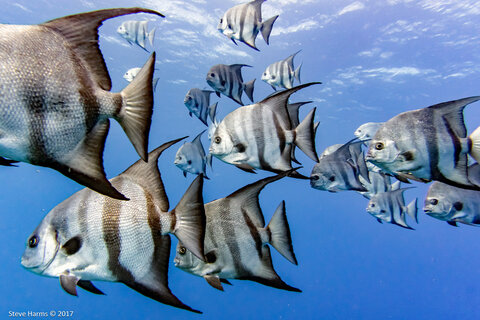
In addition to the Custom White Balance, the settings for ISO, aperture and shutter speed still play a huge role. Maximizing available light means striking the balance between these values. This is where the elegance lies. ISO tends to be the biggest variable so generally I set this set to Auto with a Max value of 1600 and let the camera figure it out. The Sony cameras have excellent processors so even at relatively high ISO, you can get good image quality. Aperture I set for f/5 – f/8 and shutter speed between 1/125 and 1/200 depending on the subject and how much available light I have. Cloudy days are challenging.
If you’re shooting a smaller subject, the trade-off of ambient light is that you can’t get as close and get a good depth of field due to the higher aperture required to get light. If you’re in shallow water with lots of light, you can shoot smaller subjects with a tighter aperture but you may need to slow down your shutter speed and increase your max ISO depending on how much your subject moves. Play around with the settings and find what works best for you.
Shooting with ambient light offers some real challenges but the rewards of being able to capture subjects in their natural habitats, and landscapes as we see them is worth the effort. You can try it with macro or wide-angle underwater photography.
