Workflow Basics in Adobe Lightroom

Returning from a dive vacation is great – we’re relaxed and have taken the edge off the quest to dive every day. But as underwater photographers, there’s always the daunting task of sorting and editing thousands of photos from the trip. Different subjects, different dive locations, different cameras and a few topside photos. It’s not a very exciting process but with a streamlined workflow and efficient organization we can fly though our edits and make images easy to find later on.
Adobe Lightroom is designed to help photographers stay organized, optimize workflow from import to publish/print, and make global edits on images. It’s meant to be used before and after running detailed edits in Photoshop and many other software plug-ins. If you’re unfamiliar with the program, check out Todd Winner’s article on Why You Should Use Lightroom. This article will review my techniques to keep images organized and optimize workflow as an underwater photographer.

IMPORTING PHOTOS
The first step in our workflow is importing images into our Lightroom catalog, assigning them to a specific storage folder. I call the folders “storage folders” because Lightroom has a fantastic search feature that we’ll discuss later on. Because we search for images in Lightroom itself, there’s no need to manually scroll through folders looking for an image, and no need to change image titles in the storage folders.
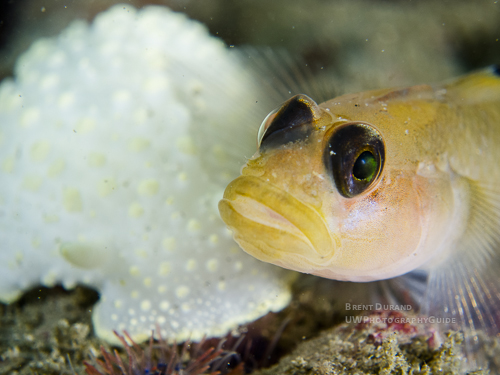
How do we know what folder to use? I use a dating system to store my images, as it keeps them organized and avoids conflicts. Let’s say you had folders for individual subjects and a photo of a black-eyed goby next to a lemon dorid. Would that go in the nudi or the fish folder? Instead, I have a topside and underwater folder, and within each I have folders for the year and then the month. If I have a big trip I may put a folder with that location within the month folder. Remember, we’ll discuss finding the images in a few paragraphs.
There are two important steps to take before actually importing photos. First, we need to decide where to import the images – which folder we’ll store them in. I normally import images directly from a card reader so that I’m importing into the Lightroom catalog and storing the actual image files in a folder at the same time (the catalog mirrors the storage folders but only records changes edits without affecting the original file). Others may have already stored their images in a folder, so they only need to import the images into the Lightroom catalog and can skip this step.
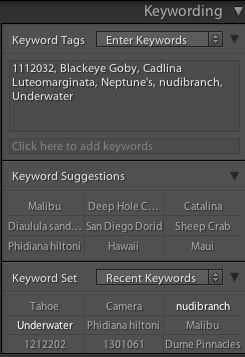
Second, we can assign the first wave of keywords. Keywords are used by the Lightroom search feature to find specific images, and once published online, by search engines or photo sharing sites to make your images more “findable.” Because we’re assigning keywords to every image being imported at this stage, the keywords need to be very general (i.e. Anilao, Philippines, Underwater). We’ll get more detailed later on. Time to import!
LIGHTROOM LIBRARY MODULE
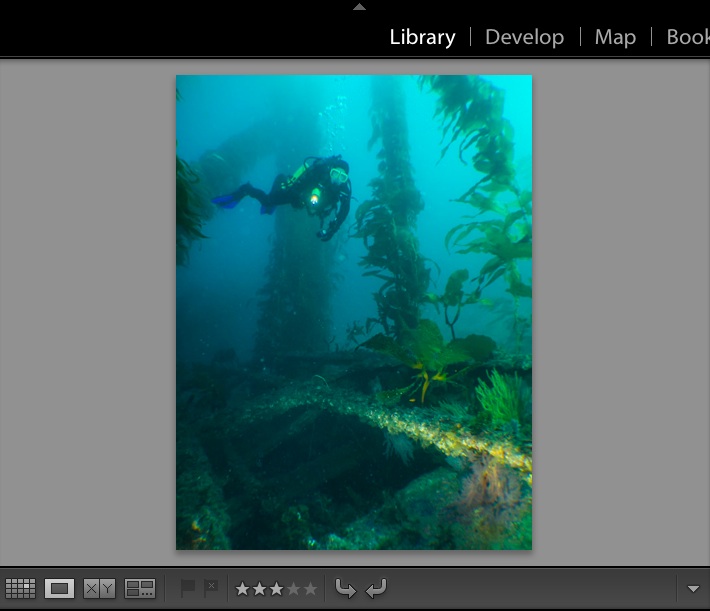
You’ll notice that the Lightroom nav bar starts with Library and Develop and ends with Web. This is to streamline your workflow from left to right. I use the Library module for 3 main things: deleting non-keepers, assigning more detailed keywords and later on, rating images.
Deleting images is pretty straight forward – take out the trash. You can always delete a photo later on, so if you’re not sure just come back to it later. I’ll often edit a couple versions of a photo if I’m undecided on which composition feels right, then delete the non-keepers afterwards.
Now that we’re working with individual images we can add in detailed keywords, including specific subjects or other details that describe the photo. If there are several photos requiring the exact same detailed keywords, you can select them and make sure “auto sync” is clicked in the bottom right of the right-hand editing modules. This will apply all changes across all highlighted images, saving time.
The last feature to note in the library module is the rating system, incorporating colors, flags and stars. I use the star system to rate images, with 5-stars for portfolio images. Because I haven’t edited yet, I’ll come back to the library module and assign stars after editing all the images.
LIGHTROOM DEVELOP MODULE
The develop module is a powerful feature in Lightroom, and each new version enhances editing capabilities. Read more about the Lightroom Adjustment Brush. I like to think of Lightroom for global edits and then use Photoshop for detailed and regional edits like layers and dodging/burning (if needed).
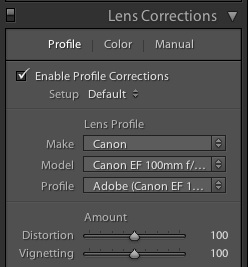
The first thing to look at is Lens Corrections, which is found by scrolling down the right-hand editing modules. Lightroom has built-in lens profiles that make adjustments to images depending on your camera & lens combo, accounting for barrel distortion and vignetting. I make sure that lens profile corrections are always enabled EXCEPT when shooting with a fisheye lens. Read more about Lens Corrections.
Next, we scroll back up to the Basic edit module to make global adjustments. This is where we can adjust the color temp (white balance) if needed. I’ll also adjust the presence at this point. A quick bump in clarity, vibrance and saturation (if needed) will really make your images pop. As with everything except diving… moderation is the key. We can also make global tone adjustments to enhance the contrast and dynamic range of the image, however many photographers prefer to adjust these within the Tone Curve box. This is because we can adjust specific regions (i.e. highlights) of the image instead of the entire image (as in the Basic box). Most underwater images can use a slight bump in the darks to add a bit more contrast, but remember, moderation is key.
There are many more options here (cropping, clone/heal brush), but I’ll address those in a future article. If you find yourself making the same edits to many images across several imports you’re able to create presents via the left-hand module “Presets.” One simple click and all those sliders will be right where you want them.
EXPORTING IMAGES
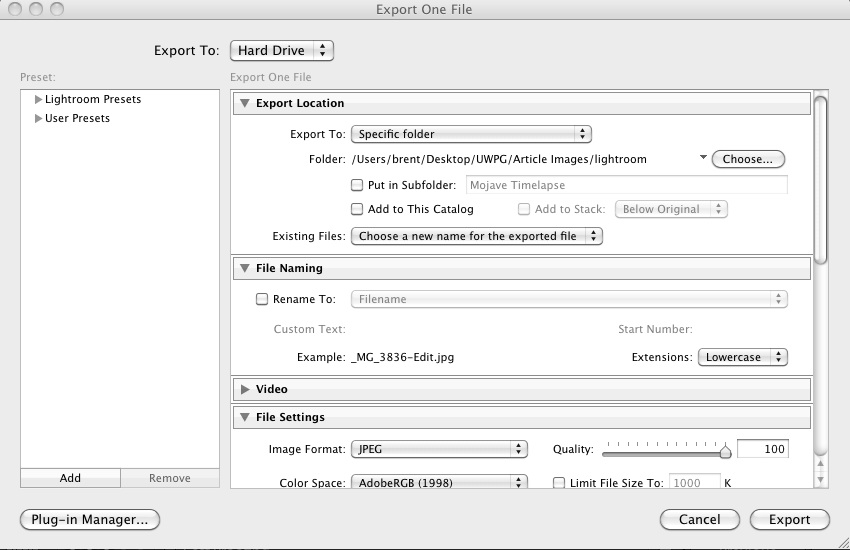
Time to export and show off our photos! Lightroom allows you to export at point in your workflow, so I’ll oftentimes export right after editing. Just click File -> Export to open the export dialog box. Adobe has designed the export box to flow from top to bottom, starting with Export Location. I export my images to folders SEPARATE from where I store my RAW files. This is to avoid any confusion with my image library.
Once a folder is assigned you can rename files and also adjust file settings. I’ll generally export at 100% quality in AdobeRGB colorspace. You can also limit the file size here. Moving along, we can adjust image sizing and resolution. If you’re exporting for web, then 72 pixels per inch is standard. For printing or high-resolution, use 220 or 300 dpi. I sharpen for screen or print depending on photo use, but note that you can also adjust sharpening during the editing process. Read more about image sharpness. Lastly, if you have present watermarks, you can decide which to use now.
SEARCHING FOR A SPECIFIC PHOTO
Searching for images makes us appreciate all the time spent keywording. Just click to the Library module and select Library -> Find. From here you can filter via keywords and also by star ratings or other attributes like colors or flags. Lightroom searches the folder you’re currently viewing, so if you’d like to search all images, navigate to your main photo gallery via the left-hand Folders box. Sure beats scrolling through specific folders on your hard drive!

Lightroom is a powerful tool for underwater photographers and well worth the investment. Once you get used to the workflow it will speed up your editing process, leaving you excited to dig into those images after your next trip. Well, maybe not excited, but the reward is there when you can easily find your best images. Let us know what you’d like to hear about next in Lightroom or Photoshop!


