Canon 7D Mark II Best Settings for Underwater
The Canon 7D Mark II is a great semi-pro DSLR for underwater photo and video. Boasting a 20.2 MP dual-pixel CMOS AF sensor, 65-point all cross-type autofocus system, Servo AF during Live View, dual DIGIC 6 processors, full HD video and many more features, this workhorse camera is earning its place in u/w photographers’ gear bags.
If you haven’t yet, be sure to read our ‘Canon 7D Mark II Review for Underwater Photography‘.
We recently published the 7D MkII review linked above, so this tutorial will focus on the best settings for underwater photo and video with the camera. I had the opportunity to make three dives with the 7D Mark II in the Ikelite housing (read our Ikelite 7D MkII housing review) to get a feel for the camera. Here are the tips, tricks and best settings for photo and video.

Setting up the 7D Mark II Menu
In this section we’ll go through the camera menu one screen at a time, mentioning the most important settings for underwater photography and settings we changed from the camera default.
SHOOT MENU TAB
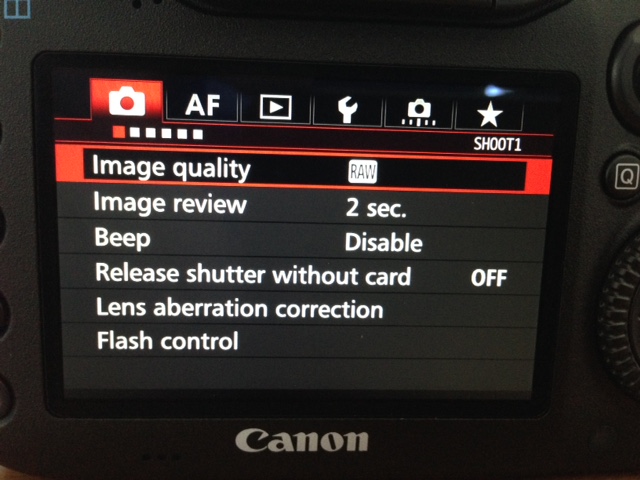
Screen 1
-
Image Quality: Set to RAW. If you are shooting RAW and JPG at the same time, you can set the JPG quality as well.
-
Image Review: 2 seconds
-
Beep: Disable
-
Release button without card: OFF. By setting this to OFF, you eliminate the chance that you think you are recording images when you are not. If there is no memory card in the camera it simply won’t fire and you will know immediately to 1) add a card, or 2) enjoy your dive without worrying about a camera.
-
Lens aberration correction: Enable Peripheral illumination and Chromatic aberration. If you don’t do this, your final images will still be ok because your post-processing software also has these camera and lens correction algorithms built-in, and worse case, you can manually compensate for these individual lens characteristics.
-
Flash Control: If you are using TTL flash power, then no changes are necessary. If you are using manual strobe power, then you will want to turn the built-in flash to manual power and set it to the lowest setting for fastest recycle time. Do this by entering Flash Control, then selecting Built-in flash settings, then setting Flash mode to Manual. After that, move down to flash output and set that to 1/128. Done!
Screen 2
-
Auto Lighting Optimizer: OFF. We don’t want the camera making these types of exposure assumptions for us.
Screen 3
-
Picture Style: Standard. This is my personal preference so that the LCD shows me an idea of how my photo will look after post-processing the RAW file. Some prefer neutral so that they see what the unprocessed RAW file will look like. It’s totally up to you. If you have a special processing style, you can even create custom picture styles.
Screen 4, 5 and 6 do not need any changes from the default settings except for advanced users who know exactly why they are adjusting those settings.
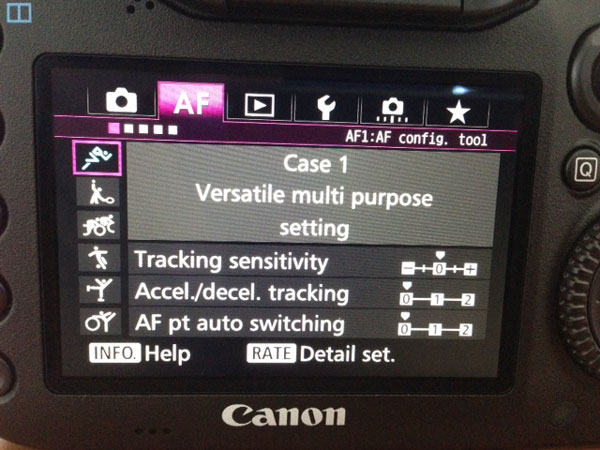
AF MENU TAB
The Autofocus menu also doesn’t need any adjustments before shooting underwater. The menu allows for detailed control of your AF system for different shooting situations, however the default settings are the most versatile for beginner and intermediate underwater photographers. Let’s skip on ahead!
PLAYBACK MENU TAB
The first two menus in the playback tab do not need to be adjusted from the default settings. The third screen, however, has two adjustments that I like to use on my EOS DSLRs.
-
Highlight alert: Enable. This feature makes over exposed highlights blink during image review. While distracting, this let’s me know whether highlight areas of subjects are blown out before inspecting the histogram.
-
AF point disp.: Enable. This feature puts a red square over the area the camera’s autofocus used to focus. If you were aiming for an eye and this box is on the dorsal fin, then on first glance you know the eye will be out of focus.

SETUP MENU TAB
Screen 1
-
The most important setting on this screen is the Format card function. Selecting this will allow you to format either card in your camera.
Screen 2
-
Auto power off: 2 min. This is up to you, but 1 min. or 2 min. are nice choices to save battery when shooting underwater.
-
Date/Time/Zone: This is where you set the camera’s date and time, which is very useful to have in your metadata.

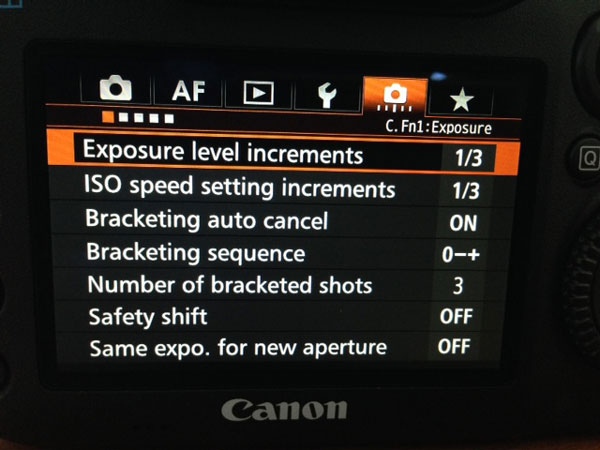
CUSTOM FUNCTION MENU TAB
This entire menu tab also doesn’t require any adjustments before shooting underwater. Advanced shooters will dig further into this menu to customize their camera based on shooting style.
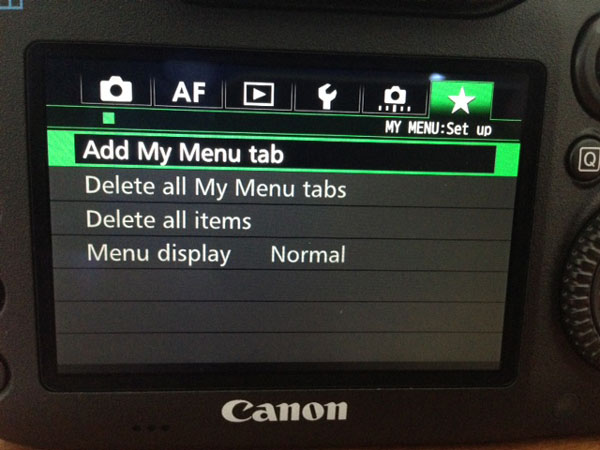
MY MENU TAB
This tab is a nice place to put your frequently-accessed menu items, saving you from digging though multiple menus in order to change a group of settings. It’s also a convenient menu to leave as first-to-open when shooting underwater, allowing you to access these favorit settings with a single push of the menu button.
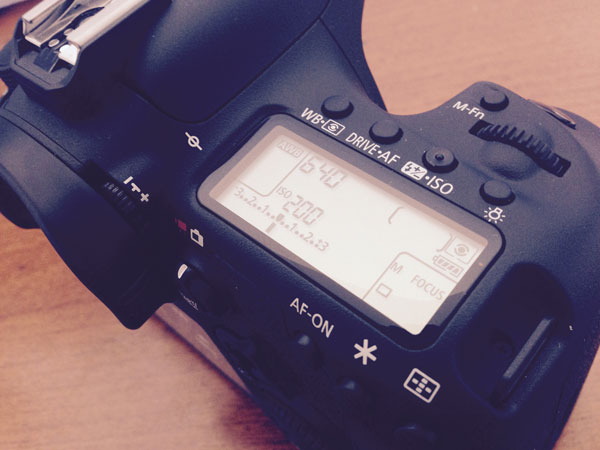
7D Mark II Wide-Angle Settings
Wide-angle settings on the Canon 7D Mark II will vary depending on whether you’re shooting sharks, reefscapes or sunbursts, as well as depth, distance to the subject, angle of sun and clarity of the water. A great starting point for wide-angle with the 7D Mark II is:
-
ISO: 160
-
Aperture: F9
-
To create a blurred background, try opening up the aperture more
-
To shoot towards the sun, try stopping down the aperture. Also see our tutorial ‘Guide to Shooting Striking Sunbursts‘
-
-
Shutter speed: 1/125s
Lenses:
There are two types of lenses available for shooting wide-angle: fisheye and recilinear wide-angle lenes. Fisheye lenses are great all-around underwater lenses while wide-angle lenses are best for shooting subjects that are further away, like sharks and schools of fish. Video shooters will often select their wide-angle lens over the fisheye for tighter framing in their shots.
The Tokina 10-17mm fisheye is hands down the most popular lens for wide-angle use underwater for both Canon and Nikon crop sensor shooters. Keep in mind that there’s a lot that goes into choosing the right lens, especially if you also plan to use it topside. Some of these include: price, weight, filter sizes (77mm vs. 82mm), vignetting properties with your favorite filters, as well as lens speed (for bokeh or low light use).
Bluewater Photo‘s top recommendations for the Canon 7D Mark II are the Tokina 10-17mm fisheye and the Canon 10-22mm as a wide-angle option – you’ll be very satisfied with both!
-
Canon 10-22mm f/3.5-4.5 USM
Useful Reviews & Comparisons:
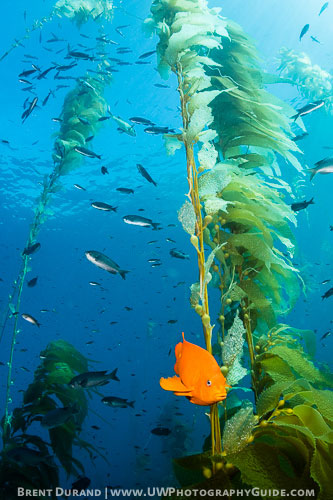
A garibaldi greets the camera at Eagle’s Nest, Catalina Island.
Canon 7D Mark II, Nauticam 7D Mark II housing, Tokina 10-17mm fisheye lens.

Purple hydrocoral and gorgonian at Farnsworth Bank, Catalina Island.
Canon 7D Mark II, Nauticam 7D Mark II housing, Tokina 10-17mm fisheye lens.
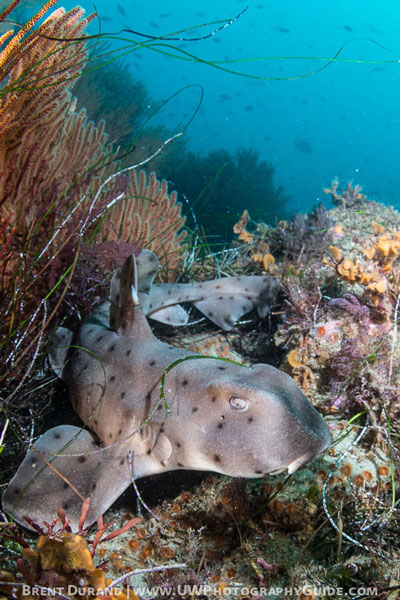
A horn shark poses for a photo on a typical Malibu reef.
7D Mark II, Ikelite 7D Mark II housing, Tokina 10-17mm lens, ISO 320, 1/160, f/10
7D Mark II Macro Settings
The Canon 7D Mark II shoots great macro shots, especially when paired with the sharp Canon 100mm f2.8L macro lens. Like in wide-angle shooting, there are no right or wrong macro settings; the settings will change depending on the subject and style of shot you’re after.
Recommended settings for macro:
-
ISO: 160
-
Aperture: f18 (*increase this to f/25 or f/32 with a +10 diopter)
-
Shutter Speed: 1/160s (*increase this to 1/250s to help create a black background)
Diopters:
-
There are two diopter brands that Bluewater Photo recommends for the Canon 7D Mark II with the 100mm f2.8 macro lens. SubSee diopters have been the go-to for years, but the newer Nauticam SMC has become a popular choice for those buying new.
Useful Reviews & Comparisons:
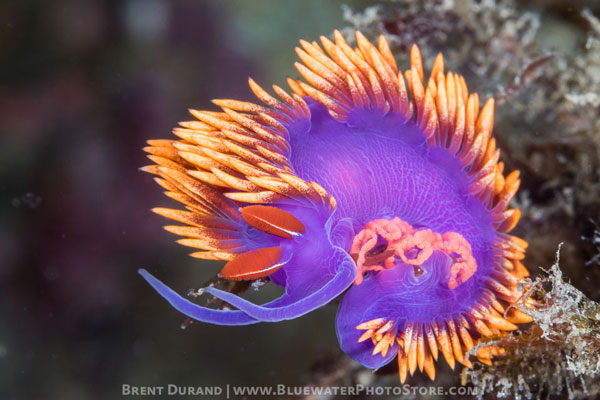
A spanish shawl nudibranch lays eggs.
7D Mark II, Ikelite housing, Canon 100mm macro lens, ISO 200, 1/125, f/22
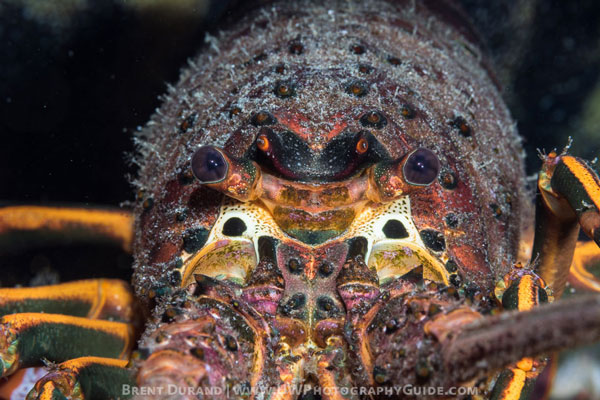
Sharp detail on a California spiny lobster.
7D Mark II, Ikelite housing, Canon 100mm macro lens, ISO 160, 1/125, f/18

Butterflyfish at Catalina Island. Shot with Canon 7D Mark II.
Video Settings for the Canon 7D Mark II
The general rule for shooting video is to select a shutter speed roughly double the frames per second you’re shooting. So for 30fps, you should be using a shutter speed of 1/60. Since this is fixed, the variables that control exposure become aperture and ISO.
Aperture:
Selecting the right aperture for your shot is a balance between depth of field and available ambient light. Stopping down the aperture provides more depth of field but limits the ambient light hitting the sensor. When you open up the aperture you decrease depth of field but allow more light to reach the sensor, which is especially important for crisp color from your video lights. But if you get too close to the subject or use too small an aperture, you’ll notice that background elements in the scene are out of focus. While this is ok in some macro shots it’s not ideal for wide-angle. In summary, aperture settings will vary depending on each shot you’re setting up.
ISO:
The easiest setting is to leave your ISO on auto. You can also limit the ISO range through the 7D MkII’s menu, setting an upward limit of 6400 (for example). This is nice if you’re panning or looking for quick shots. Advanced video shooters will opt for manual ISO control to make sure the exposure doesn’t change mid-shot if the camera meters the scene differently.
Pro Tip:
Shoot All-I and not IPB. These files are not compressed as much and deliver higher-quality video. That said, make sure you have a fast memory card to support more data being written to your card.
Sample Underwater Video from the Canon 7D Mark II
Underwater Housing Options
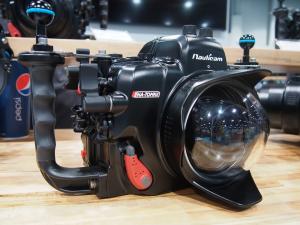
Nauticam NA7D Mk II Housing
Nauticam 7D Mk II Housing Review
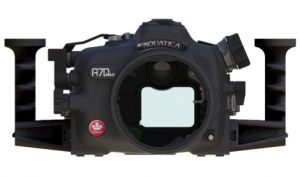
Aquatica A7D Mk II Housing
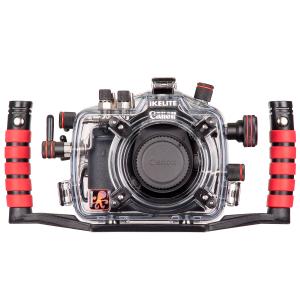
Ikelite 7D Mk II Housing
Ikelite 7D Mark II Housing Review
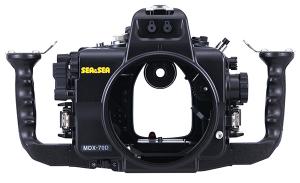
Sea & Sea MDX-7D Mk II Housing
Additional 7D Mk II Underwater Photos


