Lightroom 3 Adjustment Brush

Shooters Toolbox: Lightroom 3
Utilizing the adjustment brush
Text and Photos by Todd Winner
Photo retouching has always been a hot topic amongst underwater photographers. There are many publications and contests that do not accept digitally altered images. On the other hand many photographers view retouching as just another tool and any time you can create a better image it should be used. In my opinion, it all depends on what the final use of the image will be, but photo retouching should not take the place of good photographic skills.
Lightroom 3 gives us some extremely powerful options when it comes to photo retouching. Much of what we may have gone to Photoshop in the past can now be preformed in Lightroom directly to our RAW files. One such tool is the Adjustment Brush. In simple terms, the adjustment brush allows us to either conceal or reveal certain details in our image. We can paint on one or more masks onto our image and then apply a variety of adjustments to those masks.
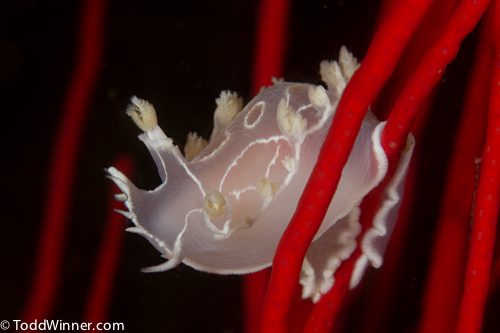
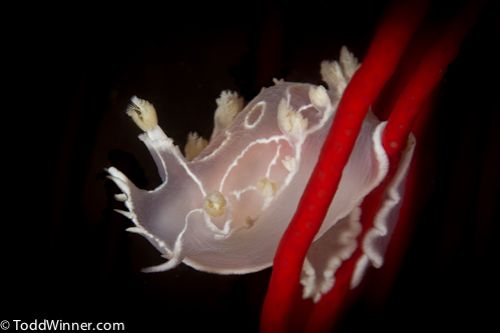
Unedited file from camera. Canon 7D, 100mm macro IS, Ikelite 160 x2
This is an image that I shot a few weeks ago of a Tritonia festiva on a red gorgonian. I was trying out the Canon EF 100mm f/2.8L Macro IS USM lens, but unfortunately my sync cord was not working so I was only able to take a few images. I kind of like the image but I find the red branches near the nudibranch distracting. To pull up the adjustment brush in the develop module, click the brush icon or use the keyboard shortcut (K). I dropped the exposure all the way down to -4 and the brightness to -200 and then chose an appropriate brush size to paint over the red gorgonians. Make sure the Auto Mask check box is disabled. You can change the size of the brush using the sliders at the bottom of brush module or use the bracket ([ ]) keys on your keyboard. When I got close to the details on the nudibranch, I flipped the Auto Mask back on to keep me from painting over the nudibranch and then I zoomed into 200% and cleaned up the edges with the Auto Mask off. Next I painted out the two branches in back of the nudibranch.
Screen shot showing the highlight mask
Then I decided I would like to bring out some of the white details in the nudibranch. I went back to the brush panel and selected a new mask, changed my exposure to +.5 and painted over some of the white details on the nudibranch. After the mask was applied I added some additional adjustments with the clarity, sharpness and contrast sliders. You can see the mask that you have created at any time by hovering your brush over the active mask dot or checking off “Show Selected Mask Overlay” located beneath your image. You can also get to many of your tool adjustments by going to the top menu bar and selecting the Tools dropdown. The last step I did was to add a post-crop vignette. This is found under Effects in the Develop module. I used this to soften the edges of the branches as they bleed off the frame.
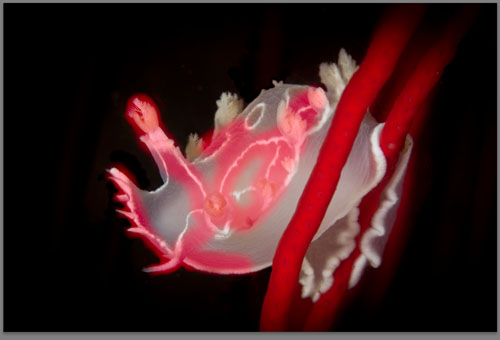
Edited version.
I hope you agree that these simple adjustments have improved the look of this image. The adjustment brush is extremely powerful tool. In addition to the sliders, trying using some of the adjustment presets as a good starting point. You can always edit them after the fact.
If you're interested in hands on training for Lightroom please contact Todd Winner.
Further Reading:
Post-processing with Photoshop
Workflow Basics in Adobe Lightroom
Using the new Lens Correction feature in Lightroom 3 for underwater photography
Why you should be using Lightroom


