Top 11 Tips for Cenote Photography

The cenotes of Mexico’s Yucatan Peninsula offer a unique diving and underwater photographic opportunity. They have often been ranked among the world’s best freshwater dives, including these best cenotes in Tulum. Distinct environmental features with unique lighting and variations in visibility provide a limitless backdrop of creative and technical challenges. It’s a canvas that can product astounding images. But achieving what you see in your mind’s eye is not always so simple. Based on my experience as a professional cenotes photographer, I have compiled a list of tips and tricks that can greatly improve your abilities to authentically capture these incredible places as they deserve to be showcased.
Editors Note: “Luke Coley is a very accomplished cenote photographer who is able to manipulate the way light moves in overhead environments to his advantage. We are honored to feature his work on the Underwater Photography Guide. Please see more of his work at www.lukecoleyphotography.com.”
1. Stay Safe
Safety is always the top priority in diving, and special considerations need to be taken in an overhead environment. It can be easy to get lost in the beauty of the cenotes and quite literally find yourself between a rock and a hard place. Proper gas planning is a necessity for entering a cavern. You should be sure to leave ample gas supply to exit with as well as a reserve for any delays or failures. You should always carry an adequate but not excessive amount of equipment. From the open water there must be a continuous guideline, and you should always follow it. No matter how tempting it may be to deviate from the line, nothing outside of it is worth the risk of getting lost. Always listen to your guide, who should be a minimum of Divemaster and Full Cave Diver, and will be diving in full tech gear. The rules are in place for a reason. Accidents have unfortunately occurred when they have been broken. Don’t be that guy.
2. Buoyancy & Awareness is Key
Buoyancy is our bedrock in any type of diving; in the cenotes it becomes our top priority. Diving in freshwater challenges our buoyancy more than in saltwater. The lower density of the freshwater water results in greater changes of depth when only minor buoyancy adjustments are made. You WILL need to use your BCD and not just rely on lung volume as we often do in the ocean. To further complicate things, some cenotes are solely fresh water while others are a mix of fresh and salt. Where the salt and freshwater meet creates a layer called a halocline, which can produce incredible visual effects. When undisturbed it can seem like a sheet of glass, and when a diver swims through, it mixes together and produces a blurry haze. Hitting the salt water is like putting on the brakes; you sink through the freshwater and then whoops become completely buoyed up by the salt, and vice versa to come back up. Combine this with delicate limestone formations and silty bottoms and you have an incredibly sensitive environment. Contact with anything should be avoided as best you can, for the betterment of your photos and the conservation of the cave systems. 360 degree awareness is critical – which can mean safety divers for photographers and videographers is never a bad idea. Guides are not permitted to carry cameras for this reason.
3. Do Your Research and Dive the Plan
With Instagram and other photo sharing platforms, we have so much access to images that we often have a good idea of what it is we want to see and capture even before getting in the water. All the cenotes have something unique about them. It is important to have an idea of what you are planning to shoot to ensure you get the best results. Creating a plan and communicating it pre-dive with your team will yield the best outcomes and prevent those awkward underwater miscommunications – which is overhead environments can cause much bigger problems. Make sure you brief any relevant hand signals that may be needed. Carrying a slate or wetnotes can help in times when more complex ideas need to be communicated. Keep it safe, simple, and let the creative juices flow.
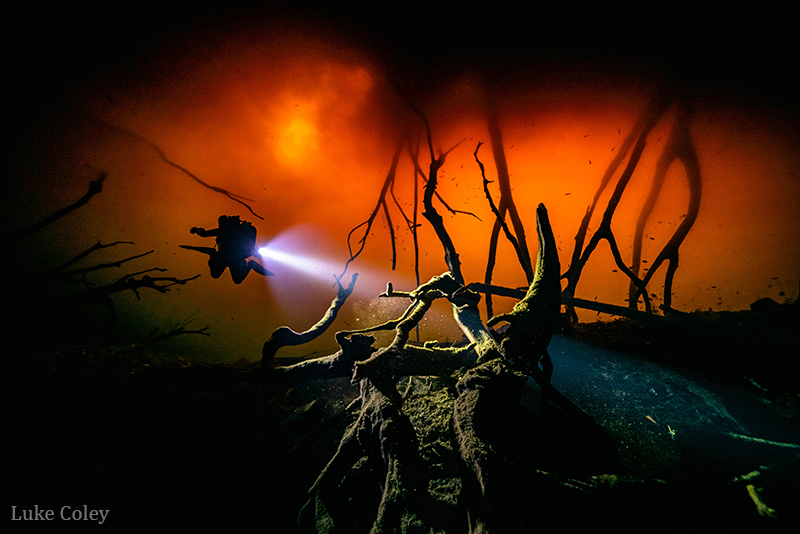
4. Season and Time of Day
The angle of the sun and its relative position in the sky changes throughout the year and of course throughout the day, creating peak times for the light in each cenote. If you want to see the light beams in the Pit reach down 30m to the sulphur cloud, or the Cenote Carwash when it is a vibrant orange colour, or Angelita when the water is at its clearest, ask your guide to get you there at the best possible time. Guides dive into these environments year-round and see the changes day to day, and those subtleties will make a big impact on your shots. Timing is everything and asking a few questions beforehand will help your expectations to be met accordingly.
5. Capturing the Big Picture
The majority of photographers shooting regularly in cenotes use wide angle lenses, and I’m no different. The sheer magnitude of some of these picturesque scenes is daunting, but there are some excellent lens options that yield different results depending on your style. In my opinion, using a fisheye lens tends to distort the images a bit too much – noticeably in straight lines of light beams and rock formations. I prefer to use 16mm on my Sony 16-35mm rectilinear lens to avoid this distortion and keep things looking as you see them. Panoramas, or stitching images together, though hard to pull off, are another style alternative from a normal single frame taken with a wide-angle lens. There are also opportunities to shoot smaller subjects with a longer focal length, such as a macro lens. The cenotes have a variety of freshwater fauna and artifacts like animal bones and Mayan pottery that can be shot with longer lenses. Be sure to ask your guide and they will happily point these out to you.
6. Slow that Shutter Speed
Which shutter speed to use is case-by-case, but some subjects in the cenotes move very slowly or not at all. There are many factors that affect motion blur, but I try to know the slowest possible shutter speed that I can shoot on a stagnant subject and still get a crisp photo. A general rule, as long as your stability allows, is that your shutter speed can be double your minimum focal length, i.e. 15mm to 1/30, 24mm to 1/50. You need the camera to allow in as much light as it can before the help of boosting your ISO. For me, with my Sony 16-35mm, that is 1/30 while using ambient light, and can be less while using strobes to freeze the frame. The more stable you are, the lower shutter speed you’ll be able to use. Couple that with better technology and improvement in camera and lens stabilization, and we can get incredibly sharp images with slower shutter speeds. A camera with good in body image stabilization (IBIS), like the Canon EOS R5 or the Sony A1 will help you lengthen hand-held shutter speeds without motion blur.
7. Bump Up Your ISOs
I continue to be impressed by the low-light capabilities of new camera models – take, for instance, the incredible Sony A7S III. As flooded caves are among some of the darkest places on earth, we really do require the most from our cameras in terms of dynamic range and higher usable ISOs. The typical rules of using a lower ISO in underwater photography don’t apply here. We can now create images with ISOs of 3200 and higher. As technology improves I predict we will continue to be able to push these levels to reach our desired exposure settings. Some cameras that are traditionally suited towards video, like the Sony A7S III and Panasonic S1H, are equipped with dual native ISO which allows you to shoot clean photos at extremely high ISOs. Be aware that you will have less resolution with these cameras.
8. Aperture – To Widen or not to Widen?
Many of us have been taught that lower f-stops like F8 or F13 are to be used in wide-angle photography to achieve a desired depth of field, but this can be challenging in the overhead environment. My advice is don’t be afraid to shoot on a wider aperture, such as F4 or F5.6, to expose your image. Personally, I prefer to work around my shutter speed so that I can do a lot in post-production, but a blurry image is a blurry image. Bigger domes can also help with increasing overall image sharpness while shooting at those lower f-stops. I would always rather have an image with slightly blurred edges than no image at all.
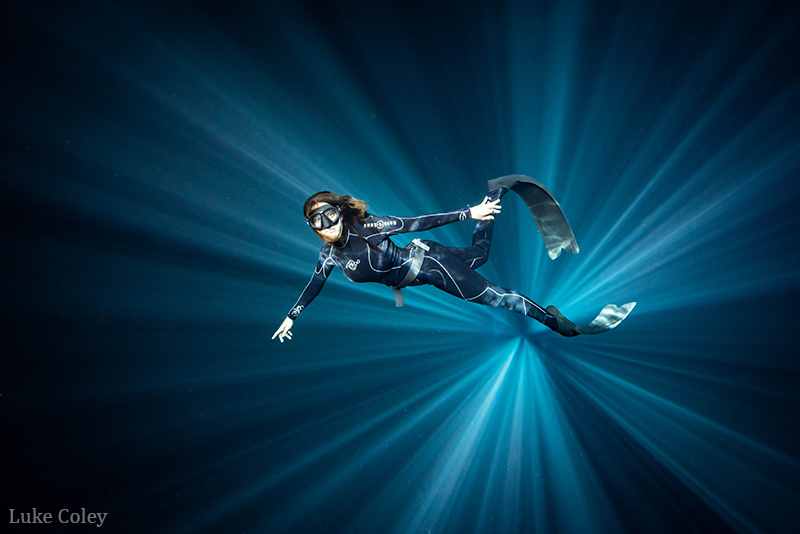
9. Models Make the Photo
It’s no secret that the Riviera Maya has grown and become a top destination for not only divers. Mexico has remained open to foreign tourists throughout the Covid-19 pandemic, further putting Cancun, Playa del Carmen and Tulum’s cenotes on the map as respites from global lockdowns. As photos of the area spread on social media, the desire for interesting images of destinations and experiences has increased exponentially. Having a human in an underwater photo gives us something to relate to or can provide a certain sense of mystery and adventure. The sport of freediving has also increased in popularity, and “Trash the Dress” photo shoots have introduced a whimsical and artistic spin on underwater photography, with the cenote as the perfect backdrop for your creativity.
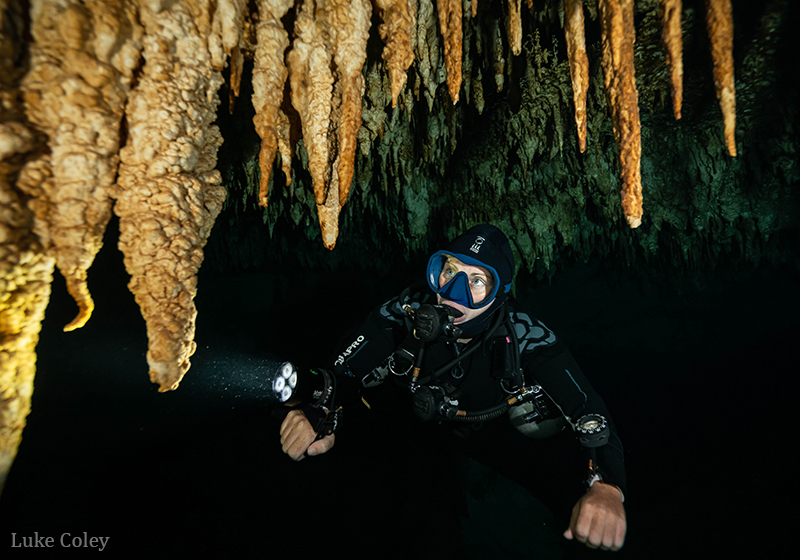
10. Focusing in Haloclines
Like any low-light environment, focusing your camera in the cenotes can be a bit of a nightmare. Each diver must carry a light to communicate with the other members of their team, additionally I recommend having a focus light on your camera to aid you in those darker sections, especially if formations and artifacts are your desired subjects. Autofocus is improving, but most systems are still not 100% accurate for our needs. Manual focus is still my preferred method – especially while shooting at wider apertures, with the goal of achieving a sharp, focused photograph. With this in mind, be careful if you’re diving in a cenote with a halocline (see item 2). Haloclines are mesmerizing and quite surreal to see, but nearly impossible to shoot in. For sharp images, be sure to move above or below the layer where the fresh and saltwater meet, not directly in it. Your photos may seem sharp while you’re shooting, but when opened in Lightroom they will be blurry, not because your focus is off, but because the water itself is blurry.
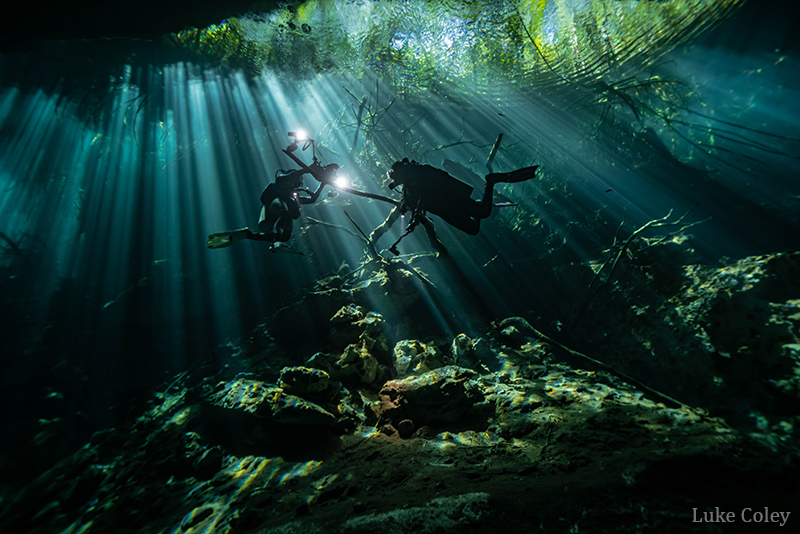
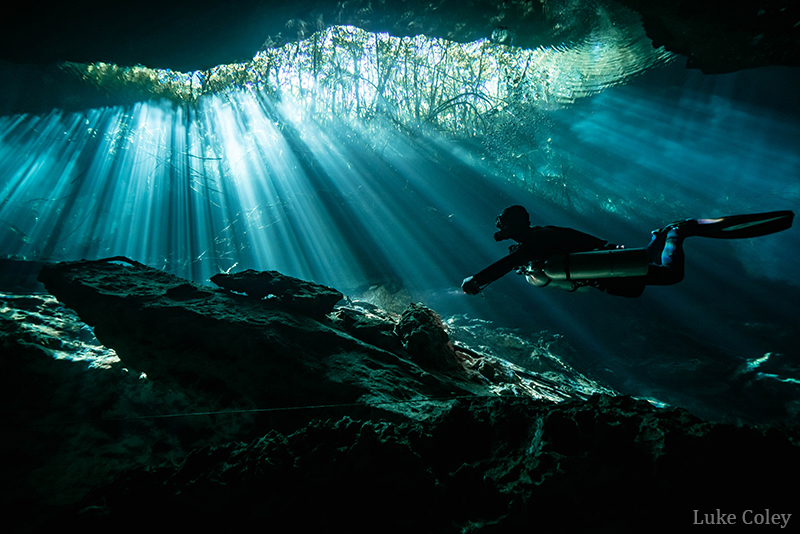
11. Advanced Lighting Techniques
The lighting possibilities are as endless as your imagination. The use of strobes are always a nice edition when lighting up a diver or a distinctive formation. In contrast, sometimes less is more, and using ambient light, shadows, and your model’s primary light source can create a very moody image. Silhouettes of divers are classic and dynamic, and their primary dive lights can create a leading line to help move your eyes though the image. Outside of ambient light, an effective technique is using video lights to backlight your subjects to create a “halo” surrounding them, which can be very striking.

Although the cenotes are challenging for photography, they are extremely rewarding both to dive and to shoot. I am continuing to learn each time I take out my camera but I hope some of these tips will help point you in the right direction.