Best Underwater Settings for the Olympus OM-D E-M1 Mark II Camera
Navigation:
-
- Note – historically the Aquatica set up has been similar, we will update once the Aquatica housing is available.
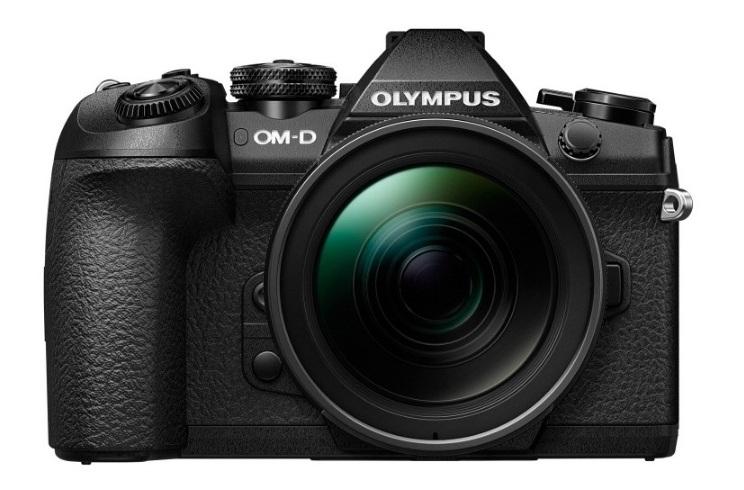
Olympus has long been a forerunner in high quality mirrorless cameras, with models that not only work well topside, but also work wonderfully underwater. The OM-D E-M1 further pushed the quality of these cameras with a more professional body style and more functionality. Now, with the release of the E-M1 Mark II camera, Olympus continues to improve on these great mirrorless cameras.
Learn about the E-M1 Mark II in our full Review.
The OM-D E-M1 Mark II offers 4K video recording, improved autofocus, a megapixel increase from 16 to 20 MP with improved image processing, improved battery life, and faster sequential shooting, among many other upgrades. The only downside is that the high shutter sync speed of 1/320th on the E-M1 was reduced back down to 1/250th with the Mark II.
Below I’ve compiled several good starting camera settings for different shooting situations. Following that is a list of the most important, or required settings that are crucial to change on your E-M1 Mark II when shooting underwater. Last, we’ll take an in-depth look at the menu system of the OM-D E-M1 Mark II so you can fine tune your camera for the best underwater shooting experience.
Olympus OM-D E-M1 Mark II Shooting Settings
Settings for Macro with the 45mm or 60mm Lens:
-
Manual mode, F16-22, 1/250th, ISO 200
-
Auto white balance, camera flash on “fill in flash”, Strobe on TTL
-
Or set the strobe to manual power and adjust power as needed
-
For manual power set the on camera flash to manual to save battery life (see below for instructions)
-
-
TIP: Shoot at lower F stops like F5.6 or F2.8 to try to get some better bokeh and a blurred background
-
TIP: You’ll need to open up your aperture to around F8 when shooting fish; at F22, your strobes won’t “reach” very far and the photo will look black.
-
** These settings are also useful with the 12-50mm lens in Macro Mode **

Settings for Macro using a standard zoom lens (14-42mm / 12-50mm) with a wet diopter:
-
Manual mode, F16-22, 1/250th, ISO 200
-
Auto White Balance, camera flash on “fill in flash”, Strobe on TTL
-
Or set the strobe to manual power and adjust power as needed
-
For manual power set the on camera flash to manual to save battery life (see below for instructions)
-
-
Zoom all the way in
-
Shoot at lower F stops like F8-F11 to try to get some better bokeh and a blurred background, you can open up to F2.8, but will have a very small depth of field
-
Remember working distance is limited when using a wet diopter, move carefully to avoid spooking your subject and get very close.
Settings for Wide Angle with 8mm Fisheye or 9-18mm lens:
-
Manual mode, F8, 1/125th, ISO 200
-
Auto White Balance, camera flash on “fill in flash”, Strobe on TTL
-
Or set the strobe to manual power and adjust power as needed
-
For manual power set the camera flash to manual to save battery life (see below for instructions)
-
-
Important: use the shutter speed to control your ambient light (background exposure). A slower shutter speed (e.g. – 1/60th will let in light when shooting in darker waters, a faster shutter speed will allow less light in when shooting in bright conditions).
-
TIP – when the sun is in the photo, set the shutter as fast as possible (1/250th), and you’ll need to stop down your aperture to F16 or F22 to avoid blowing out the highlights
-
TIP – for ambient light photography, you may need to open your aperture to F5.6 or F4 and increase the ISO to ISO 400, 800 or 1600 to let in more light.
Note: These settings also are great for starting points for shooting with a kit lens (14-42mm), and for fish portraits with the 60mm macro lens.

Olympus OM-D E-M1 Mark II Set Up for Underwater Use
The E-M1 Mark II works well straight out of the box, and some of the features that needed to be changed in previous models are now set default, making it an even easier transition to underwater.
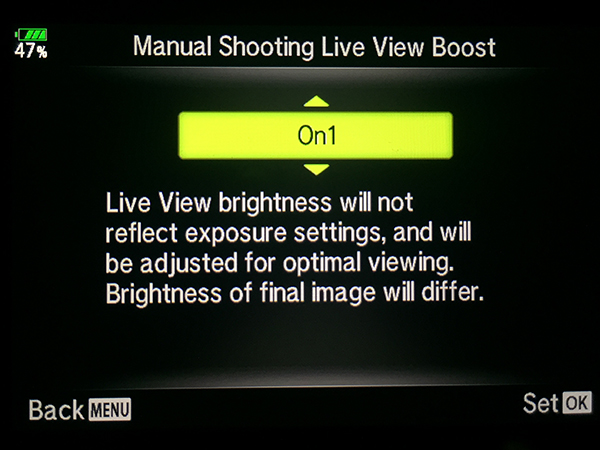
1) Live View Boost – this is very important due to the way we shoot underwater. Many shots, macro specifically, are taken with very little ambient light coming into the camera. If left off the LCD on the camera would appear black, making it impossible to compose your image. The E-M1 Mark II offers the ability to set the Live View Boost depending on your shooting mode. Here are our recommendations:
- Manual Mode – ON1 – this is the default and means your LCD will not display the exposure settings, but rather will show a bright screen for the best viewing. Note – this is actually the camera default.
- Bulb Time / Live Composite – you can skip for underwater
- Others – ON1 – this is for any other setting (P / A / S and Art Modes). Since these are auto settings, which should adjust other settings automatically you should always be able to compose based on the LCD, but to be safe turn ON the Live View Boost to always have a bright easy to see screen image.
2) EVF Auto Switch – the E-M1 Mark II offers an electronic viewfinder and the camera is set up to automatically switch between the LCD and the EVF when you put your eye up to it. This is problematic underwater, as the rear housing door will trip the sensor and the view will always be on the EVF. Follow these steps to disable the Auto Switch.
Custom Menu -> I: EVF -> EVF Auto Switch -> OFF.
3) The Flash – if you are shooting with an underwater strobe, do not forget to attach the accessory flash to the camera. All uw strobes fire via fiber optic and require the flash to fire from the camera.
4) Flash Modes – if you are using a strobe with TTL you will use the single lightning bolt “Fill in Flash” mode on the camera however, if you are planning to use the strobe in manual mode* you can save battery life by changing the flash mode to “Manual Value” through the quick menu. This is also beneficial because using the internal camera flash at a lower power means less recycle time and helps eliminate any delay on being able to take a picture.
OK -> scroll to flash icon -> scroll over to select “Manual Value Flash” -> Press Info to change flash power -> scroll to 1/64th power -> OK to confirm
*Remember – if you change the flash mode on the camera, you are also changing the pre-flash. When shooting manual flash on the camera, make sure you are using a no pre-flash mode on your strobe.
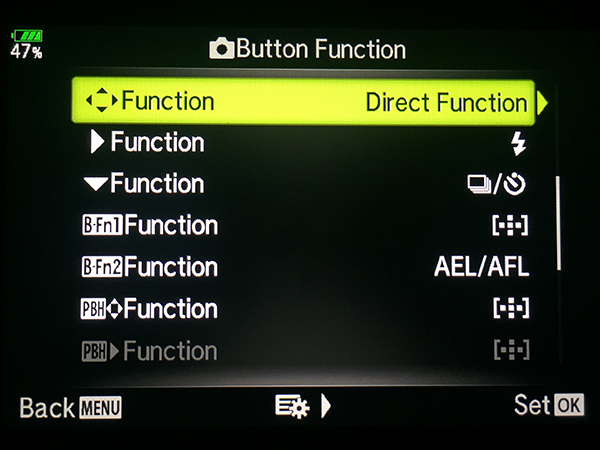
5) Rear Control Buttons – the default setting on the E-M1 rear arrow key buttons controls only the focus point, limiting the functionality of those buttons. You can customize two of the buttons instead to gain quick, one-touch access to important features.
Custom Menu -> B: Button/ Dial/Lever -> Button Function -> Key Function (option with the four arrow key icon) -> Direct Function -> OK
Now you have access to change the right and down arrow key controls on the back of the camera. (Up gives control of Aperture / Shutter Speed without the dials and Left gives control over the focus point, these are NOT customizable). You have the same options for both customizable buttons, I suggest reviewing each and picking the ones that best suit your needs. For example, I left my camera at the default to have direct access to the flash mode via the right arrow key and direct access to the sequential shot/ timer mode for the down key. (The sequential shot is not something used much underwater but I find i use it alot topside, so it was important to have direct access for me.)
6) Rec View – this sets the length of time an image review is displayed after taking the picture. Default is 0.5 seconds. For underwater use, 2 seconds is usually recommended so you have a chance to quickly gauge that exposure and focus look good before taking another picture. If 2 seconds is too long, set it to what you desire, or simply press the shutter halfway down to cancel the review after taking a photo.
Set Up Menu (wrench icon) -> Rec View
7) Picture Mode – the default is natural, but jpeg shooters may prefer Vivid
NOTE: this does not affect RAW files
Accessible through the SCP / Quick Menu or Shooting Menu 1

OM-D E-M1 Mark II Button & Auto Focus Set Up:
The auto focus set up on the E-M1 Mark II is very similar to the E-M1. The camera will work smoothly right out of the box, for for more control, you can set up an advanced autofocus system to aid in your underwater photography.
Set Up for Nauticam Housings
 The Nauticam Housing is designed much like their DSLR housings with built in handles and a leverl style shutter release. They reposition buttons to make a more streamlined user experience and help you have the right controls within easy reach. Here are our recommendations to take full use of the AEL / AFL button and advanced focus options.
Button Functions (Custom Menu -> B: Button / Dial / Lever -> Button Function)
Previously you had to assign, or reassign some buttons to create an advanced autofocus system, now that is no longer needed. Scroll through the options in the setting to choose special functions you’d like control over. For example Fn1 is well placed on the Nauticam housing to act as your “One Touch White Balance” control… Here are the options I selected:
- Fn1 – One Touch White Balance (useful for video and ambient light shooting)
- Fn2 – MF – this allows you to quickly switch between Manual Focus and your current focus mode (S-AF or C-AF). This comes into play when using the AEL / AFL focus lock feature.
- REC – I leave this as record, for quick movie capture.
- AEL / AFL – I leave this as is so you can have access to the focus lock function
- All other customizable buttons – I have not changed any of those, you can view the options and decide what works best for your shooting style.
Focus Settings for the Nauticam Housing – use this advanced set up to allow you to split out the focus from the shutter release. This can be extremely useful for macro shooting.
- AEL / AFL – set the Auto Focus Lock settings to separate focus from the shutter based on the focus mode on the camera.
- S-AF – Mode 1 – this is the default, standard focus on a camera. Press the shutter half way to focus, all the way to take a photo. I leave S-AF as default for topside and underwater wide angle shooting, when I don’t want to miss a focus, and am often needing to refocus between shots.
- C-AF – Mode 3 – this separates the shutter release from the auto focus so you can refocus the camera from the AEL/AFL button and not risk taking a photo. I use C-AF primarily for video, so it is helpful to be able to refocus mid clip and not risk having the clip split by taking a photo.
- MF – Mode 3 – same as C-AF, this separates the shutter release from the auto focus so you can lock focus and then take as many exposures as you like without refocusing the camera. When using this mode on Manual Focus you get the ability to both manually focus the camera with a focus gear in the housing, or use the AEL/AFL for auto focus. It is a perfect set up for shooting macro.
Now that you have set up these modes, you can shoot a picture “normally” (half shutter to focus) when in S-AF mode. Simply press Fn2 to swith from S-AF to MF focus mode and now when you press the shutter release halfway nothing happens. Focusing is done through the AEL/AFL button, or manually with a focus gear on the lens. This is perfect for macro shooting when a macro lens, like the 60mm, may hunt some and not lock exactly where you want. A minor adjustment towards or away from the subject brings your focus in line much easier than trying to refocus the lens. In addition, by using Fn2 to switch between focus modes, you have both a wide set up (or topside) and a macro set up ready to go at the touch of a button. You will not have to dig through the menu to fix focus options again.
Using the 1:2 Lever on the Camera – the 1:2 lever is a nice addition to the Olympus Cameras, allowing quick change of controls without many button presses. You can ignore this feature or assign it however you like, here are the functions to set this up.
- Custom Menu -> Fn Lever Settings -> Fn Lever Function
- I chose to leave this on Mode1 which means when you flip the lever it changes the function of the two primary control dials on the camera. Mode 3 may also be useful if you switch between video and photo shooting and want more than the quick record option or clicking the mode dial around to the dedicate movie mode.
- Switch Function – OFF – I do not use the HDR / AF button on the left of the camera when underwater, so I don’t have the 1:2 affect the modes of that button.
- Fn Lever / Power Lever – If you want to be able to have single hand control, you can move the ON/OFF function from the dedicate power lever to the 1:2 lever switch. I don’t need this, so just leave that option at Fn for function control.
- Dial Function – here is where you can select which specific function each dial controls based on the position of the 1:2 lever. This is broken down all the way to specific shooting mode, giving you a lot of control on the set up of the camera. My primary shooting mode underwater is Manual, so scroll down to the M option and click OK. I don’t change the 1 position function (Shutter and Aperture.. but you can flip them if you prefer aperture on your rear dial). Then press INFO to get to the function options when the lever is in the 2 position. I choose WB (white balance) and ISO. Click OK to save.
- Now that this is set up, you can test it. In manual mode, with the lever in position 1 the shutter speed and aperture number will be green, or active. If you rotate the dials you’ll see those change. Now flip the lever to position 2 and you’ll notice that the ISO and WB icons are now green. If you rotate the front dial ISO changes. Click OK to save. If you rotate the rear dial, you can select a White Balance mode. OK to save. To get back to shutter and aperture, just flip the lever to position 1.
- You can set it up as you like for all other shooting modes (P / A / S / Menu / Playback)

Set Up for Olympus Housings (PT-EP14)
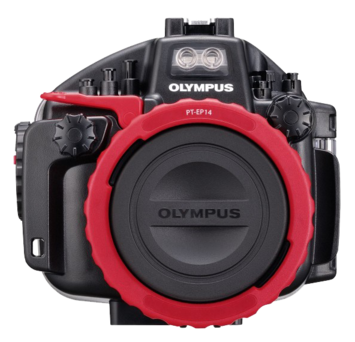 Improvements have been made on the Olympus housing, making it a nice option for those on a budget. However, unlike Nauticam, Olympus does not move controls around much on the housing, so some compromises have to be made regarding set up.
You can set up an advanced auto focus system by splitting out the focus function from the shutter, but as the AEL / AFL button is not repositioned, it is somewhat harder to reach and not recommended for use in this scenario. Instead, reassign the Fn1 button to control AEL / AFL, then follow the mode set up below.
In addition, with the change of the accessory flash, you no longer have to use Olympus’ dedicated underwater mode to get the flash to fire. This means you do not have to assign that function to a button, and gives you more custom control over how your system is set up.
Preparing the Camera for the UW Housing – follow these steps to ensure the camera is ready to be installed in the housing.
- Remove the camera strap and any filters from the lens.
- Remove the Eye Cup from the Electronic Viewfinder
If you leave those items attached you may not be able to install the camera (strap for example). Others, like a filter or the eye cup, can put pressure on the housing and lead to a flood.
Focus Settings for the Olympus Housing – use this advanced set up to allow you to split out the focus from the shutter release using the Fn1 button for focus. This can be extremely useful for macro shooting.
- Button Function –
- Fn1 – AEL / AFL – because the Fn1 button is better positioned to use for focusing.
- Fn2 – MF – this allows you to quickly switch between Manual Focus and your current focus mode (S-AF or C-AF). This comes into play when using the AEL / AFL focus lock feature.
- REC – I leave this as record, for quick movie capture.
- AEL / AFL – you can ignore or assign for one touch White Balance.
- All other customizable buttons – I have not changed any of those, you can view the options and decide what works best for your shooting style.
- AEL / AFL – set the Auto Focus Lock settings to separate focus from the shutter based on the focus mode on the camera.
- S-AF – Mode 1 – this is the default, standard focus on a camera. Press the shutter half way to focus, all the way to take a photo. I leave S-AF as default for topside and underwater wide angle shooting, when I don’t want to miss a focus, and am often needing to refocus between shots.
- C-AF – Mode 3 – this separates the shutter release from the auto focus so you can refocus the camera from the Fn1 button and not risk taking a photo. I use C-AF primarily for video, so it is helpful to be able to refocus mid clip and not risk having the clip split by taking a photo.
- MF – Mode 3 – same as C-AF, this separates the shutter release from the auto focus so you can lock focus and then take as many exposures as you like without refocusing the camera. When using this mode on Manual Focus you get the ability to both manually focus the camera with a focus gear in the housing, or use the Fn1 for auto focus. It is a perfect set up for shooting macro.
Now that you have set up these modes, you can shoot a picture “normally” (half shutter to focus) when in S-AF mode. Simply press Fn2 to swith from S-AF to MF focus mode and now when you press the shutter release halfway nothing happens. Focusing is done through the Fn1 button, or manually with a focus gear on the lens. This is perfect for macro shooting when a macro lens, like the 60mm, may hunt some and not lock focus exactly where you want. A minor adjustment towards or away from the subject brings your focus in line much easier than trying to refocus the lens. In addition, by using Fn2 to switch between focus modes, you have both a wide set up (or topside) and a macro set up ready to go at the touch of a button. You will not have to dig through the menu to fix focus options again.
Using the 1:2 Lever on the Camera – the 1:2 lever is a nice addition to the Olympus Cameras, allowing quick change of controls without many button presses. You can ignore this feature or assign it however you like, here are the functions to set this up.
- Custom Menu -> Fn Lever Settings -> Fn Lever Function
- I chose to leave this on Mode1 which means when you flip the lever it changes the function of the two primary control dials on the camera. Mode 3 may also be useful if you switch between video and photo shooting and want more than the quick record option or clicking the mode dial around to the dedicate movie mode.
- Switch Function – OFF – I do not use the HDR / AF button on the left of the camera when underwater, so I don’t have the 1:2 affect the modes of that button.
- Fn Lever / Power Lever – If you want to be able to have single hand control, you can move the ON/OFF function from the dedicate power lever to the 1:2 lever switch. I don’t need this, so just leave that option at Fn for function control.
- Dial Function – here is where you can select which specific function each dial controls based on the position of the 1:2 lever. This is broken down all the way to specific shooting mode, giving you a lot of control on the set up of the camera. My primary shooting mode underwater is Manual, so scroll down to the M option and click OK. I don’t change the 1 position function (Shutter and Aperture.. but you can flip them if you prefer aperture on your rear dial). Then press INFO to get to the function options when the lever is in the 2 position. I choose WB (white balance) and ISO. Click OK to save.
- Now that this is set up, you can test it. In manual mode, with the lever in position 1 the shutter speed and aperture number will be green, or active. If you rotate the dials you’ll see those change. Now flip the lever to position 2 and you’ll notice that the ISO and WB icons are now green. If you rotate the front dial ISO changes. Click OK to save. If you rotate the rear dial, you can select a White Balance mode. OK to save. To get back to shutter and aperture, just flip the lever to position 1.
- You can set it up as you like for all other shooting modes (P / A / S / Menu / Playback)

Olympus OM-D E-M1 Specific Menu Settings
The Olympus E-M1 Mark II has an extensive menu system, with the ability to control, customize or select many options to create the perfect camera for your shooting style. In this section we’ve listed out all the custom menu options on the E-M1 Mark II as they relate to underwater photography. This info is helpful for fine tuning your camera for the best underwater settings. If a menu item is not listed that is because it does either does not affect shooting pictures or does not affect a setting that would be used underwater.
Shooting Menus
These set your cameras defaults, general settings that it will revert to after shutoff.
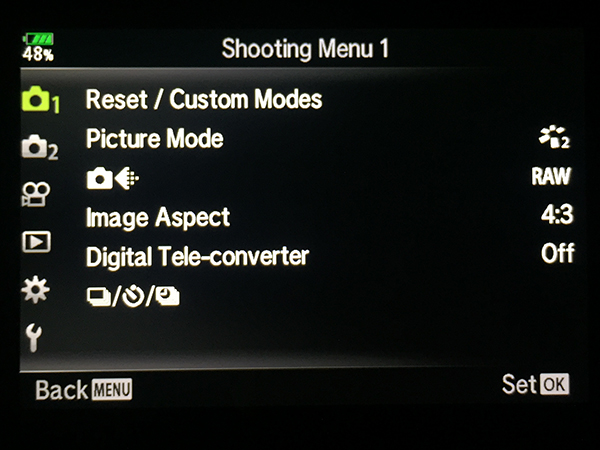
Shooting Menu #1
Picture Mode – This menu sets the look of your pictures, it is completely a personal choice to change, I prefer Vivid, because it enhances reds & oranges. NOTE: this only affects photos shot as .JPG, RAW images will not be affected.
Picture Quality (pixel icon) – Sets the default quality mode for the camera. Set this to RAW for still images, default for video is FullHD Fine, leave it there unless you know you want a lower quality.
*Note: if you do not have software on your computer that can read and edit RAW files then leave it set to .jpg (LF). I highly recommend shooting RAW for the most flexibility with in computer editing.
Image Aspect – Leave at the default standard image aspect ratio of 4:3 unless otherwise desired.
Digital Teleconverter Leave at default of OFF.
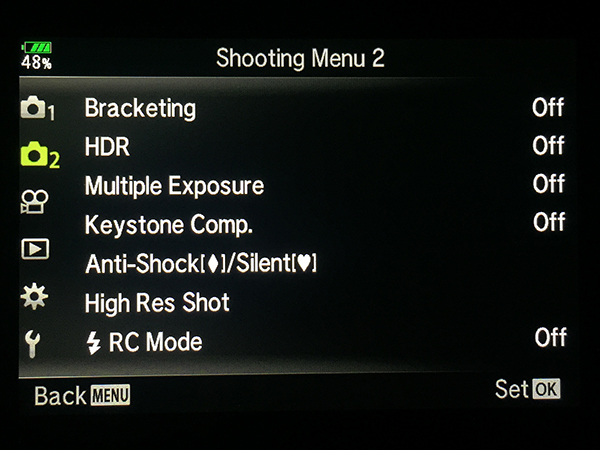
Shooting Menu #2
Bracketing* – Leave at default of OFF
HDR* – Leave at default of OFF
Multiple Exposure* – Leave at default of OFF
*These settings all control creative photo styles. You may choose to experiment with them, but for most normal shooting situations you’ll leave them off.
Flash RC Mode – Leave at default of OFF
** NOTE – If you are using the Olympus UFL-2 strobes, you can increase your shutter sync speed with the PEN and OMD cameras to 1/500 using the RC feature of the camera and strobes. Check out the strobe manual for this, but it can be very useful for getting great sunbursts in wide angle shots
Custom Menu Options
The custom menu offers more detailed camera adjustments, however, these can get overwhelming. When in doubt leave it at the default, unless otherwise noted in the Important Settings section above.
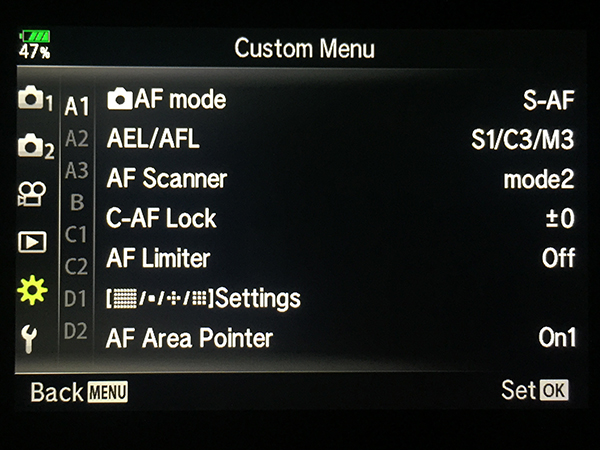
Menu A1: AF/MF
AF Mode – I recommend setting this to S-AF (single AF). This is default for still images but not for video. C-AF, continuous auto focus, I find is too slow to accurately catch moving subjects and often hunts more frequently in the low light underwater conditions. You can halfway press the shutter during video to refocus when needed. Note: continuous auto focus has been significantly updated on the E-M1, so it can be a more useful tool with that camera.
AEL/AFL – This is a very handy feature, especially for underwater as it allows you to set focus lock separately from the shutter button, so that you can lock focus and then take several images without refocusing. The set up will vary depending on which housing you use, so please see the Housing Settings section above for specific details.
AF Scanner – This option controls how quickly the camera will stop hunting when an image is out of focus or in low contrast lighting situations. For most shooting leave at the default of mode2. This will run the scanner once. If the camera does not lock focus then release the shutter and try again. I find this quicker than sitting there holding the shutter and waiting for the camera to lock in when in a hard to focus situation. Using a focus light will limit these issues as well.
C-AF Lock – OFF – unless you are using the C-AF, this won’t be necessary. If you are using that Auto Focus mode, this feature adjusts how sensitive the target activity level of the AF sensor is during continuous AF. Set it to the level you desire if using C-AF.
AF Limiter – This limits the range that the camera will focus. You can preset the distance yourself. I choose to leave this OFF so I retain full range of my lens.
AF Target Mode Options – Allows you to activate or deactive the various Auto Focus Target Modes.
AF Area Pointer – Allows you to choose how the green AF square is displayed.
Menu A2: AF/MF
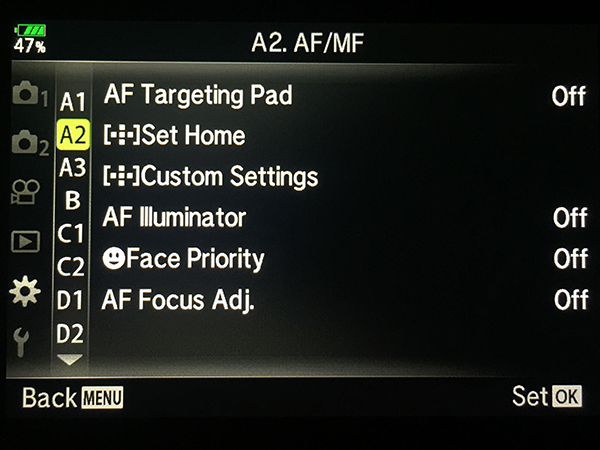
AF Targeting Pad – leave at default.
AF Set Home – SINGLE- this sets the “home” position for the AF target for each AF mode. It will return to the position selected after power down. Default is full matrix, change this to Single Auto Focus Point for more control.
AF Illuminator – OFF – this is the small red AF assist light on the camera. It won’t shine through the black housing so turn it off to save battery life. If you use the camera both topside and underwater and don’t want to hassle with constantly changing it then leave it on, it will not affect picture taking.
AF Custom Settings – Allows you to set up how the AF settings are controlled. Fine to leave at defaults unless you prefer your own set up.
Face Priority – OFF – this automatically focuses the camera when it detects a “face” however underwater it can mis-detect and cause issues, will not detect faces in masks so it is not needed.
AF Focus Adj – Adjusts target AF points based on the lens you’re using, advanced operation only, I recommend leaving at default setting, OFF.
Menu A3: AF/MF
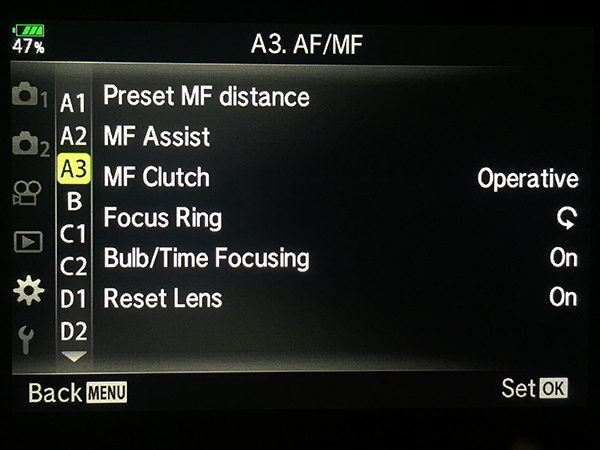
Preset MF Distance – Allows you to preset a distance for Manual Focus
MF Assist –Allows controls of magnification and peaking for manual focus, this is only useful if using a Focus Gear with the 60mm Macro lens. If using a focus gear with manual focus, both options can be useful to accurately lock focus.
MF Clutch – **VERY USEFUL** The MF Clutch is the manual focus ring on the Olympus PRO lenses. This allows for fast change between Auto Focus and Manual Focus. However, for us UW photographers, it can be a big problem, if you accidentally set up your gear with this engaged in manual focus you lose all focus control. However, this menu setting allows you to deactivate the Clutch, which returns normal auto focus controls to your camera regardless of what position that ring is in. Never miss a dive due to an error in set up!
I leave this as Operative (for topside shooting), but it’s good to know where to find it so you can quickly change it should you accidentally set up the camera with the ring in Manual Focus.
Focus Ring – Allows you to set which direction the focus ring control direction. Set to your preference or leave as is.
Bulb / Time Focusing – Allows for control and set up of Bulb / Time Focusing, not needed underwater, leave at defaults.
Reset Lens – This will reset the lens position after the camera is turned off. If you want to maintain the last position of the lens, turn this to OFF.
Menu B: Button / Dial / Lever
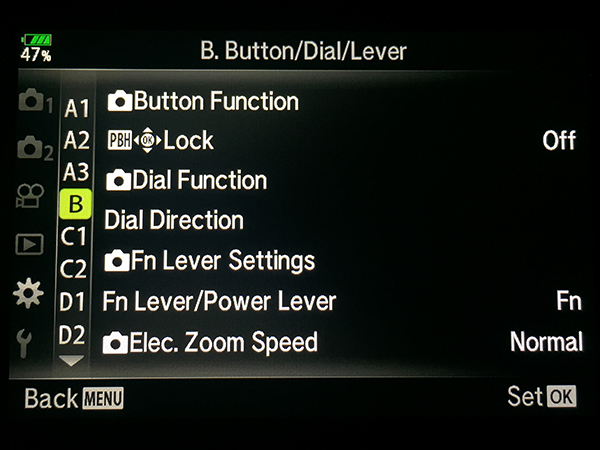
Button Function – There are 2 Fn buttons on the OMD and each has a variety of functions you can set. You can also customize the Rec button and assign its own function. Other settings in the Button Function menu allow you to modify the action of that key listed. To gain customization of the up and down arrows you need to change the setting of the four arrows option just below them. I recommend choosing Direct Function and setting the two customizable options for whatever best suit your needs.
For customization of other buttons, check out the Important Settings and Focus Settings Sections above for more detailed information on why I’ve set these options and how to use them.
Dial Function – This menu allows you to set the functions of the control dials for the camera. Functions are set per shooting mode indivually. If you want to change the default set up, simply select the option for each control outlined in the image on the selection screen, and remember that they depend also on the position of the 1:2 lever.
Dial Direction – can be set to change which way you turn the dial to increase shutter or F stop. Set to personal preference or leave at default
Fn Lever Settings – MODE 1 – this gives quick access to ISO and White Balance which are two useful settings for underwater
Fn Lever / Power Lever – leave at Fn, otherwise this changes On/Off control to the Function lever and disables the power lever.
Elec. Zoom Speed – allows you to adjust the electronic zoom speed when using an electronic zoom lens (such as the 12-50mm)
Menu C1: Release / Burst / Image Stabilizer
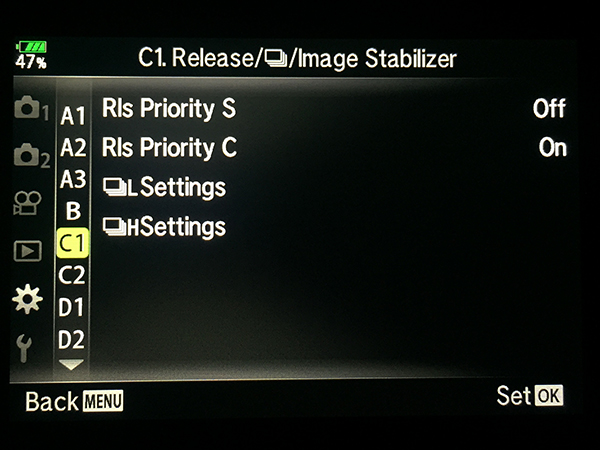
Rls Priority S / C – this option allows you to set whether the shutter can be released even when the camera is not in focus. I recommend leaving it at the default of OFF for S-AF to help limit out of focus pictures. (can be set individually for S-AF and C-AF modes)
Burst FPS H / L – leave a default – this sets the frame rate for each burst mode option
Menu C2: Release / Burst / Image Stabilizer
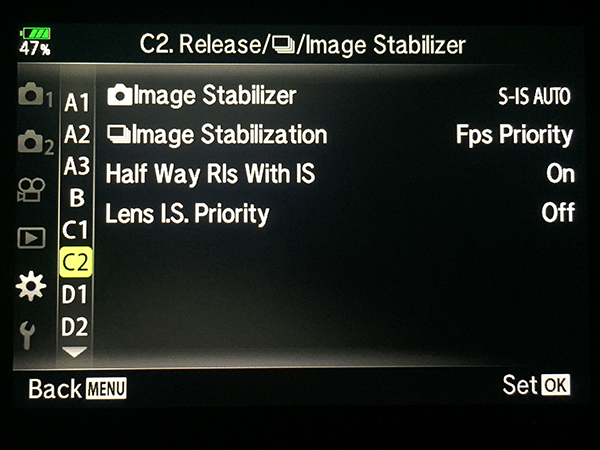
Image stabilizer – Leave at default, Auto – this engages full stabilization in all directions
Halfway Rls with IS – ON – this allows for Image Stabilization to begin when the shutter is pressed halfway.
Lens IS Priority – allows you to choose priority for IS from the lens or in camera. I leave at OFF.
Menu D: Disp / Beep / PC

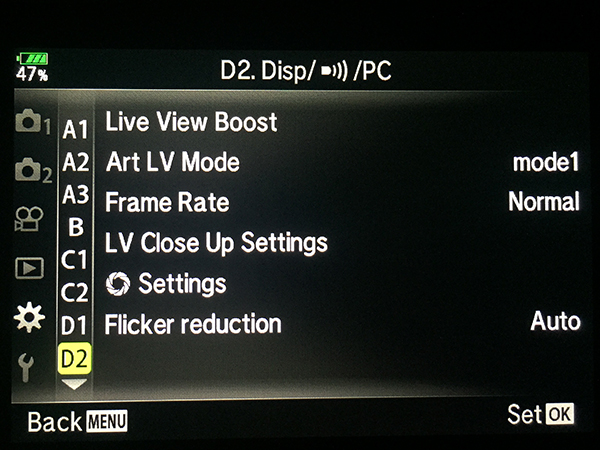
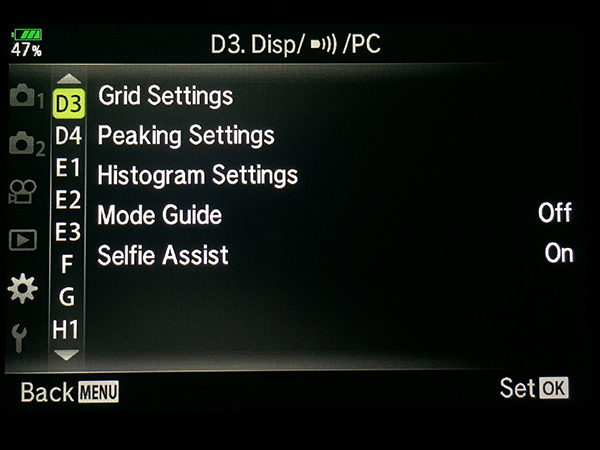
This menu customizes display and sound options. Set these to your preference, they don’t affect picture taking, except for a select few.
Camera Control Settings – this gives you options for the display of the quick menus. When the EVF Auto switch is turned off you can only access one of these. Default is the Live Control, Olympus’ standard type menu. The other option is the Super Control Panel, the new style for the OM-D that mimics many dSLR cameras. To activate the SCP, turn off the LC and turn on the Live SCP.
Info Settings – Under this menu is LV-Info. These options allow you to streamline your LCD view information. By turning each on or off you choose which viewing modes you would like to be able to see when you press the INFO button on the camera.
Live View Boost – This must be turned on to aid in viewing the LCD underwater in dark shooting conditions.
Menu E1: Exp / ISO / Bulb
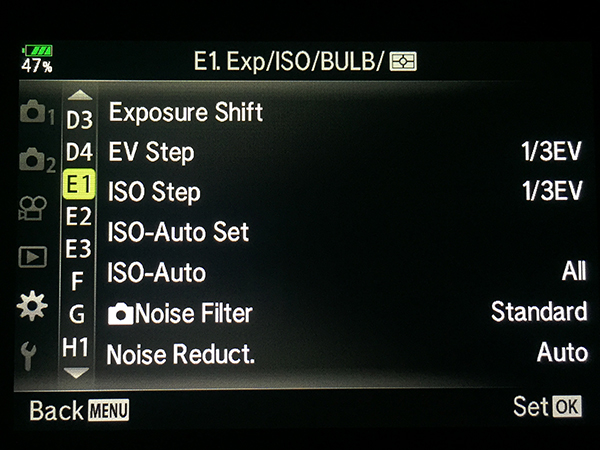
Exposure Shift – leave at default. This allows you to adjust the optimal exposure for each metering mode, advanced set up only.
EV Step – leave at Default 1/3EV – this gives access to all “in between” stops, for more fine tuning your picture settings. It controls the size of the increments for shutter speed, aperture, etc.
ISO Step / ISO Auto-Set / ISO-Auto – leave these options at the default
Noise Filter – leave at defaults
Menu E2: Exp / ISO / Bulb
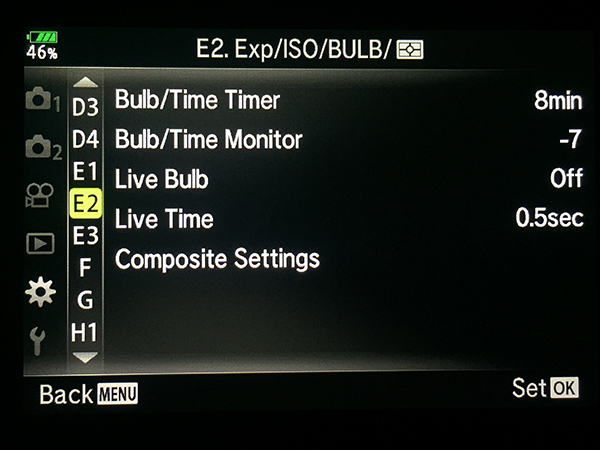
Bulb / Time Timer, Live Bulb, Live Time – default (this won’t be used underwater)
Menu E3: Exp / ISO / Bulb
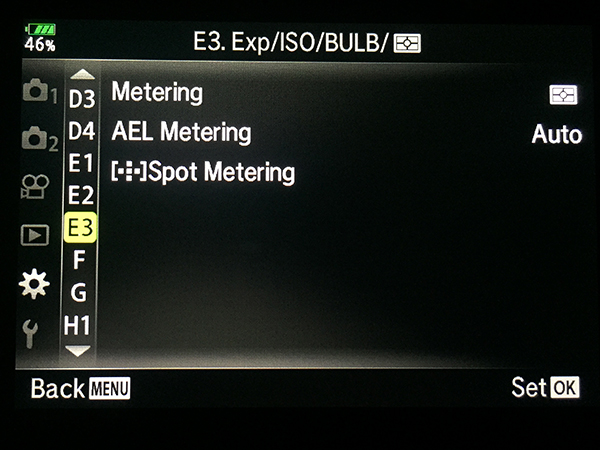
Metering – Default (Digital ESP Metering) – this evaluates the entire image for the best overall exposure. For more specific metering you can choose center weighted or spot.
AEL Metering – Default (AUTO) – if you use the AEL function leave this at the default and it will automatically choose the same metering you are currently using.
Spot Metering – Default (all selected) – this allows you to choose when spot metering applies, regular, highlights or shadows.
F: Flash Custom
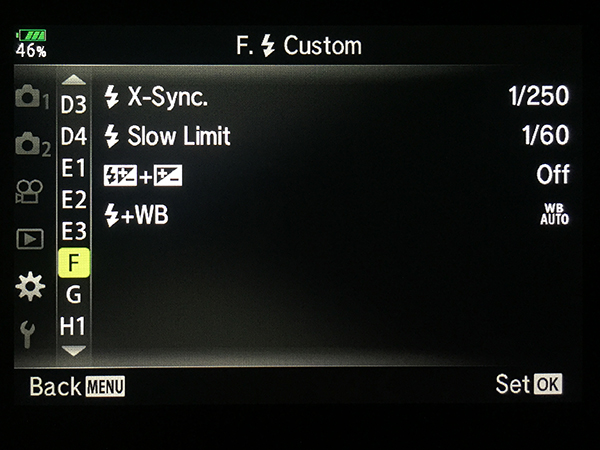
X-Sync – Default (1/250 for E-M1 Mark II) this sets the fastest default Shutter Speed at which the flash can fire.
**If using the YS-D2 Strobes you can override this max by using the Nauticam Flash Trigger, which allows firing at higher sync speeds. From our tests, the camera will sync with the flash up to 1/500th!**
Slow Limit – Default (1/60) – You can adjust this lower as desired.
NOTE: These flash settings do not matter for Manual Mode, the flash fires based on the shutter speed selected when in Manual Mode. However 1/250 is the highest option available for the E-M1 Mark II, 1/160 for earlier PEN’s.
Flash Exposure + Exposure – Default (OFF)
Flash + WB – leave at default, WB Auto.
G: Pixels / Color / WB
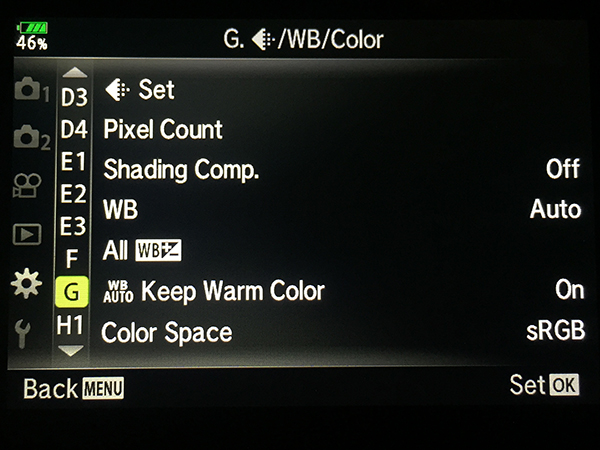
Pixel Set – leave at default, this allows you to change the JPG recording modes for different combinations of image size and compression. Does not affect RAW shooting.
Pixel Count – leave at default, this allows you to change the size of the M and S JPG size modes.
Shading Comp – leave at default.
WB – Auto (default) – this sets the default WB mode, you can adjust for certain instances through the quick menu
All WB Evaluation – default – this changes the overall WB compensation for all modes except custom WB
WB-Auto Keep Warm Color – default – keeps colors warm for Auto WB mode.
Flash + WB – default (auto)
Color Space – default sRGB (unless you specifically know you want a different color space)
H: Record / Erase
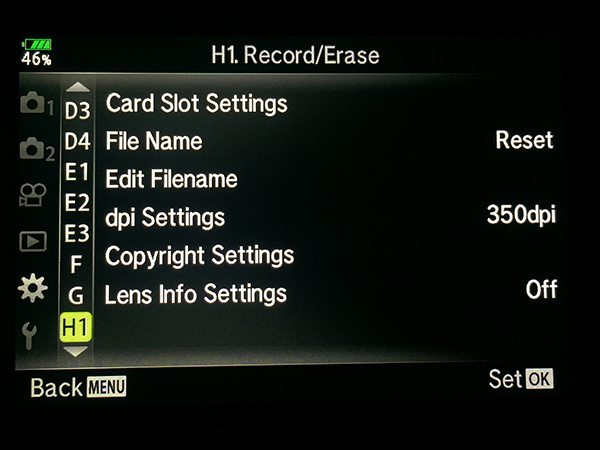
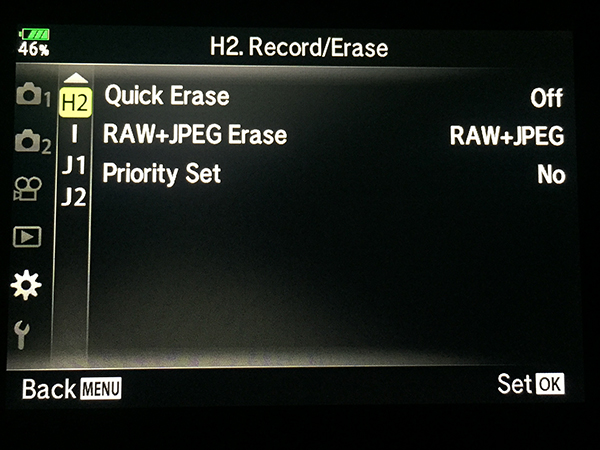
Set these to your preference, they do not affect picture taking
J: Built in EVF
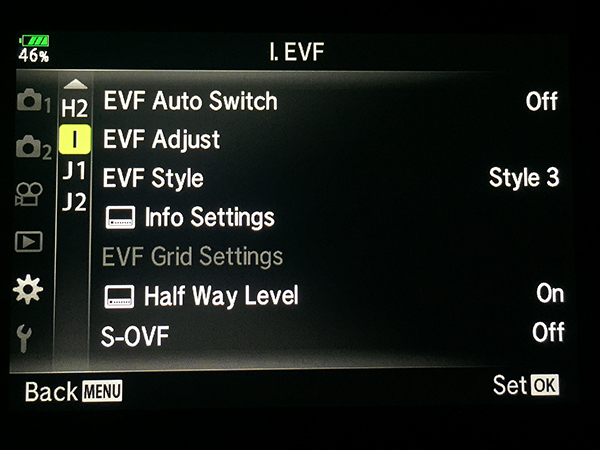
These do not affect picture setting, adjust as you prefer. The only important setting in this menu is:
EVF Auto Switch – OFF – this disables the automatic switch between the LCD and EVF. This is important for underwater use because the housing will always block the sensor and it will be stuck on the EVF only.
J: Camera Utility
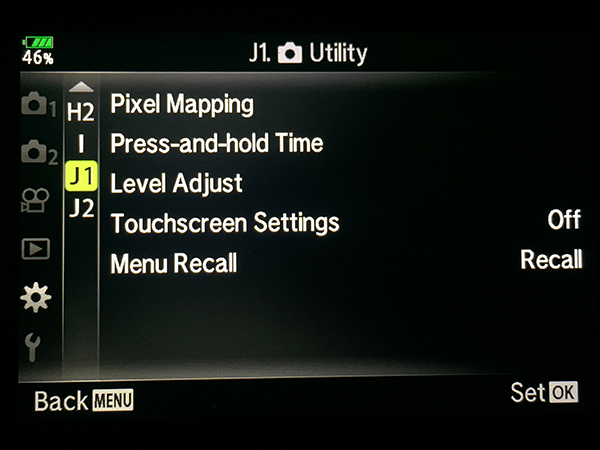
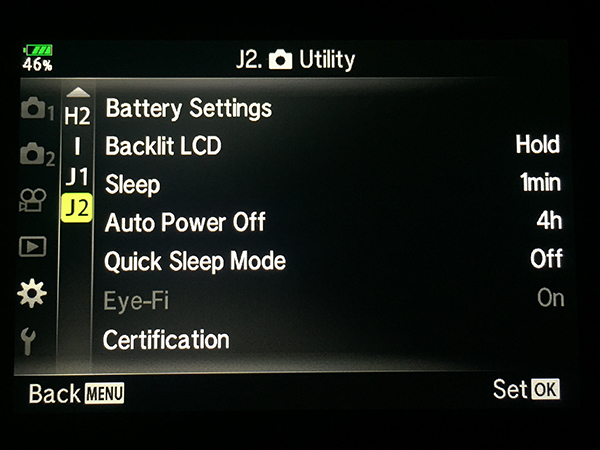
Set as desired, these do not affect picture settings
Setup Menu
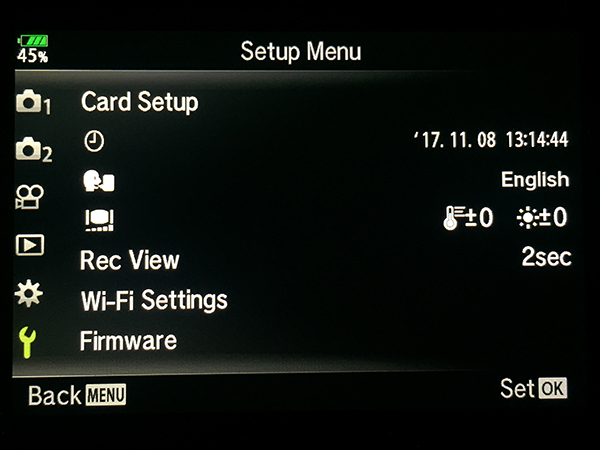
Set Date / Time, LCD brightness, upgrade your firmware, etc. The most important item on this menu is:
Rec View – this sets the amount of time an image is displayed for review after taking it. Default is .5 seconds, which is very fast. 2 seconds is a good average to set this to so that you can check exposure and focus on the LCD before taking another picture. If you need to take the next shot quickly this review disappears with a 1/2 shutter press.


