Using Dehaze in new Adobe Lightroom CC

Using Dehaze in new Adobe Lightroom CC
Lightroom's new dehaze feature could mean big things for underwater photography – let's check it out
Text and Photos By Brent Durand
Adobe has just released Creative Cloud 2015, with some performance and feature updates. If you're using Photoshop Creative Suite or a standard version of Lightroom, then these features are off-limits for the time being… and may be incentive to switch over to the Creative Cloud subscription.
Creative Cloud allows access to Adobe's full suite of products, and while there are some very cool updates across the board, we as underwater photographers will be primarily interested in Lightroom's new feature: Dehaze.
The new Dehaze feature does exactly what the name implies. It will increase or decrease the feeling of haze in your photos, whether from mist or particles in the water. For underwater photography, we are primarily interested in removing the reeling of haze in order to increase sharpness / clarity lost underwater.
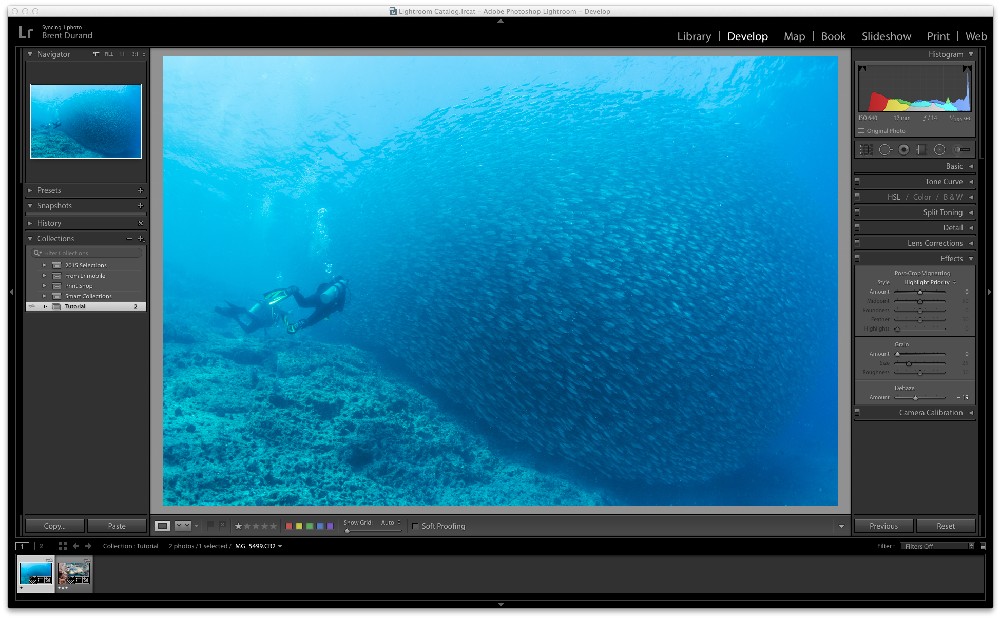
Dehaze is comprised of a single slider, which is located in the "Effects" box at the bottom right colum of the Develop module. This is not the best placement for a feature meant to be used all the time, which may be better off in the Basic box, however when thought of as a combination of image property adjustments (as discussed below) it makes sense that it is categorized as an effect… similar to the photo filters available on your cell phone.
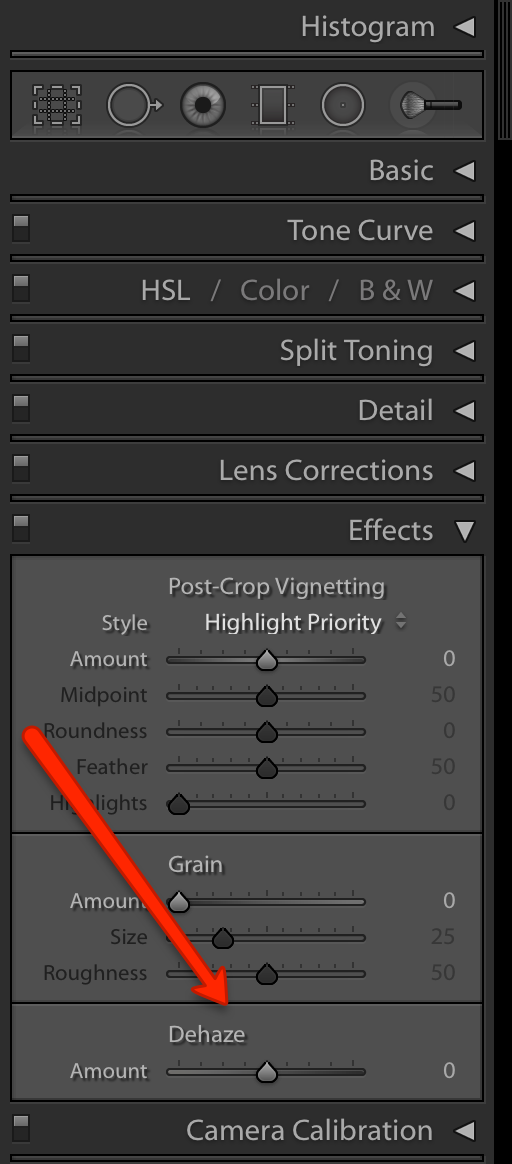
Dehaze is located in bottom of the Effects box in the Develop Module.
Using the Dehaze Feature
The most simple way to see the changes Dehaze makes to your image is to play with the slider. Move it all the way left (-100) to increase the haze effect and all the way to the right (100) to decrease the haze effect. In doing so, we notice that Dehaze applies a formula to change several of the image's properties.
I'm not too savvy with Lightroom algorithms, however it appears that Dehaze adjusts the image saturation, sharpness, contrast and possibly noise reduction / smoothing.
Here are a few examples of Dehaze on photos from Bluewater Photo's La Paz trip in 2013. I didn't push the sliders too far to try and keep it realistic.
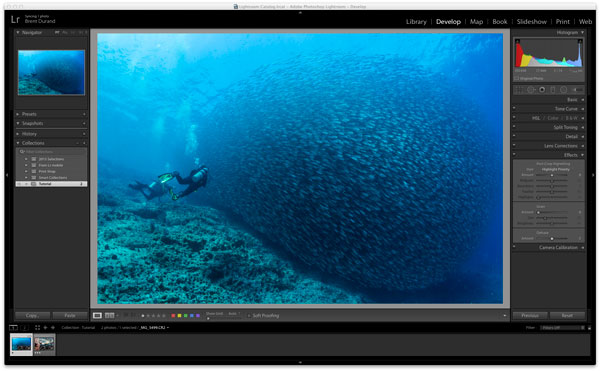
Before using the haze effect
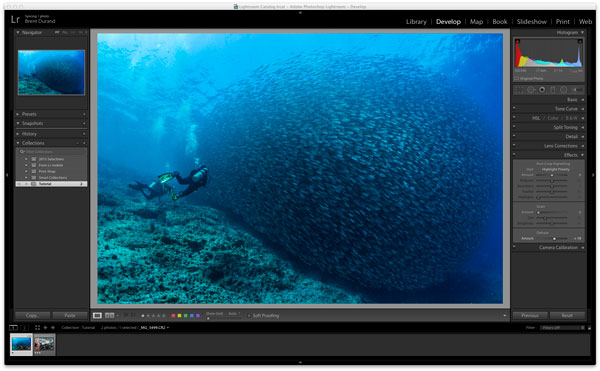
Removing haze at amount of +19
Applying haze at amount of -19
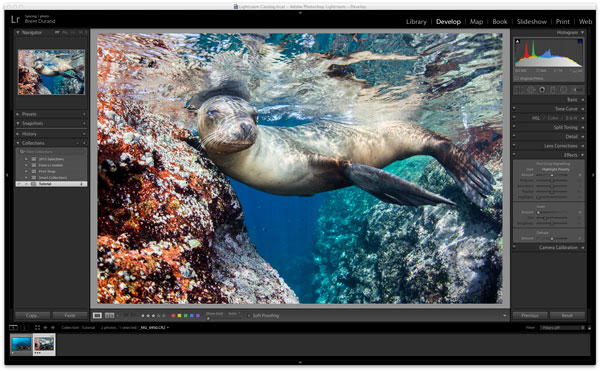
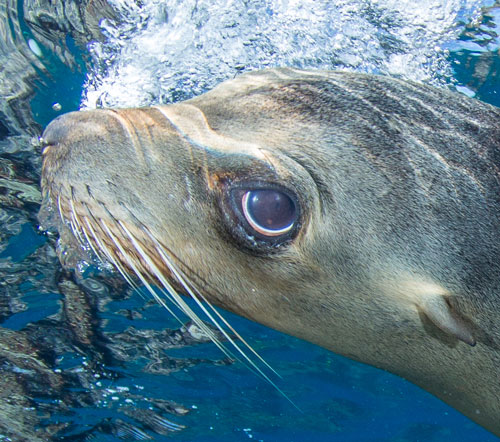
Sea Lion with no haze effect applied
Sea Lion with haze at amount of +19
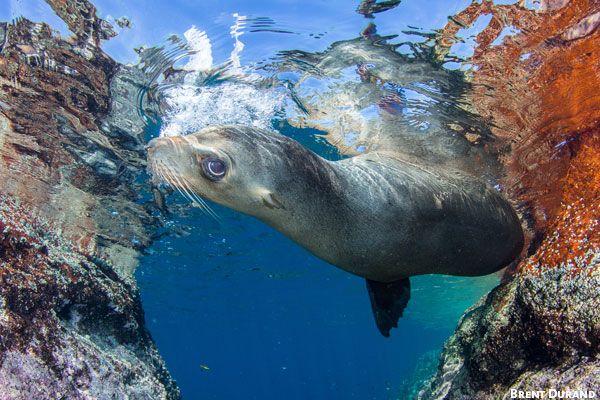
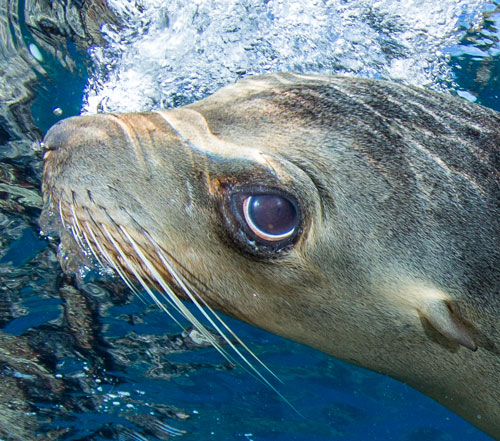
Sea Lion with no haze effect applied
Sea Lion with haze at amount of +19
Sea Lion crop with no haze effect applied
Sea Lion crop with haze at amount of +19
All photos shot with Canon 5D Mark III and Tokina 10-17mm in Aquatica A5D Mk III housing, in October 2013.
Conclusions
The new Dehaze feature in Adobe Lightroom is pretty cool. It will take some more experimenting to find preferences between increasing Dehaze versus adjustments of contrast, blacks, clarity, sharpening and saturation, however I do see this as something that will fit into my general editing presets.
Further Reading
-
Best Cameras of Summer 2015
-
Beginner's Guide to GoPro for Underwater Video
-
5 Easy Steps to Process your Underwater Photos
About the Author
 Brent Durand is a weekend wanderer, story teller and image-maker from California. Brent is editor of UWPG. Follow UWPG on Facebook for daily photos, tips & everything underwater photography. View more of Brent's work or follow his imagery through www.BrentDimagery.com.
Support the Underwater Photography Guide:
The Best Service & Prices on u/w Photo Gear
 Visit Bluewater Photo & Video for all your underwater photography and video gear. Click, or call the team at (310) 633-5052 for expert advice!
The Best Pricing, Service & Expert Advice to Book your Dive Trips
 Bluewater Travel is your full-service scuba travel agency. Let our expert advisers plan and book your next dive vacation. Run by divers, for divers.