Best Underwater Settings for the Sony A7R II Camera

- Important Camera Settings
- Focus Modes and Settings
- Macro Settings
- Wide Angle Settings
- Video Settings
- Set Up for Aquatica Housings
- Set Up for Nauticam Housings
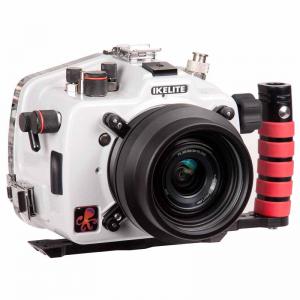
- Set Up for Ikelite Housings
- Other Menu Options
The Sony A7R II camera has come on to the scene with incredible specs and delivering the highly detailed, excellent quality results we’d expect from a full frame camera. With a smaller footprint than the larger pro style DSLR cameras, it makes it a bit easier for housing and using underwater. However this small size does not hinder the camera in any way* as it still delivers top notch functionality, controls, customization and more. Everything you’d want in a larger DSLR body is available in this smaller mirrorless system. For a full look at the Sony A7R II Camera for underwater photography read our in depth review.
*Except maybe battery life. :(
With the expansion of the native lens line, the A7 series is even more desirable, and with three different camera options to choose from, photographers can really hone their system specifically for their desired use.
I’ve been using the A7R II camera in a couple different housings over the last months, and have dug through the menu’s to find and use the best set up I feel possible for ease of shooting and excellent results while taking advantage of the many options this camera allows.
Please keep in mind as you read there may be a few options that are not possible or differ on the other camera models - A7 II and A7S II - but hopefully nothing too different!
If you are a video shooter, be sure to read Sony a7R II Best Video Settings.

Important Camera Settings
There are several settings that must be changed from the default in the camera menu before using the camera underwater. Make sure to go through your menu to properly select these options in order to maximize your A7R II underwater and have an enjoyable time shooting!
Automatic Switch Between the Electronic Viewfinder and the LCD Screen
The Sony A7R II automatically switches between the LCD and EVF when you put your eye up to the EVF. Underwater this is problematic as the housing blocks the sensor tricking the camera into thinking an eye is up to the EVF so it will not switch back to the LCD automatically. The Nauticam housing uses a light blocker to allow the auto switch to work, however I have found that it does not always work as it should. Aquatica and Ikelite need to have the auto switch shut off or you will be limited to using only the EVF.
To turn off the automatic switch between EVF and LCD: Menu —> Settings (Cog Icon) —> Screen #4 —> Finder / Monitor —> Select either Viewfinder (Manual) or Monitor (Manual) —> OK to confirm.
This will give you the option of selecting EVF, Auto or LCD. For manual control choose the one you will most often use (either EVF or LCD). The camera will default to that screen when you turn it on.
To be able to switch between the EVF and LCD quickly you need to program one of the custom buttons for this function. I choose C3 as its located on the back of the underwater housings, making it not great for quick access, but easy enough to reach when you need it.
To assign the EVF/LCD switch function to the C3 button, follow these steps: Menu —> Settings (Cog Icon) —> Screen 7 —> Custom Key Settings —> Custom Button 3 —> Finder / Monitor Sel —> OK to confirm. Now when you press the C3 button it will switch between the EVF and LCD.
Allow for Easy Image Composition When Using Strobes
The A7R II does not take into account the external strobes we’re using underwater, and the out of the box default for the EVF or LCD screen brightness is to accurately reflect the effect that the camera settings will have on exposure. This means that if you set the camera to F22, 1/250th, your screen will be black! In order to be able to properly compose your image you need to turn this function off so that the screen will always display a bright image. Just keep in mind that what you see is not what you will get! Keep an eye on the meter (which takes into account the flash) or shoot a test shot to refine your exposure.
To turn off the setting effect follow these steps: Menu —> Settings (Cog Icon) —> Screen 3 —> Live View Display —> Setting Effect OFF —> OK to confirm
Control Your Focus Point
The A7R II comes set up with no easy way to quickly change your focus mode or choose a specific focus area. In order to change the mode or focus area you have to navigate through a few menus unless you customize the path. I recommend assigning the Center (OK) button to control Focus Settings so you gain one touch control of your focus point.
To assign this function follow these steps: Menu —> Settings (Cog Icon) —> Screen 7 —> Custom Key Settings —> Center Button —> Focus Settings —> OK to confirm.
Now when you hit the center button it will automatically bring us the focus area and allow you to move it. (Applicable for Zone, Flexible Spot and Expand Flexible Spot). To quickly change your focus mode you can assign that to one of the other Custom Buttons, or leave the cursor highlighted on the field when you press the Fn key so its ready to be selected without additional scrolling.
Turn Off the AF Illuminator
This is unnecessary in any underwater housing as it is blocked completely. Turn this off to save a little bit of battery life.
Menu —> Camera Icon —> Screen 4 —> AF Illuminator —> OFF —> OK to confirm
Display Rotation
For whatever reason the A7R II camera defaults to no image rotation during playback. This means if you shoot a portrait oriented image when you go to review it, you’ll see the small version on the horizontal orientation and it will not change to fill the screen if you rotate the camera. To keep from going crazy, turn on the auto display rotation.
Menu —> Playback Settings (Play Icon) —> Screen 1 —> Display Rotation —> Auto —> OK to confirm
Check Your Image Format
Before shooting always check that you are shooting in the mode you want. Make sure you’ve selected RAW, or the correct JPEG option. Do the same if you shooting video to confirm your settings are correct.

A7R II Focus Settings
Focus Mode Options
Knowing how your camera is focusing is half the battle with getting that perfect, sharp focus in your images. The second half is properly using those focus modes to your advantage. Here is a quick outline of the A7R II’s focus modes for photography, and my recommendations of which to use underwater.
AF-S
This is single auto focus, where a half shutter press will lock the focus and that focus will stay locked in place until you depress the shutter. The next half shutter press will lock focus again, etc.
AF-C
The camera will continuously focus while the shutter is held half depressed. Once you release the shutter it takes the photo. You can even specify in the camera menu whether you want the priority of the shutter release in AF-C mode to be on locking focus or on releasing the shutter. If you set it to “Release” then the shutter will release even if the camera is not 100% locked in focus. This can mean catching quick action that you would have missed while waiting to lock focus and may be useful in certain shooting situations. The default is “Balanced Emphasis” where the camera chooses the best option for that moment, although I do not know what criteria it uses to decide which to prioritize.
AF-A
This is a more advanced focus mode that is seen on many cameras and may be useful for underwater wide shooting. It effectively lets the camera decide whether to use AF-S or AF-C focusing based on how it sense movement in the frame. If the camera sense that the subject is stationary when you half depress the shutter button it will lock focus. However, it if senses that the subject is moving it will continuously focus while the shutter is half depressed. The downside here is that you may want a specific focus option but the camera may choose differently.
DMF
This is an autofocus mode that allows you to tweak the focus lock manually while holding down the focus. I personally do not feel this one is that useful for underwater as it requires alot of pressing and holding. To use this function you would half depress the shutter and hold it while manually focusing the lens. The risk of accidentally engaging the shutter the rest of the way and taking a photo is too high for me, I prefer the AF-S lock and rocking in and out method to tweak focus for macro shooting.
MF
If you have a lens that is compatible with a focus gear you can use manual focus underwater. I recommend also engaging focus peaking and or manual focus assist to aid in nailing manual focus control.
Focus Mode Recommendations for Underwater
Wide Angle Focusing
For shooting wide angle scenics (reefs / wrecks, etc), I tend to prefer to leave the camera set up in a standard configuration with the autofocus engaging at a half shutter press. It makes it easy to focus and shoot a photo, in addition you’ll never forget to lock focus when shooting engaging big animal action.
The wide angle focus mode I prefer using is AF-C, as this continually allows the camera to refocus while I hold down the shutter half way which is great for moving animals.
In addition I like to select the menu option for PRE-AF (Menu —> Settings (Cog Icon) —> Screen 3 —> Pre-AF —> On) so that the camera is adjusting focus before I take the photo. **Keep in mind this will cause more battery drain when on**
When shooting reef scenes, wrecks or other large stationary objects you can choose any focus area you like, as nailing focus right away is not a huge deal - your subject is not going anywhere. When shooting big animals I prefer to use either the Wide Focus Area, Zone Focus Area or the Expand Flexible Spot. The Wide option will take into account all the focus areas in the frame and select the best one. It will show the green focus square around the area it selected. If you want to specify a specific area use the Zone, which allows you to select a section consisting of 9 focus areas. The camera will then choose one of those nine. Lastly expand flexible spot allows you to choose a specific focus area. If the camera cannot lock focus on that spot it will use the focus points around that spot as a secondary priority area to focus.

Macro Focusing
When shooting macro I find its best to work with the AF-S focus mode. This allows me to lock focus once. I also split the focus away from the shutter so that I can take multiple exposures without refocusing.
Any of the focus area options will work fine for macro, however I prefer to use the Flexible Spot so that I can pinpoint exactly where I want the camera to focus (ie: eyes). If the macro subject is quick to move I’ll use a different mode, but for most macro work I select Flexible Spot - Medium. For even more fine tuning select Flexible Spot Small!

Macro Settings
Shooting macro typically means blocking out the ambient light so you can control the scene using your strobes or video lights. Here are my recommendations for starting when shooting with the 90mm Macro lens.
- Manual Mode, F22, 1/250th, ISO 100
- Auto White Balance
- Most systems will use manual control only on the strobes, but for Ikelite you can set them to TTL if you desire
- Set Focus Mode to Flexible Spot so that you can easily target a specific area of the image to focus.
TIP - Watch your shutter speed! The A7 cameras do not have a max shutter speed sync stop when plugged into the hot shoe. This means you can easily dial down the shutter past 1/250th, however once you do so, you’ll start to see that black bar across your photos as the exposure is too fast for the flash!
TIP - Get creative - Open up your aperture to F5.6 or lower for blurred background and shallower depth of field
TIP - When shooting fish portraits with the 90mm open your aperture to F11 to start. This will give you strobes more reach, as the camera is letting in more light. Slow your shutter speed down to allow for ambient light to come into the sensor if you don’t want black backgrounds in your portraits.

Wide Angle Settings
The opposite of macro where you block out ambient light, wide angle needs the ambient light to capture the surrounding views. Adjust your aperture and shutter to allow more light in, while still getting sharp, detailed photos. Here are my recommended starting points.
- Manual Mode for Reef Scenes, Wrecks, Etc, F8, 1/ 125th, ISO 100
- Auto White Balance
- Strobes on Manual or TTL when available
- Set Focus Mode to Wide to capture all possible focus points, or Expand Flexible Spot when trying to isolate one area for focus, but want some added padding in locking focus.
TIP - Use Aperture or Shutter Priority when shooting big animals or faster moving subjects.
TIP - Remember, shutter speed controls your background exposure for wide angle. Slow or speed up the shutter speed to get the perfectly exposed, nice blue background in your photos.
TIP - When shooting into the sun you’ll need to set the shutter speed as fast as possible (1/250th to properly sync), also stop down the aperture to avoid blowing out the highlights (increase strobe power)

Video Settings
The A7R II camera really shines for video shooting, with the ability to shoot full 4K (100M bitrate at up to 30p). In addition the backlit sensor dramatically improves the low light performance, an added bonus for video shooting. The best option for shooting video if your editing system can handle it would be to shoot 4K, then down res the footage when exporting to which ever format you prefer. If you don’t have a robust editing system that can handle the 4K shooting, then our recommendation is to shoot using the high quality XAVC S HD codec (vs MP4 or AVCHD). This will give you nearly 2k resolution, which is still more than you need for online sharing and the max of what most current TV’s display. Here are the basic settings to start with for HD (not 4k) video on the A7R II:
- XAVC S HD
- Either 30p or 60p (allows for more control with slowing down motion)
- Manual control so you can set the correct shutter speed and control aperture and ISO to get a proper exposure / depth of field
For a more detailed look at proper settings and camera control when shooting video, check out our video specific settings article for the A7R II.
Underwater Video with A7R II, 1080 30p - Socorro Islands
Recommended customization for the Aquatica Housing
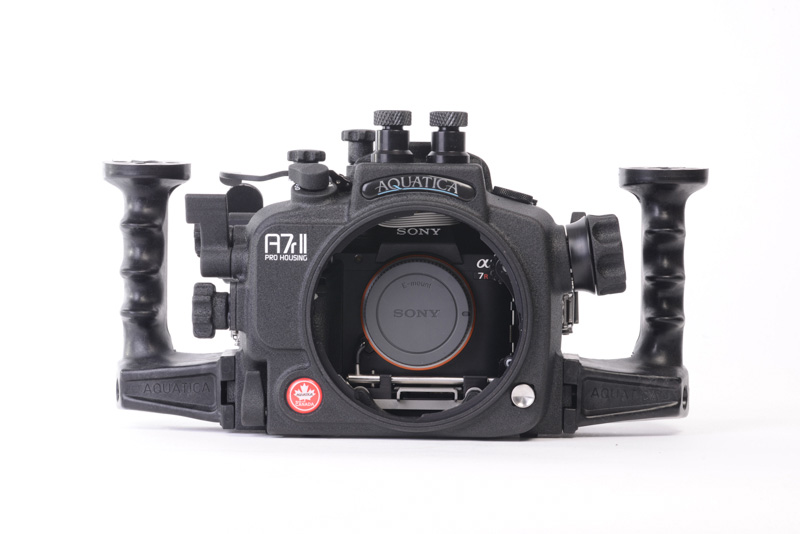
When installing the camera onto the camera tray, make sure you pop out the LCD screen so that it sits on the tray at an angle. Take care to make sure the ON/OFF lever on the housing is in the same position as the camera (ie: both set to OFF). This will ensure functionality for turning the camera on / off after the housing is closed. In addition you will want to pull up the bracketing and mode dials so that the camera can slide in easily. If you are using a lens with a zoom or focus gear be sure to pull out the zoom knob on the housing also.
If you have also adjusted the Important Camera Settings there is nothing else you have to change to enjoy the A7R II in the Aquatica housing underwater. However, if you want quick access to ISO or to use some more advanced options such as splitting out the focus lock from the shutter release, here are my recommendations for customizing the camera for the Aquatica housing.
ISO Control
One great feature of the Aquatica housing is that you have access to a third control wheel, the one surrounding the center button on the back. I love this control, as it allows me to access and change my ISO on the fly when shooting video or ambient light.
To set the rear control wheel for ISO: Menu —> Settings (Cog Icon) —> Screen 7 —> Custom Key Settings —> Screen 1 —> Control Wheel —> ISO —> OK to confirm
Split Out Focus Lock
Aquatica did not extend the AF/MF button on the back of the camera, so I have found the best option for splitting out the focus when shooting macro is to use the C1 button. They made this a longer lever that you can access with your thumb.
To set this up:
- Assign the focus control to the C1 button: Menu —> Settings (Cog Icon) —> Screen 7 —> Custom Key Settings —> Screen 1 —> Custom Button 1—> AF On —> OK to confirm
- Remove the Autofocus from the Shutter Release so you can take multiple photos without refocusing: Menu —> Settings (Cog Icon) —> Screen 5 —> AF w/ shutter —> OFF —> OK to confirm
To quickly go back the standard (focus with half shutter release) set up simply turn back ON the AF w/ Shutter option.
White Balance Access
You may want quick access to White Balance control as well. I would recommend assigning this to the either the down button on the back of the camera or the C2 button. On the Aquatica housing the C2 button is a small lever that may be easier to access than the down button, but that is your choice.
To set this up: Menu —> Settings (Cog Icon) —> Screen 7 —> Custom Key Settings —> Screen 1 or 2 —> Custom Button 2 or Down Button —> White Balance —> OK to confirm.
Aquatica Housing Review
Be sure to read our complete Aquatica a7R II Housing Review.
Recommended Customization for the Nauticam Housing
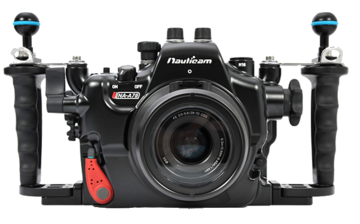
When installing the camera onto the camera tray, make sure you pop out the LCD screen so that it sits on the tray at an angle. Take care to make sure the ON/OFF lever on the housing is in the same position as the camera (ie: both set to OFF). This will ensure functionality for turning the camera on / off after the housing is closed.
If you have adjusted the Important Camera Settings there is nothing else you have to change to enjoy the A7R II in the Nauticam housing underwater. However, if you want to use some more advanced options such as splitting out the focus lock from the shutter release, here are my recommendations for customizing the camera for the Nauticam housing.
Split Out Focus Lock
To easily be able to split out the focus I recommend assigning the focus control to the small button on the back of the camera - AF/MF/AEL. On the Nauticam housing they have designed the control of this button as a lever that is easily controlled by your right thumb.
To set this up:
- Assign the focus control to the AF/MF button: Menu —> Settings (Cog Icon) —> Screen 7 —> Custom Key Settings —> Screen 2 —> AF/MF Button—> AF On —> OK to confirm
- Remove the Autofocus from the Shutter Release so you can take multiple photos without refocusing: Menu —> Settings (Cog Icon) —> Screen 5 —> AF w/ shutter —> OFF —> OK to confirm
To quickly go back the standard (focus with half shutter release) set up simply turn back ON the AF w/ Shutter option.
White Balance Access
Lastly you may want quick access to White Balance control as well. I would recommend assigning this to the down button on the back of the camera (Nauticam agrees as they have even labeled it in parenthesis on the housing). Menu —> Settings (Cog Icon) —> Screen 7 —> Custom Key Settings —> Screen 2 —> Down Button —> White Balance —> OK to confirm.
Recommended Customization for the Ikelite Housing
Coming soon….
Other Menu Options
The menu of the Sony A7R II camera is very detailed and there are so many functions you can choose to use or not use which can help create the perfect shooting system for your needs. Below I’ll outline a few key settings that you may want to use underwater, however we will not be going through all the options in detail. For more information on every menu option I recommend referring to Sony’s Expanded Manual which is available online here.
Camera Menu
ISO AUTO Min SS
This is an awesome feature on the Sony A7R II and can be especially useful underwater. When shooting in Aperture priority mode, this menu item allows you to specify a minimum shutter speed. This means that you can set it to the lowest shutter speed desired, then choose AUTO ISO and the camera will bump the ISO up instead of dropping the shutter speed to get the proper exposure. When shooting big animals, you’ll never have blurry motion again! (Keep in mind, if its dark you may end up with a very high ISO which will add grain to your photos, test this function out and only use it in conditions that will allow the ISO to stay in your desired range. To make use of this function set your desired minimum shutter speed through the menu, set the camera to A mode and the ISO to auto. The camera will choose the correct shutter speed keeping ISO at 100. If the exposure is too dark and the camera reaches your desired minimum shutter speed then it will begin to bump up the ISO instead of slowing the shutter!
Settings Menu
MF Assist
Turn this on if you’re using manual focus with a focus gear. It will magnify the image so you can focus more easily.
Auto Review
This is the length of time the image review shows on the screen after exposure. 2 seconds is default and may be too short for some. Set to your desired duration.
Peaking Level
Another useful manual focus tool this shows a color along edges in the photo when they are in focus. Choose Mid for peaking level to get good results without being too distracting
Peaking Color
I prefer red, but you can also choose white or yellow, pick whichever shows up best for your preference (again only used for manual focusing)
Priority Set in AF-S / Priority Set in AF-C
Controls the emphasis on shutter release or autofocus lock for those two focus modes. Refer to the section on focus settings above and set to your preference
APC-S / Super 35mm
Here is another great tool that can get you that extra bump from your lens while shooting. Selecting this mode will effectively crop the image in camera resulting in the same field of view you’d see on a cropped sensor camera. You’ll lose resolution from 42 mp down to 18 mp but you’ll gain additional zoom. Use this for macro shots when you want a little extra magnification and don’t plan to crop in post (or are not allowed to crop for the contest you’re entering), it can also be useful when shooting video.
Custom Key Settings
As described above there are many customizable buttons on the A7R II camera. Set these as desired, or as recommended above to create a personalized camera set up.

Sony a7R II Resources:
If you have any questions, feel free to email me at kelli@bluewaterphotostore.com.
Sony a7R II Housing info, with recommended ports & lenses

Aquatica a7R II Housing $2,600 (includes flash trigger)

Ikelite a7R II Housing $1,500 (Polycarbonate housing)


![]()

Purchase the a7R II Underwater Housing
RECOMMENDED ARTICLES


ABOUT THE AUTHOR

Kelli Dickinson is an avid diver and underwater photographer who shoots primarily on mirrorless cameras. Familiar with a variety of cameras and housings she tries to shoot on as many different options as possible to improve her overall knowledge of underwater camera systems. In addition she is Manager of Bluewater Photo. In her spare time she can be found running, hiking or underwater.
Connect with her on instagram @kelnkelp or at www.kelnkelp.com.
She can be reached via email at kelli@bluewaterphotostore.com.
ALSO BY KELLI DICKINSON


SUPPORT THE UNDERWATER PHOTOGRAPHY GUIDE:
The Best Service & Prices on u/w Photo Gear
Visit Bluewater Photo & Video for all your underwater photography and video gear. Click, or call the team at (310) 633-5052 for expert advice!
The Best Pricing, Service & Expert Advice to Book your Dive Trips
 Bluewater Travel is your full-service scuba travel agency. Let our expert advisers plan and book your next dive vacation. Run by divers, for divers.