Lightroom Tricks: Adjusting Tones using the Histogram
In this article I wanted to share a method I use to adjust the tonal range of my images. As with most things in life, there is usually more than one way to get the result you are after. In Adobe Lightroom that holds true for many of the tasks that photographers use during the image editing process.
What is tonal range? In photography, the tonal range is the spread of values from the lightest to darkest areas of an image, from pure white to solid black, if you will.
In Lightroom CC, we have a lot of control over the tonal range of a RAW file, and there is an entire section of the Develop module dedicated to just this…the Basic section, located directly below the Histogram. In this area Adobe has labelled these tonal range controls, or sliders, as Highlights, Shadows, Whites, Blacks, as shown below. Exposure and Contrast live within this control module as well, but more on those later.

Notice now, if you place your cursor over the Histogram and move it from left to right, you will see there are five distinct sections which will become a lighter shade of gray. These correspond to these four “tonal ranges”, plus one general control in the center for Exposure. From left to right, they are Black, Shadows, Exposure, Highlights, Whites, and Lightroom gives us two ways to control and modify these.
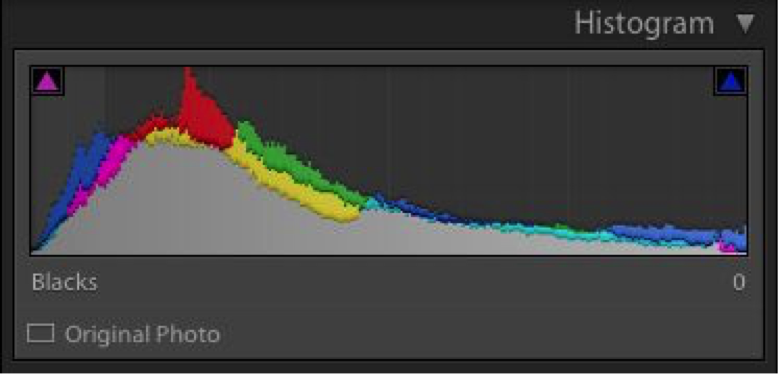
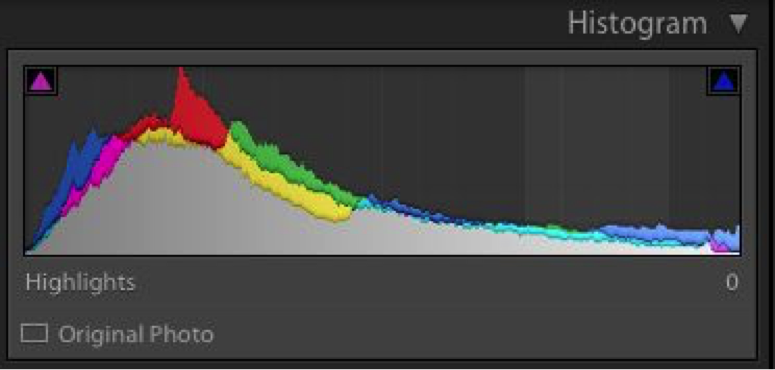
Two examples of the histogram with the Black (top), and the Highlights (bottom) sections selected.
The first way, which I suspect most Lightroom users use, is to grab a slider and adjust to the left or right. Makes perfect sense and it works perfectly.
Another method that I prefer and I feel gives me a bit more of a visual and perhaps tactile feel to control these is via the Histogram. Simply, click your mouse and hold it over one of the four sections of the histogram and slide it left or right. Move through each tonal range until you have your desired results. You can also hold it over the center section of the histogram to control the overall exposure this way as well.
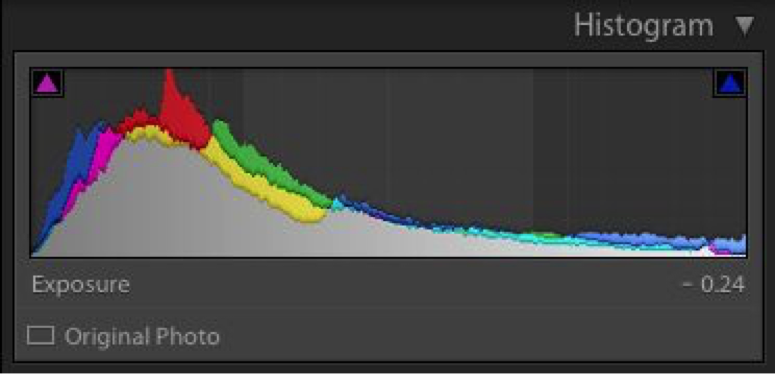
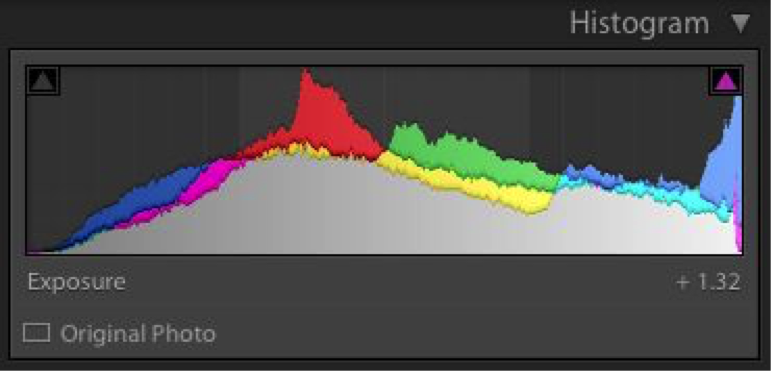
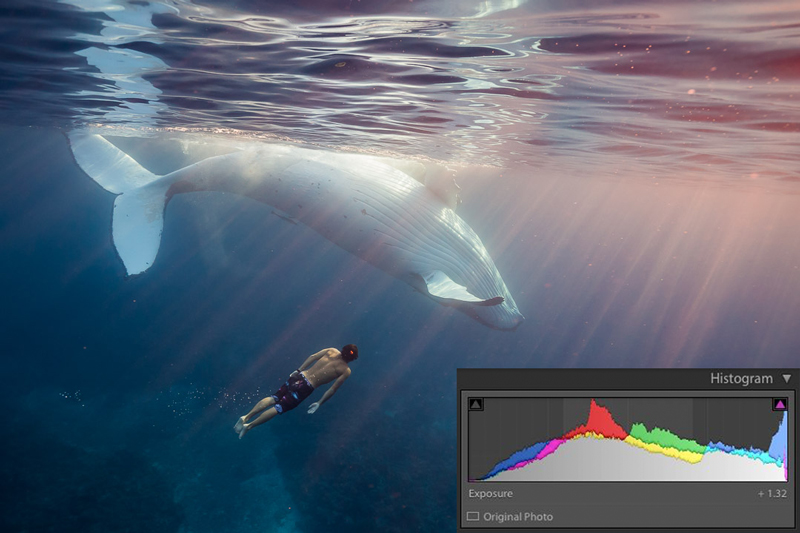
Here I have shown the control over the Exposure. In the first image (top) the Exposure is shown as it was out of the camera, in the second images (bottom) I pushed the exposure to the right to demonstrate the ability to control the exposure by moving the histogram from L to R.
Both methods produce exactly the same results, but for me, I feel that I can focus more on the image and less on the specific slider, and I find I can get the results I want more quickly.
This is the first set of controls I touch once I begin to work on an image. The goal is to expand the tonal range of an image to get the most dynamic range possible out of the RAW file. I try to pull the whites as far to the right of the histogram as I can without blowing out any important highlights, and I try to pull the blacks as far to the left of histogram as possible without blocking out any details and textures. The shadows and highlights adjustments can be pretty subjective, but the goal with them is to get important details and textures to show their best.
Only after I have gotten the tonal range where I like it, do I move on to other settings and tools within Lightroom…but more on those in a future article. Give this method a try a let me know what you think. In my next article I will go on a show you a trick or two that will further help to speed things up even further once we have the exposure and tonal range where we want it for other, similar images.
Lightroom Trick: Learn about using the Crop Overlay Tool.
View all of our Adobe Lightroom Post-Processing Tutorials for Underwater Photography.