Removing Backscatter with Photoshop’s Content Aware Tool
Removing particles (i.e., backscatter) from your underwater image can seem like a daunting task. Luckily, we have a variety of methods to choose from, depending on the application. Lightroom’s Spot Removal and Photoshop’s Clone tool are both popular but they lack a certain amount of precision, especially if you’re trying to remove a spot that is over a critical area of detail. One-touch filters are fast but are limited as they can create unwanted posterization or overall blur to the image.
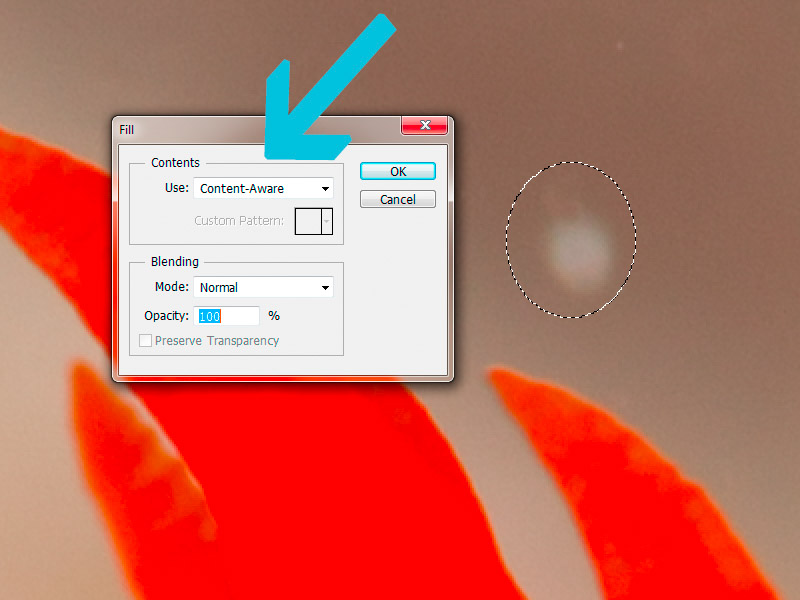
I have found Photoshop’s Content Aware tool to be the most precise method of cleaning up backscatter. It will take a little more time than other methods but the process can be simplified by creating a shortcut key to speed up your workflow.

Content Aware – Step by Step
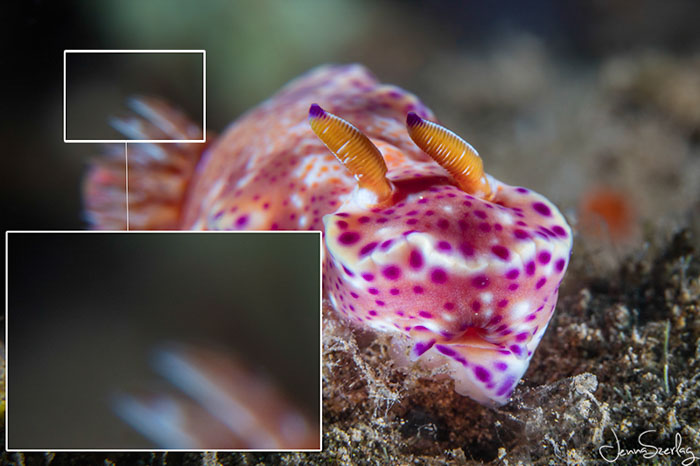
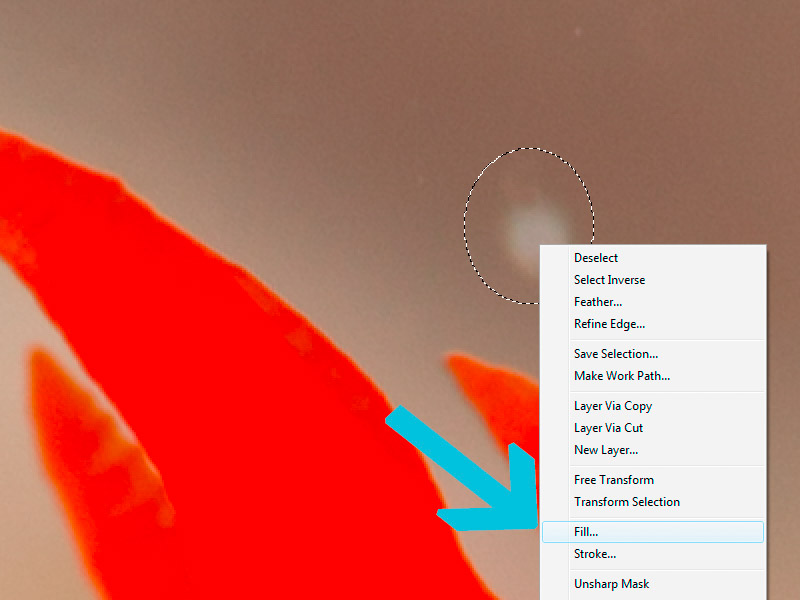
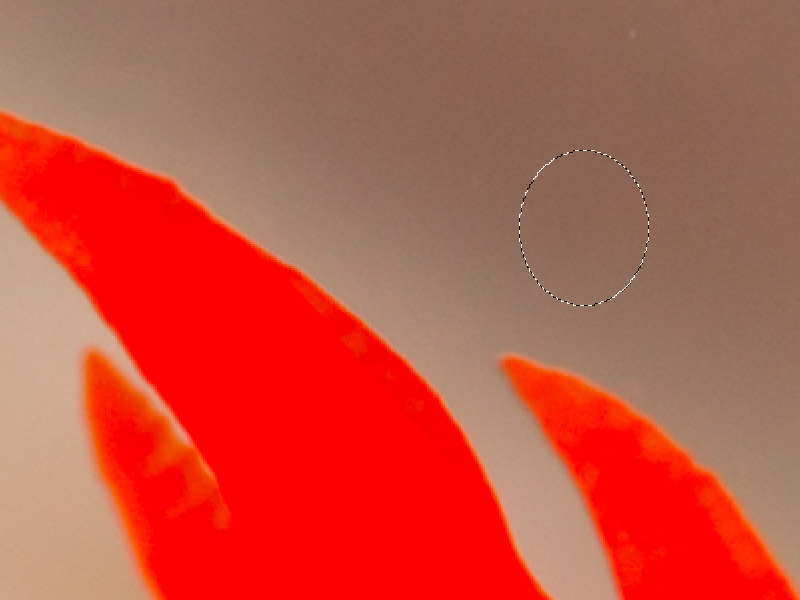
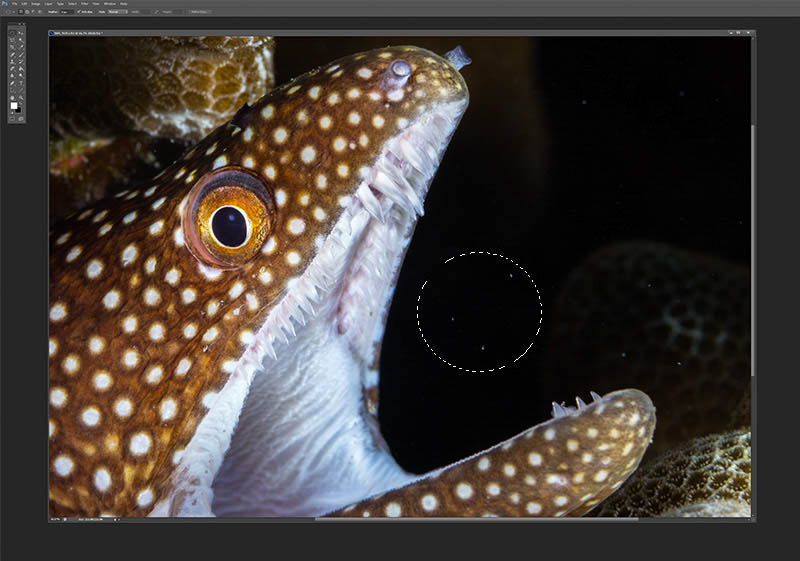
Open your image in Photoshop and choose a selection tool. I prefer the Elliptical Marquee tool but for more complicated areas I’ll use the Polygonal Lasso. Select the spot you wish to remove by dragging the circular selection around it. You may want to enlarge your image and zoom in first to see the detail better. The following step-by-step instructions are viewed at 400% zoom on the cerata of a chromodoris magnifica nudibranch photographed in Anda, Bohol, Philippines.
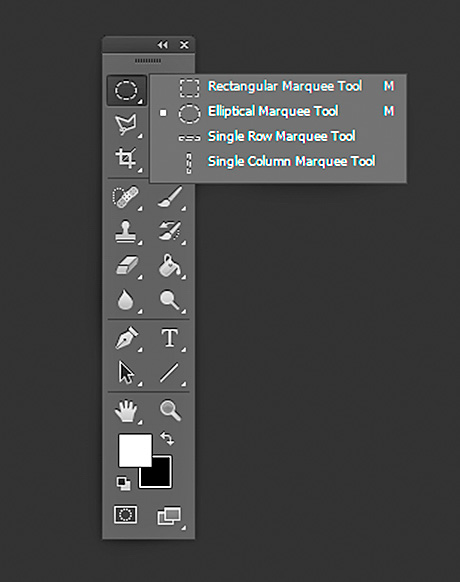
Choose selection tool (Elliptical Marquee shown here)

If you have an enormous amount of backscatter this process will obviously take a very long time. I would typically disregard any image with too much particle but if the image is so incredible that it deserves the extra time I would recommend using this method to remove the larger more obvious spots before moving onto a quicker fix such as the Dust and Scratches filter. You’ll see that just by taking a minute to remove the majority of the prominent spots that the secondary method will have more success.
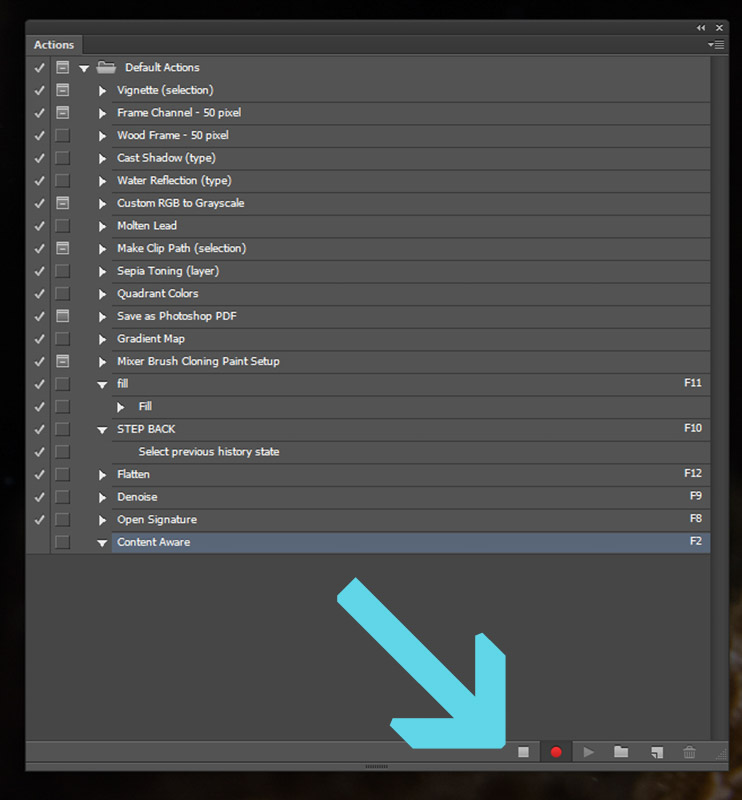
Creating A Shortcut Key
Using shortcut keys can save precious time in your workflow. Although this tutorial is geared towards creating a shortcut for particle removal with Content Aware, the way the shortcut is created can be applied to numerous tasks as simple as saving or “undo/step backwards” making your edits move along much faster.
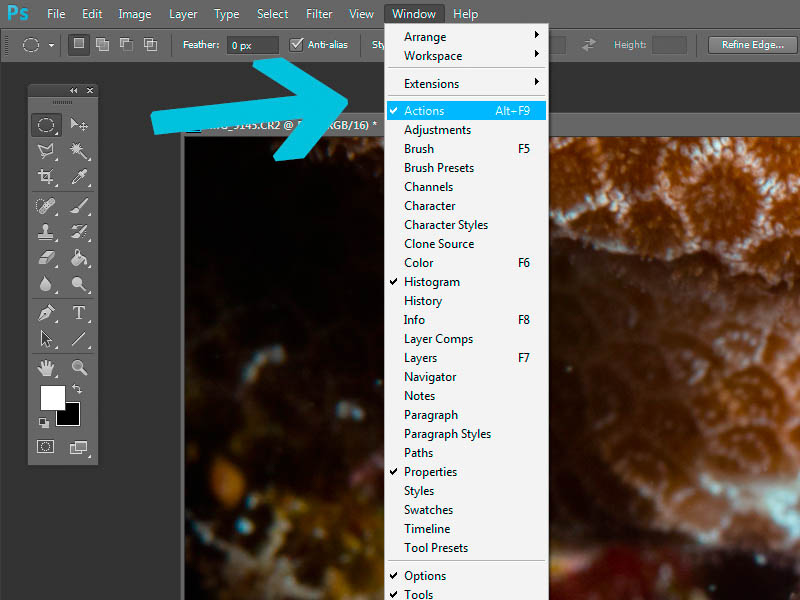
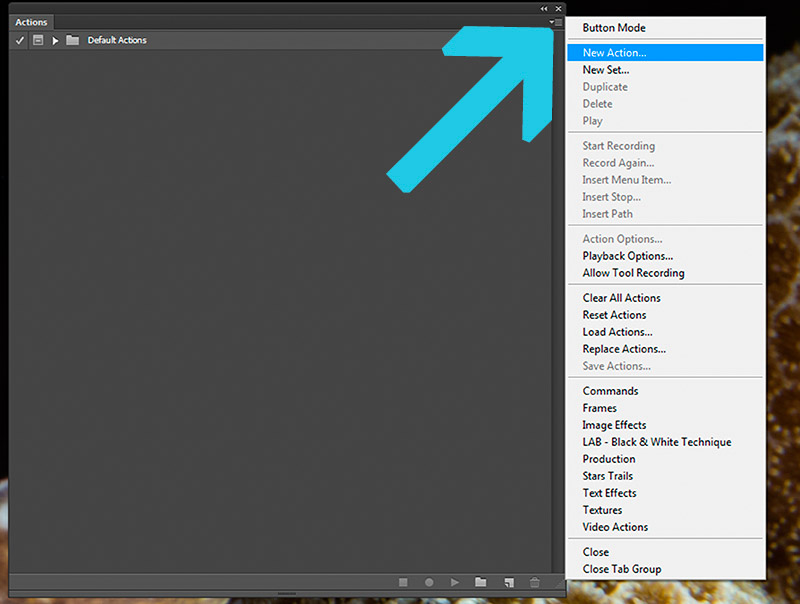
To create this shortcut, you will be repeating a portion of the previous steps while recording it. You’ll have a chance to name it and assign the shortcut key before recording.

You’re done! Now every time you make a selection and press your assigned shortcut key the spot will disappear.
Selecting Multiple Particles at Once
Depending on how fast your computer is, it may take a second to carry out the content aware fill command. If this is the case, you may find that selecting multiple particles at once, and then using content aware fill on all of them at the same time, saves you a bit more time. To do this, simply hold shift and drag the elliptical marquee over each spot one by one. Once you have selected all the particles you want, use content aware fill (either the manual way or via the shortcut key) to remove them all at once.
That’s really all there is to this technique. I hope you find it useful!