How to convert images to black & white
Black & White images
Why do we find ourselves attracted to black & white images? Are they more poignant than color images? Do they have a stronger narrative? I can’t really provide any definitive answers to those questions. What I can say is that removing color from a photograph does seem to focus our attention on the subject matter more acutely. Yet another question, what’s our goal? As an experienced underwater photographer I believe having an artistic intention before getting in the water does make a difference. Do we have a specific subject in mind that we believe will work well in black and white rather than color? Are we trying to fix an image of a lovely pelagic lacking in contrast? A once in a lifetime encounter with a humpback whale that suffered from poor visibility might be improved in black and white? Although you can’t fix a bad idea in post production, converting an image to black & white could help an image with poor contrast.
Once upon a time the world was revealed to us on a monochrome palette. Since the 1960s when color film became widely available, it provided us with a medium to express a more honest impression of the world around us. Black & white photography is the foundation on which all photography was built. The black & white discipline still carries a whole different set of credentials which we all need to practice and hone.
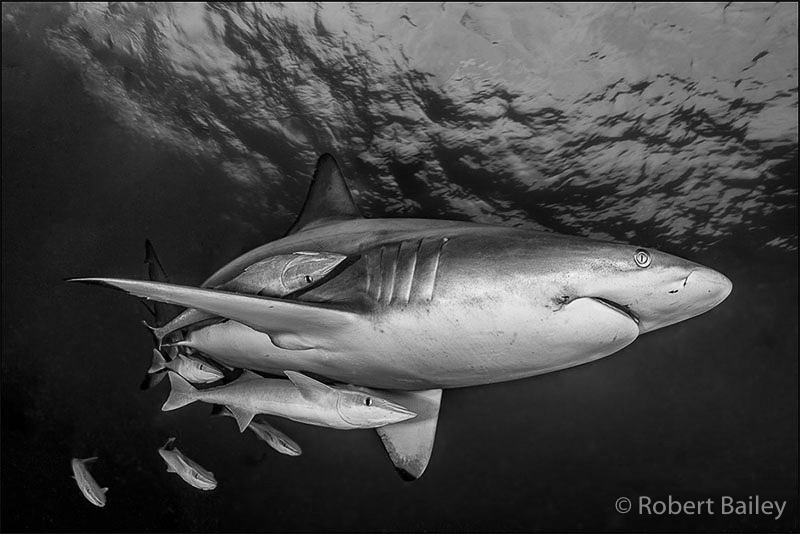
So what kind of subjects work best in black and white? Ones with stripes, bold patterns, and strong lines often work well. Perhaps you would like to show a favourite wreck with more grain than your camera is capable of? Maybe you want show a toothly grin of a shark, and think it will have more impact in black & white. You’re only limited by your imagination.

Creating Black & White Images in camera
So let us discuss how to go about making a black and white picture in camera. There are settings in most cameras to create black and white images. While you might think this is a handy setting, your camera will produce a jpeg file of your image rather than a raw file. That is another discussion in itself! When you create a raw file, you have much more control over the end result. An analogy of a jpeg might be an omelette, while a raw file is the raw egg itself. Information is often lost when creating a jpeg (sometimes referred to as lossy), that does not help you get the most out of our images. A raw file has all the information your camera recorded when you pressed the shutter (sometimes referred to as lossless). This is especially important if we need to make corrections in post production, like exposure or recovering blown highlights for example. So my advice is to stick with raw files. One tactic you can use is setting your camera up to create a black and white jpeg, and raw files. When you take a picture your camera’s monitor will show you the result in black and white, while the raw file is stored on your memory card. This will help you see while you are underwater what the black and white image will look like.
So you have created an image in camera, now what?
As ever with post processing there are many avenues you can follow, and they all lead to the same destination. Whether you work with Adobe Elements, Lightroom, Photoshop, or any other post production software, most of them incorporate tools designed for black and white conversion. Many professionals use Silver Efex Pro 2 today, it basically tries to mirror all the processes that used to be done in the darkroom.
Before I explain Silver Efex Pro 2 and its basic functionality, try doing black and white conversions in Lightroom or the Photoshop Raw Converter.
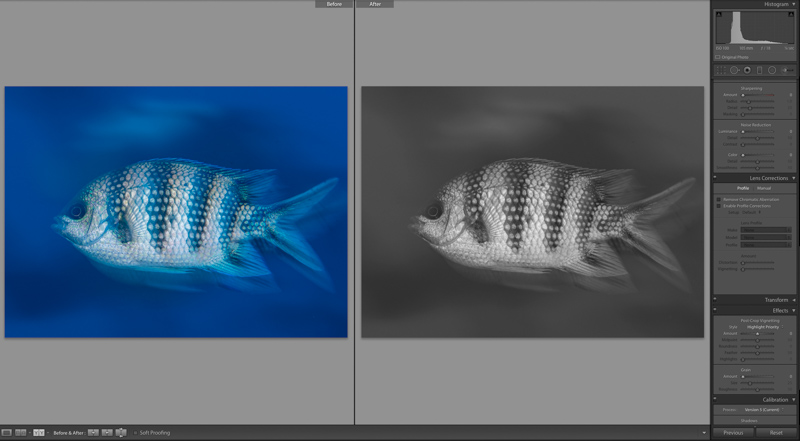
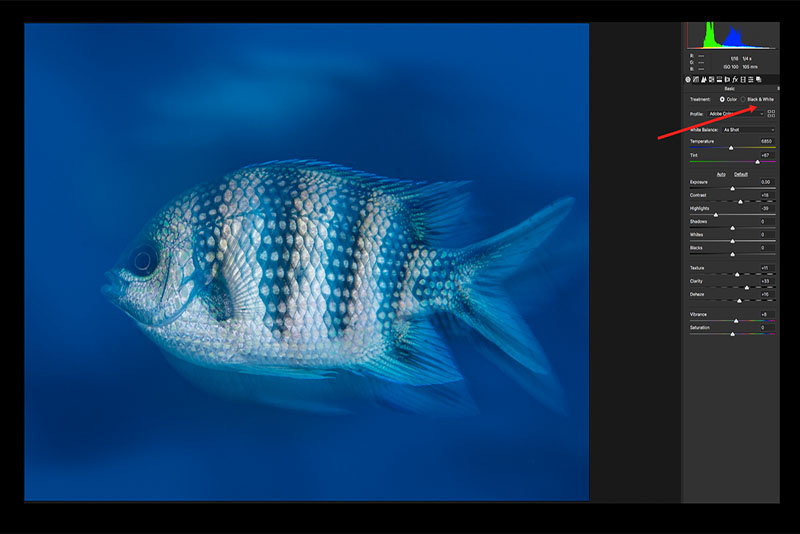
Lightroom – one click conversion to black & white
When you’re in the main screen of Lightroom, you can basically just click on black & white as shown below.
I would suggest that there are many more adjustments you can do to make your image pop! Just carry on with your normal adjustments to suit your own taste in Lightroom, the same goes for Photoshop.
Photoshop one click conversion to Black & White, ok maybe two.
In Photoshop Raw Converter there is virtually the same button as in Lightroom, they are after all based on similar code.
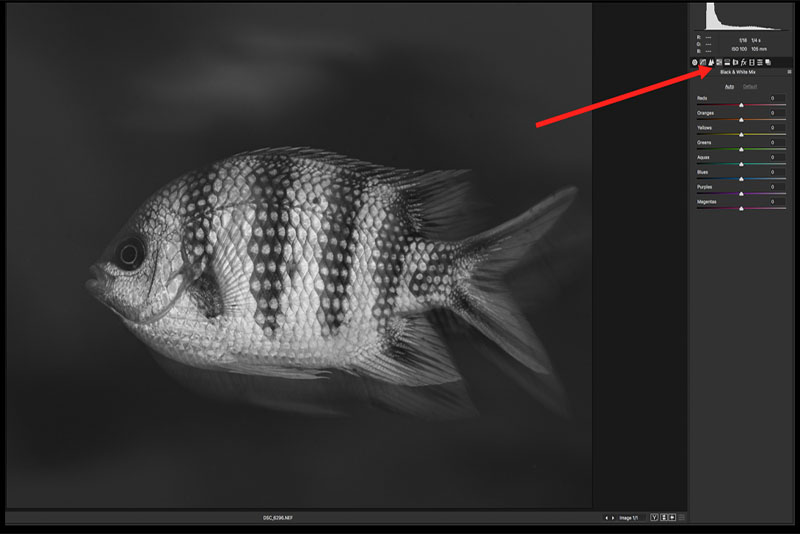
Then, click on the Black & White Mix tab to access eight sliders that resemble the Black and White Adjustment Layer. As the image above is dominated by blue, that slider is where you will notice the greatest change. It is all up to you and your taste what you do.
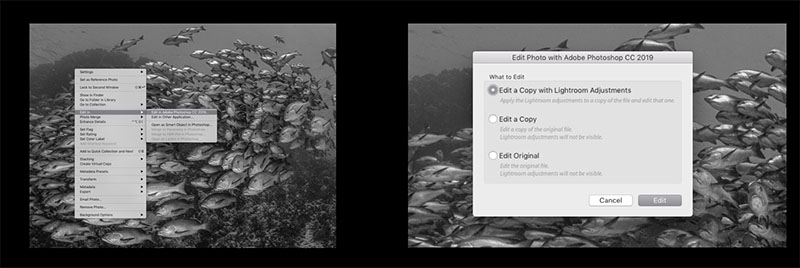
Using Lightroom and Photoshop together
Conversions to Black & White using Silver Efex Pro 2
Silver Efex Pro 2 is a plug-in, it works within other other applications. It is compatible with both Mac and Windows and works with Elements, Lightroom, and Photoshop. You can try it for free for 30 days. Check the DXO website here https://nikcollection.dxo.com/ for more details. There are a suite of plug-ins you can use to adjust your images, but for today we will stick to Silver Efex Pro 2.
Before you proceed any further you need to install this plug-in, all the instructions to do this are on the DXO website. You can try this software free for 30 days, and then after that you’ll need to pay.
Step 1 – Creating a smart object in Photoshop cc
Converting to Smart Objects in Photoshop CC will allow you to take advantage of non-destructive workflow, leaving you an editable layer, and preserving the source content. With smart objects you can go back and edit your black & white conversion once saved as a .psd file. Anytime you re-open it after that you’ll have the chance to re-edit as required, without having to do everything all over again.
Once your image is open in Photoshop you should create another layer, cmd j on Mac, or crtl j on Windows. Then right click on the new layer and select ‘convert to smart object’ as shown below.
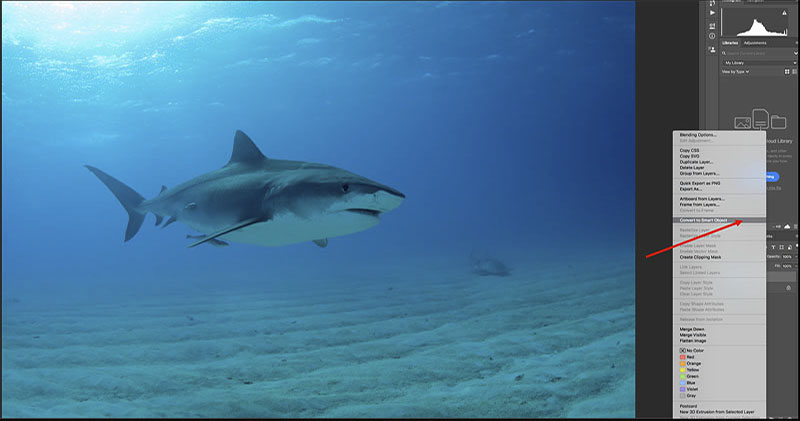
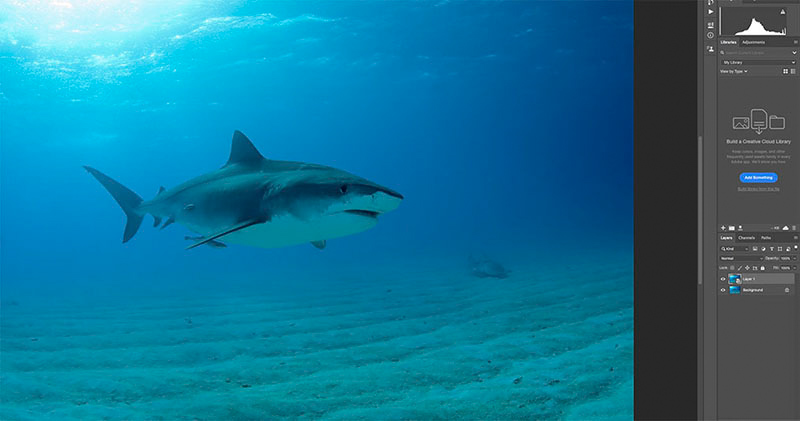
You’ll also note that there’s a tiny little icon in the layer you created, this confirms that the layer was converted to a Smart Object and can edited in future.
Now for the fun part
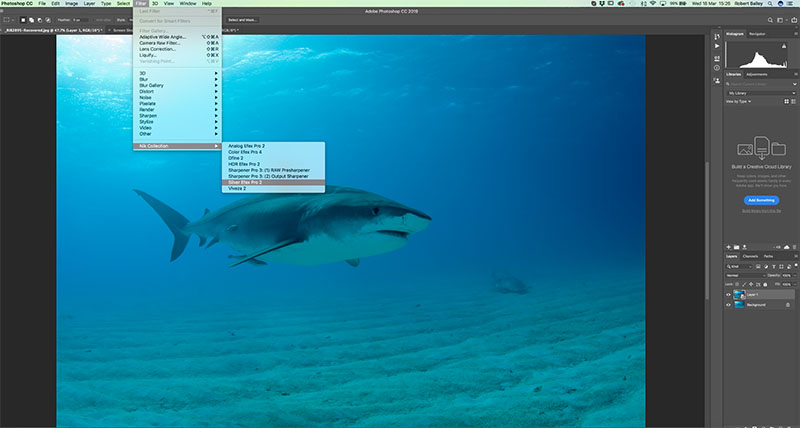
Step 2 – Opening your image in Silver Efex Pro 2
Open your image in Silver Efex Pro, simply select Filter, and then go to Nik Collection and hit enter.
Step 3 – Select a Preset in Sliver Efex Pro 2
It’s up to you which one you choose. In this case I’ve selected High Structure (harsh) to bring out detail in the sand.

Step 4 – Follow suggested workflow below:
I. Select a Preset from the library
II. Do Global Adjustments (brightness, contrast and structure)
III. Do Selective Adjustments (control points) U-Point Technology ©
IV. Use Colour Filter, Film Types, and Finishing adjustments (toning, hue, vignettes)
V. Review & save by clicking OK.
The world’s your oyster here. Once you’ve made all the adjustments you like, just click OK, and your adjusted image will show up in the Photoshop window, be patient it can take a minute or two. If you are not satisfied just click the copied layer where it shows Silver Efex Pro 2, and it will take you back to where you were and you can continue editing.
If you started in Lightroom, just close and save the file in Photoshop, and the changes will now showup in Lightroom, it does a take a minute or so to complete.
I’ll be working to outline the process in a video tutorial as I’m sure you have questions.


