Wide-Angle Photography in Low Light Conditions
As a cold-water diver, one of the most frequent phrases I hear from other photographers encountering bad visibility is “I guess it’s a macro day!” Except in extreme cases of bad conditions, that photographer is often missing out. Contrary to popular belief, it is possible to take quality wide angle images in poor visibility down to about five feet at any time of the day. It’s just a matter of understanding how light works.
. 1/160, f/3.5, ISO 400 - Olympus E-PM1 with Panasonic 8mm fisheye and Sea & Sea YS-D1 Strobe(s?)")
Painting with Light
As a photographer I only have one aspiration – to use light as a paintbrush in a way that extracts a work of art from a scene. I stopped “taking photos” years ago and switched to “painting with light”. The “painting with light” mindset is particularly essential for diver who do not have frequent access to the studio-like conditions of tropical sea, such as myself. The importance of quantity of light pales in comparison to understanding how it works.
“Painting with light” is a mentality where you can picture in your head how the light you have at your disposal (e.g., the sun, strobe, focus light) will affect the image you are creating. It’s a skill that takes years to develop but ultimately results in a photographer being able to set up his/her camera and take an excellent photo on the first try. The best way to develop this mentality is to constantly change your settings and strobes. Taking multiple photos of the same scene will help you understand how each element of the available light is affected by each element you change.

One thing I like to do is pre-create an image in my head at a dive site I know and then replicate it underwater. First, I will look at the sky and the clouds and determine what the sun will look like underwater. Then I pick a subject I know I can find, guess a depth it will be at, and determine how I would like to compose it. I think about where in the image I would like the sun to illuminate, and what I would like the strobes to expose. Finally, I choose a rough range for my aperture and shutter speed, pick my ISO, set my strobes, and hop in the water. You’d be surprised – it almost always works. Some of my best images were made this way.

Positioning
The two golden rules of underwater photography are especially important in limited visibility.
1. Get close to the subject
2. Shoot up at the subject
Shoot Into the “Sun”
The most consistent aspect of my photography in limited visibility is that I almost always shoot towards the sun. Even if it’s not a sunny day, I strive to position myself where the lens of my camera is pointed towards the highest amount of ambient light. There are a few reasons for this. The first is that if there is very little ambient light, shooting away from the sun will result in an image lit only by your strobes. This usually creates a black background. In a few circumstances an image like this can be desirable. But usually some amount of colorful water in the background will give your subject perspective. The second reason is that shooting into the sun results in the ability to use a higher shutter speed, small aperture, and lower ISO – all essential to improving the quality of the image. The third reason is the higher contrast resulting from multiple sources of light and shadow. Everything is more dramatic that way.
Snell’s Window
Snell’s window is an optical phenomenon where an underwater viewer sees the surface as if looking through a tunnel to the light at the end. This effect can be easily captured when shooting into the sun, resulting in dramatic underwater photos. Low light intensifies Snell’s window in underwater photos because the edges of the tunnel become black instead of dark blue as they would in clear water.

Shooting with two strobes? Leave one at home!
When shooting in low light conditions, you need much less light to take photos. This is a counterintuitive concept that can be very difficult for some to understand. The reason for this is that strobes are used to balance ambient light in the background and artificial light on a subject. When there is a lot less ambient light in the background, you need to respond with less artificial light so that you don’t blow out the exposure of the subject.

Although many photographers swear that two strobes increase artistic capacity, I disagree in low light situations. Many times, it is better to shoot with one! In limited visibility, I think two strobes can make wide angle photos look unnatural. This is because there is a larger gradient of ambient light in the image, especially in a Snell’s window. If too much of the foreground is lit, then it looks unnatural. Using one strobe will let you work with Snell’s window. This is done by lining up the subject you want to light with your strobe with the bright part of the window. The subject is then lit with the single strobe, but the rest of the foreground remains dark – naturally following the pattern of Snell’s window.
Aperture
Aperture can be a tricky thing to set in limited visibility. It’s the setting that I change the most. Many people start by shooting at f/8 as it’s the most neutral aperture. You will likely have enough depth of field in the image, but it also lets in a good amount of light. However, this aperture might be too small (i.e., too dark) in might low-light situations. I will often open my aperture wider than this, even taking the f-stop down to f/3.5. This almost always results in a shallow depth of field and a blurry background. However, I think that any image can be composed in response to any f-stop. Sometimes having a blurry background is worth having better lighting with more ambient light in the background.
 in this case enabled me to point focus to the octopus, properly expose the diver, and maintain balance with the background. 1/160, f/3.5, ISO 200")
Shutter Speed
Different photographers have differing opinions concerning shutter speed. I like to keep my shutter speed consistently at the highest sync speed – 1/160 sec in my case. This results in a crisp image with no motion blur as well as better contrast. I find that if I let more ambient light into the image by decreasing the shutter speed rather than opening the aperture, the image can become rather flat in low light. There will be more ambient light in the background, but there is less of a gradient to produce a dramatic effect.
One of the biggest benefits of shooting wide-angle in low light is the ability to take long exposure images underwater. These images result in artistic motion blur, further enhanced by panning on the photographer’s part. Remember to turn off your horizontal image stabilization if you’re planning on trying it. I find that shooting at 1/8 sec to 1/13 sec is the sweet spot.

ISO
I am a firm believer of shooting with a camera’s native ISO, even in low light. It results in the highest quality image with the least amount of noise. My opinion is that it is best to bring out exposure in post processing instead of fixing noise. Fixing noise kills detail in the image. However, if your photos are resulting in a black background and you can’t afford to lower your shutter speed or open your aperture, bumping up your ISO to around 400 can be a big help.

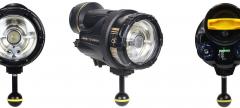
Strobe Positioning and Reducing Backscatter
Strobe positioning is essential in low light wide-angle photography. Poor positioning is the reason many people think you can’t take wide-angle photos in anything less than 20 or 30 feet of visibility. Perhaps the largest mistake photographers make in limited visibility is using too much light and not being close enough to the subject. Too much light increases the chance of having backscatter in the image and over exposing the subject. Being too far from the subject reduced the color of the subject and increases the chance of backscatter. Two strobes often exacerbate this problem by introducing too much light in all the wrong places. The best way to get nice, even lighting and to reduce backscatter is by increasing the distance between the strobe and the dome while maintaining a close distance to the subject. There is an artform to being able to do that. Here are some of my favorite strobe positions in low light:
1. Place the strobe(s) above the camera and behind the camera without creating a shadow in the image from the camera. In limited visibility, strobes act more like spotlights. Using the traditional position of placing the strobes on the side of the camera can result in strange shadows. Putting the strobes higher up makes the lighting more even and reduces backscatter.
2. Placing a single strobe above the camera and as far behind the camera as possible. As mentioned before, a single strobe is often more than enough light in limited visibility and will make light more even if used correctly. I almost never shoot one strobe from any other position since it can often introduce unwanted contrast.
3. Place a single strobe right next to the subject but pointed away from your camera when shooting close-focus wide-angle and reducing the power. This will help properly light a close subject while allowing ambient light to properly expose the background.
4. Use what works. It can’t be stressed enough that these are suggestions but not instructions. I almost never keep my strobes positioned the same way for more than one or two photos. The best position is the one that works!

Conclusion
Shooting wide-angle photos in limited visibility could be described as its own “genre” of photography – one that only a select few photographers capitalize upon. But taking the leap into low visibility and bringing along your fisheye can introduce you to a whole new dimension of art. It takes more experimentation, dedication, and failures, but it is well worth the effort. Beyond all else it’s important to remember that art can be made regardless of the conditions. You just have to let the light paint a nice picture.
Additional Reading
RECOMMENDED ARTICLES


ABOUT THE AUTHOR

Nirupam Nigam is the Editor-in-Chief of the Underwater Photography Guide and the President of Bluewater Photo - the world's top underwater photo & video retailer. While growing up in Los Angeles he fell in love with the ocean and pursued underwater photography in the local Channel Islands. After receiving degrees in Aquatic and Fisheries Science and General Biology, as well as a minor in Arctic Studies, Nirupam worked as a fisheries observer on vessels in the Bering Sea and North Pacific. Since then, Nirupam has been a full time underwater photographer and photo gear head. Check out more of his photography at www.photosfromthesea.com!
ALSO BY NIRUPAM NIGAM


SUPPORT THE UNDERWATER PHOTOGRAPHY GUIDE:
The Best Service & Prices on u/w Photo Gear
 Visit Bluewater Photo & Video for all your underwater photography and video gear. Click, or call the team at (310) 633-5052 for expert advice!
The Best Pricing, Service & Expert Advice to Book your Dive Trips
 Bluewater Travel is your full-service scuba travel agency. Let our expert advisers plan and book your next dive vacation. Run by divers, for divers.