Fisheyed in Fakarava - Premiere Shark Diving
While in French Polynesia with my fiancée Lisa for a Moorea humpback trip, I knew that, no matter what else we did, we needed to do some diving in Fakarava. I had seen the photos and heard the stories of this UNESCO biosphere reserve - with massive walls of grey sharks, and its protected water teeming with fish. It was rumored to be almost untouched and undeveloped above-water, having so far avoided the massive Western-style development and resorts which have spread so rampantly throughout French Polynesia’s more popular islands.
I ended up doing 6 days of diving on Fakarava – 12 dives over five days in the North Pass and three dives over one day in the South Pass. It was a spectacularly beautiful island above and below water, and we had some very memorable dives.
See also: Best Shark Diving Destinations

Dive Sites
Fakarava is a large atoll, meaning it’s basically a very thin island wrapped around a large lagoon. There are two passes from the ocean into the lagoon; the North Pass (Passe Garuae) and the South Pass (Passe Tumakohua). The North Pass is massive, at 1600 m across, and is located by the main town of Rotoava and the airport. The South Pass is quite a bit smaller, at 200 m across, and is located at the opposite end of the lagoon, close to 40 miles/64 km away from the North. It is much more remote.
In the North Pass, the dive centers run morning two-tank dives, and some run an afternoon dive as well. The morning dives followed this pattern: one dive on the outer reef, either to Ohutu (East side) or Maiuru (West side), followed by one dive drifting into the pass. The first dive was during the end of the outgoing current, when mantas could be spotted coming to the reef to be cleaned, while the second dive was either at slack tide or at the start of the incoming current. The incoming current is when the visibility in the pass is best, and also the best time to see huge amounts of gray reef sharks.

North Pass (Passe Garuae)
When we were there, there was a full moon, and the currents were less predictable than normal (both for magnitude and timing). I did my first day with Dive Spirit, and we were in a small group of 5 plus the dive guide. The first dive we went out looking for slack tide, but the tide was still going out, so we dropped down to 90 feet on the outer reef and watched for mantas. It was nice and relaxed, and we saw three mantas, but none came up to visit us.
The second dive we dropped down onto the slope to the East of the pass, and as we made our way towards the pass we were surrounded by grey sharks on all sides, though the visibility was not the best. We were also deep enough that I could not get below the sharks to shoot upwards, so I got some downwards shots.

Fisheye Shooting
I did manage to get a few upwards shots, but only of lone sharks. I got into some decent positions to get some good shark portraits, but the sharks always turned before I could get close enough for my fisheye lens to be really effective. I felt the fisheye curse very keenly.
Fisheye curse – when shooting with a fisheye lens, you see lots and lots of big subjects which come close enough to be lit nicely with strobes, but don’t come close enough to come anywhere close to “filling the frame.” You notice these “missed opportunities” very keenly, thinking “if only I was shooting a wide angle zoom…”
I love shooting a fisheye lens because it gives the sharpest images (minimizes the amount of water between subject and lens/strobes) and allows me to take spectacular shots if the opportunities arise. But dealing with the curse can create a lot of doubt, especially when diving with non-photographers who figure that, if a shark came within 5 feet of youand your big and fancy camera rig, surely you must have gotten a great shot, right?
Actually, here's what it looks like with a gray shark about 5 feet away - close enough to be lit up by strobes, but not close enough to look very impressive. This image is not cropped, though in post I would normally crop about half of the empty space out.
. Olympus OM-D E-M1, Olympus 8mm fisheye f/1.8 PRO lens, Nauticam housing, Sea & Sea YS-D1 strobes. 1/200 sec, f/7.1, ISO 200.")
That’s where it’s important to counter the fisheye curse with your best shot of fisheye faith.
Fisheye faith – the faith that after missing a lot of “decent” shots because you are shooting a fisheye lens instead of a wide angle zoom, it will all pay off, because you will eventually get that opportunity for the phenomenal shots that only a fisheye lens can create.
Learn more about fisheye lenses vs wide angle lenses.
As the current took hold, we drifted into the pass to the grotte de dormirs, a series of overhangs which provided shelter from the current, as well as the spectacle of many “sleeping” white tip sharks. By this point I was down to 2 minutes of no deco time, so I hurriedly took my shots of two sharks that stayed nice and still for me in their overhang. As you can see, I did not quite get the lighting right, but I did manage to start ascending before hitting deco time (safety first!).

That afternoon I dove with my fiancée, and we were followed around by a very curious tuna that made enough passes for me to not totally blow it out with my strobes. Again, I keenly felt the fisheye curse as the tuna came to about 3-4 feet away, but definitely did not come close enough!
! Olympus OM-D E-M1, Olympus 8mm fisheye f/1.8 PRO lens, Nauticam housing, Sea & Sea YS-D1 strobes. 1/200 sec, f/9, ISO 200.")
I reviewed my images in the evening, and realized that I had been suffering from a strong case of strobe positioning tunnel vision.
Strobe positioning tunnel vision: when you stick to a certain default strobe positioning, and figure that you just have to get your power settings and camera settings right. So you adjust your strobe power, shoot, then adjust more, then shoot, making changes and shooting faster and faster, but never getting the “right” shot.
Time pressure is the initial cause of this phenomenon, but I realized I had a deeper issue to work on. I did a lot of shooting with my strobes in exactly the same spot. A lot. I realized that I needed to purposefully start practicing shooting with my strobes in different positions, so I could develop some muscle memory and improve my skills at altering strobe positions on-the-fly.
A Second Chance
The second day I went with another dive shop, O2 Fakarava, who I would spend the rest of my time in the North Pass with. They were awesome. Our first dive we saw a lot of fish, as was normal for Fakarava. Fortunately for us, some of these fish lined up to create a “highway” of sorts, which is just the kind of thing I love to see as a fisheye shooter.

For our second dive we drifted the pass but did not find much in the way of sharks (sometimes that’s the way things go) and then went for the grotte de dormirs again. Now my first thought was “not this one again, I want to do this Ali Baba that I’ve heard so much about.” But then I realized it was my chance for redemption, to improve upon my poorly lit white-tips from the previous day.
We got to the caves, and I single-mindedly set to work adjusting my strobes and lining up the shot. I raised up my strobes, approached as close as I could without disturbing the sharks, and excitedly got everything dialed in. Unfortunately this shark was more skittish than the one I shot the previous day, so I could not get as close, but I definitely improved the lighting.

This brings an important mindset that I always try to be thinking about, a Continuous Improvement Mindset.
Continuous Improvement Mindset: After every day of diving, check over your photos. For each good photo/keeper, think about what you really like about it and what you did right, and learn from that. Then think as honestly as you can about what you could do to improve the photo for next time. If you can, go a bit deeper than just the photo, into the strengths and weaknesses of your technique.
There’s always something that could be better, unless you really took the perfect photo of your subject (in that case, congrats, and submit it to your favourite underwater photography contest, pronto!). Maybe it was something that was out of your control, or maybe something within your control. Either way, you can learn from it, and make a mental note for how it can be improved on next time.
When I look at my two shark photos again, my plan for the next time I run into this kind of situation is to get the strobes up, get the lighting right, and then get closer/improve my head-on angle for the front shark. I will also look for opportunities with multiple sharks, and consider skipping ones with only one shark. Now I have made a mental note, so that next time I run into white tip sharks in a cave, I know what I already have, and will do my best to improve upon it with an even better photo, rather than just taking more of the same.
Trouble in Paradise
The third day, our first dive, on Maiuru, was not particularly great. I noticed condensation in my dome port when we hit the water on our second dive, and hoped that it would go away once we got underwater. We descended in the blue, while a school of about 10 tuna shot by below us, then went on to the “Piste” (Ski Slope), the slope to the East of the pass, and landed right among a whole host of grey reef sharks. I checked my dome port, and it was still covered in condensation. I really wanted to take photos, but could not. Well, technically I could, but they all turned out like this:

So instead I took GoPro footage and just enjoyed the sharks, while simultaneously worrying about my camera.
That afternoon, I found a very small amount of liquid water in my housing. I scoured the o-ring and found what looked like a small hair on one spot. Fortunately it did not damage anything other than some of my already broken housing circuitry (which is why I had not heard any leak alarms). Note: now any time I close anything with an o-ring, I put on my headlamp, so I can give it a thorough inspection that will catch even tiny hairs or debris.
Back to Ali Baba
For my fourth morning two-tank dive, Lisa joined me. Up until this point she had just done a couple of afternoon dives in Fakarava, because she is a new diver with only about 15 dives under her belt, and the North Pass drift dive can have very strong currents. O2 had told us that this day was the best this week for having a lighter current, based on the tide tables, so this is when we decided she would try the pass.
Our first dive we saw 4 or 5 mantas. At one point I was watching one manta down below me so intently that I missed one come up behind me!
The second dive we dropped down on the Piste but didn’t see many sharks. So, we quickly headed for Ali Baba, and at that point we learned that, once more, the current was not following the timing or magnitude it was supposed to. It was ripping. Lisa was a real trooper and figured out how to kick hard when needed, and how to find rocks and pieces of dead coral to hold onto.
We got into Ali Baba and snaked our way among the rocks and corals, clinging to the bottom. All around us was a profusion of fish and sharks. The rocks everywhere we looked were just covered – phenomenal!

On the Sharks!
The next day, our last in the North Pass, our first dive had, once more, a bunch of mantas, a cool jellyfish, and lots of nice reef fish.

For our second dive, O2 split us up into really small groups; just me, one other diver and our guide. We dropped right on top of a reef that looked alive, it was crawling with so many sharks.

We were also visited by a curious tuna.

As we ran low on bottom time and started making our way up towards Ali Baba, we were surrounded by sharks cascading past us along the rocks, and I finally got to shoot upwards.
Drifting up to Ali Baba, the current was unexpectedly much lower than the previous day. This allowed more freedom to go above the carpet of fish covering the rocks, and really show the full extent.

South Pass (Passe Tumakohua)
We relocated to Tetamanu Village to visit the South Pass. This involved a 30 minute drive from the airport, followed by a 1.5 hour boat ride across the lagoon. Tetamanu Village is a lovely setup of very simple bungalows in a spectacular natural setting.

It is right along the South Pass. Seriously, it doesn’t get more convenient than this. We got geared up on the dock, hopped in the boat for a 3 minute boat ride up the pass, then dropped down to the reef. Then we just drifted along with the incoming current, stopping at 3 places along the way to get up close to the famous “wall of sharks.” Unfortunately, it’s not possible to get below the sharks to shoot upwards, as that will scare them off. So I just have to shoot them from the side, and be patient and quiet enough that they come close enough for me to get some upwards shots as well.


Then we drifted right back to the dock, did our safety stop under the pier, and then climbed up the ladder and dropped our gear off. It was really that easy. Oh yeah, and the pier had a huge school of fish underneath it, which, it just turns out, is the perfect opportunity for some wonderful fisheye redemption.
Fisheye redemption – when, after sticking with your fisheye faith, you are finally rewarded with the perfect fisheye photo opportunity.

After the first dive along the pass, I took about 20 shots of these fish. Then I checked over my photos and used my Continuous Improvement mindset to create this composition on the next dive, over about 20 more shots. Sometimes it takes that much to get the right framing, lighting and fish positioning!
Night Diving
Only three people signed up for the night dive, which I had heard great things about. Marc, the excellent dive guide, was quite clear– it would be no longer than 35 minutes, and we had to stick right with him. Light up the sharks with your lights, but don’t shine them in their eyes if you could avoid it.
With that, we jumped in, and dropped down in the closing twilight. Soon we saw grey shapes moving about in the water around us. Gray reef sharks and white tips, everywhere. The night is when they hunt, and instead of being shy and docile as they were in the day, they were bold and confident. They pushed right past us, and even bumped into us as they swam around searching for fish hiding in the reef. The white tips, normally resting on the bottom during the day, turned into voracious snakes, worming their way into cracks and crevices to try to dig their prey out.
It was phenomenal. I even had to get out of the way a couple of times. Finally, the fisheye paid off as I had sharks very close to my dome port - more fisheye redemption! Despite some issues getting focus locked in when using the red setting of my focus light (so not to scare them off or annoy them too much), I got a number of nice shark shots!
. 1/160 sec, f/10, ISO 200.")
. 1/160 sec, f/10, ISO 200.")
I will certainly never forget the experience of sharks everywhere, pushing past us like the intruders that we are, going about their business without paying us any heed. It was one of the best dives I have ever done, and I can’t wait to do another night reef shark dive like this one.
What was Fakarava Like Topside?
In a word – beautiful. Though it was also sometimes difficult to find dinner, as there were few restaurants around Rotoava, and some had strange hours/days they were open. We ate most of our meals in beautiful settings right on the water, locations that you would pay a lot of money to eat at on the bigger islands…but on Fakarava you only pay $10-20 USD for a great dish of grilled fish, rice and salad.
North vs. South
The North Pass gives you tons of fish, and lots of variety. We saw a bunch of mantas, Napoleon wrasse, tuna, a turtle, a jellyfish, and lots of other interesting fish, along with large amounts of grey sharks. The South Pass gave us guaranteed sharks, in larger numbers, with better visibility…but that was about it. Oh and the night dive. The night dive!
Many of the dive operators offer day trips down to the South Pass from the North. This sounds appealing, as it means you don’t have to change accommodations and move all your stuff. And I am sure it is, if it works out. We had a lot of trouble arranging a trip to the South Pass beforehand, as the trips are decided on fairly last minute, and will get canceled for bad weather. Though with that said, O2 offers scheduled trips to the pass, but we just decided that we would rather stay at the South to guarantee we did the dives, rather than risk having the trip canceled at the last minute. And the big advantage of that is…once again…you get to do the night dive, which is something that isn’t offered on day trips from the North.
So it’s best to think of the North Pass and South Pass as separate destinations.
South Pass Logistics
Tetamanu Village provides transfers down to the village from the North of the island which depart in the afternoon, to line up with the daily plane arrival. On the day of departure, they will transfer you back to the airport in time for your flight. So if you stay 2 nights you get one day of diving in, and maybe can fit in an extra dive on your departure day (unless you are flying out). If you stay 3 nights you can get two full days of diving in, with two night dives!
Recommended Adventure Timetable:
Spend 4-5 nights in Rotoava, to get in 4-5 days of 2-tank diving on the North Pass. Then transfer down to Tetamanu Village for 3 nights. That would allow for 4 day dives and 2 nights dives at the South Pass, which would be more than enough to get some great shark encounters, explore around the pier a bit, snorkel if you wanted to, and also tune up your night shark photography skills. Even more importantly, it would give you enough time to relax in the beautiful surroundings and enjoy being so far from civilization.
I would certainly return to dive more with O2 Fakarava – there is a reason they are ranked #1 on TripAdvisor. Great rental gear, small groups, excellent dive guides, and owners who still drive the boat, get in the water with you, and make you feel welcome.
If you wanted to just add a few days to another trip, like the Moorea Humpback trip, then I would recommend doing at least 3 nights in the North Pass and two in the South Pass, to get in 6 dives in the North and 3 in the South.
Bonus Video
Sometimes photos can't fully do justice to a really cool experience - such it is for diving Fakarava. So I have included the video Lisa and I created of the highlights of our Fakarava trip. It is taken from GoPro footage and is not professional by any means, but gives a good sense of the volume of sharks and fish you can find in the waters around Fakarava. Feel free to check it out!
Interested in Going to Fakarava?
One trip I’m keeping my eye on is the Fakarava Grouper Spawning trip. Basically it’s a huge aggregation of marble groupers for spawning, which draws an amount of sharks that dwarfs what I experienced on this trip. If you want to experience the very best of what Fakarava has to offer, then you really need to dive Fakarava in June on this trip!

2025 Fakarava Grouper Spawning Photo Workshop
June 5 - 13 - Starting at $5,450 per person (double occupancy)
Of course the liveaboard option is more expensive than the budget land-based option we went with, but with that you get better facilities (including A/C), more dives per day, and access to more dive sites. Especially if your itinerary goes to Rangiroa or any of the surrounding atolls, some of which are quite untouched and full of life. And surely it helps get the timing and location just right for the grouper spawning.
We went land-based because we weren’t sure how much diving per day Lisa could do with her ears, and we are on a tight budget as we both quit our jobs. The cool thing about land-based are they also let you enjoy the extremely laid-back vibe and beautiful scenery of the island and its people. If you want to go land-based, talk to Bluewater Dive Travel, as they can help arrange the best trip for you. At the very least, they can hook you up with the Tetamanu Village portion of your trip - check out the Bluewater Dive Travel Info on Tetamanu Village here, or drop them a line at info@bluewaterdivetravel.com!
Thanks for reading!
-Bryan
Gear Links
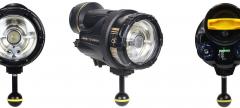
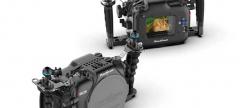
Here are the latest versions of the gear I am shooting.
- Olympus OM-D E-M1 Mark II
- Nauticam OM-D E-M1 Mark II Housing
- Sea & Sea YS-D2J strobes
- Olympus 8mm f/1.8 PRO fisheye lens
- Light & Motion Sola Photo 1200 focus light
Additional Reading
RECOMMENDED ARTICLES


ABOUT THE AUTHOR

Bryan is an editor and writer for the Underwater Photography Guide. He loves any activity that takes him out into nature, and is especially fond of multi-day hiking trips, road trips to National Parks, and diving. Any kind of diving. He discovered the joy of underwater photography on a Bluewater trip to the Sea of Cortez and has been hooked ever since. He recently finished a 1-year "radical sabbatical" with his partner Lisa (both of them quit their jobs), which included over 120 dives, mostly in Indonesia and the Philippines. His very favourite underwater experiences include swimming with humpbacks in Moorea, being smashed against the rocks next to marine iguanas in the Galapagos, marvelling at the riotously colourful reefs of Komodo, freezing his hands off under the ice in Greenland, and exploring the never-ending wonders of muck diving in Tulamben and Anilao (where he was a Bluewater photo workshop co-trip leader).
Fortunately, Bryan and Lisa managed to avoid killing each other during their year of traveling together (though at times it came close). Now they are back home in Canada, planning their wedding and doing their best to figure out what they want to be when they grow up. Their main concern at this point is finding a way to not run out of money, while avoiding returning back to their old 9-5 jobs (oil & gas, government). Oh, and also continuing to support their diving and underwater photo/video habits...
You can find more of Bryan's underwater photos on Instagram at @bryan_chu_photography and on his website at www.bryanchu.ca.
ALSO BY BRYAN CHU


SUPPORT THE UNDERWATER PHOTOGRAPHY GUIDE:
The Best Service & Prices on u/w Photo Gear
 Visit Bluewater Photo & Video for all your underwater photography and video gear. Click, or call the team at (310) 633-5052 for expert advice!
The Best Pricing, Service & Expert Advice to Book your Dive Trips
Bluewater Travel is your full-service scuba travel agency. Let our expert advisers plan and book your next dive vacation. Run by divers, for divers.