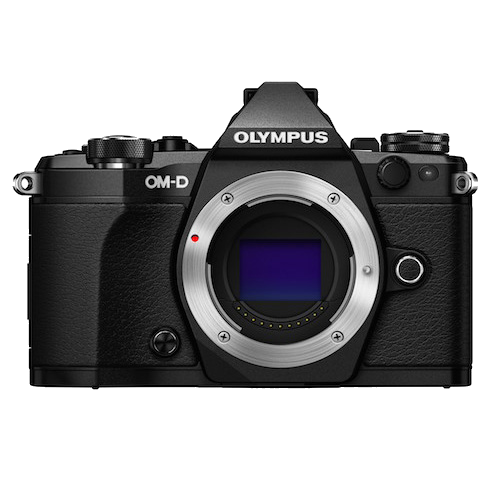
Olympus OM-D E-M5 Mark II Underwater Settings
Navigation:
The Olympus OM-D line are by far the most popular mirrorless camera used in underwater photography. The newest version, the OM-D E-M5 offers nice improvements from the original E-M5, while continuing with the quality and excellence that one expects in an Olympus mirrorless camera.In this article we discuss our recommended settings for getting the most out of this excellent camera.
Below I've compiled several good starting camera settings for different shooting situations. Following that is a list of the most important, or required, settings that are crucial to change in your E-M5 Mark II system when shooting underwater, with specifics based on which housing you are using. In addition I take an in depth look at all the menus on the camera so you can fine tune your camera for the best underwater shooting experience.
Olympus PEN and OM-D Underwater Settings
Actual settings will vary based on your diving location and conditions. Take a look at the following suggestions below as a great starting point for shooting with your Olympus OM-D E-M5
Settings for Macro with the 45mm or 60mm Macro Lens:
- Manual mode, F22, 1/250th, ISO 200
- Auto white balance, camera flash on "fill in flash", Strobe on TTL
- Or set the strobe to manual power and adjust power as needed
- For manual power set the camera flash to manual also to save battery life (see below for instructions)
TIP: Shoot at lower F stops like F5.6 or F2.8 to try to get some better bokeh and a blurred background
TIP: You'll need to open up your aperture to around F8 when shooting fish; at F22, your strobes won't "reach" very far and the photo will look black
** These settings are also useful with the 12-50mm lens in Macro Mode **
Settings for Macro using the kit lens (14-42mm / 12-50mm) with a wet diopter:
Manual mode, F22, 1/250th, ISO 200
Auto White Balance, camera flash on "fill in flash", Strobe on TTL
Or set the strobe to manual power and adjust power as needed
For manual power set the camera flash to manual also to save battery life (see below for instructions)
Zoom all the way in
Shoot at lower F stops like F8-F11 to try to get some better bokeh and a blurred background, you can open up to F3.5, but will have a very small depth of field
Remember working distance is limited when using a wet diopter, move carefully to avoid spooking your subject and get close.
Settings for Wide Angle with 8mm Fisheye or 9-18mm lens:
Manual mode, F8, 1/125th, ISO 200
Auto White Balance, camera flash on "fill in flash", Strobe on TTL
Or set the strobe to manual power and adjust power as needed
For manual power set the camera flash to manual also to save battery life (see below for instructions)
Important: use the shutter speed to control your ambient light (background exposure). A slower shutter speed (e.g. - 1/60th will let in light when shooting in darker waters, a faster shutter speed will allow less light in when shooting in bright conditions).
TIP - when the sun is in the photo, set the shutter as fast as possible (up to 1/250th), and you'll need to stop down your aperture to F16 or F22 to avoid blowing out the highlights, remember to turn up your strobe power.
TIP - for ambient light photography, you may need to open your aperture to F5.6 or F4 and increase the ISO to ISO 400, 800 or 1600 to let in more light, and shoot with the sun behind you.
Note: These settings also are great for starting points for shooting with the kit lens on, and for fish portraits with the 60mm macro lens.
Olympus Camera Set up for Underwater Use
The OM-D E-M5 Mark II camera works well straight out of the box, however there are some important menu and setting changes that you will want to make sure to set for the best underwater shooting experience.
Most Important Settings for Underwater Use:
1) Custom Menu Options - The Custom menu should be turned on by default on the E-M5, if not, follow these instructions to activate it.
Menu -> Set Up Menu (Wrench icon) -> Menu Display and click OK. The Custom Menu is the small cogs icon, hit the right button, and then the down button followed by ok to activate this menu.
2) Live View Boost - this is very important so that you can see your LCD underwater. This mode disables the live view of exposure settings, since underwater shooting with a strobe, usually results in dark settings in the camera. This function will brighten your LCD so it is always at a good viewing brightness. Note: the LCD does not accurately reflect the exposure settings for the camera.
Custom Menu -> D: Disp/PC -> Live View Boost -> Manual Shooting -> On1
(note On1 is the standard view, On2 offers a slow frame rate option that will improve total visibility when shooting in very dark conditions)

3) EVF Auto Switch - The E-M5 has an electronic viewfinder. In order to use the LCD screen underwater you need to turn off the Auto Switch. This prevents it from automatically switching to the EVF when the sensor is blocked, since the back of the housing blocks that sensor.
Custom Menu -> J: Built-In EVF -> EVF Auto Switch -> OFF. (NOTE: You can also access this menu item by simply pressing the |O| (EVF) Button on the camera and holding for about 3 seconds)
Note: You lose the ability to display the Super Control Panel in the LCD when using the viewfinder when the "Auto Switch" is turned off. The default is Live Control, which is the same quick menu as previous PEN models. If you prefer the look of the Super Control Panel you can gain access to it by turning off the Live Control and turning on the SCP through the Custom Menu.
Custom Menu -> D: Disp/PC -> Control Settings -> P/A/S/M -> Live Control OFF -> Live SCP ON


The Super Control Panel on the left, and the Live Control View on the right.
4) Flash modes - if you are using a strobe with TTL you will use the single lightning bolt "Fill in Flash" mode on the camera. However, if you are planning to use the strobe in manual mode you can save battery life by changing the flash mode to "Manual Value" through the quick menu. This is also beneficial because using the internal camera flash at a lower power means less recycle time and helps eliminate any delay on being able to take a picture.
OK -> scroll to flash icon -> scroll over to select "Manual Value Flash" -> Press INFO to change flash power -> scroll to 1/64th power -> OK to confirm
**Important Note: Remember that the new style of flash on the E-M5 Mark II requires it to be turned on before it will work. Make sure you switch it on and test that it is firing properly before closing your housing.**
5) Rear Control Buttons - the default setting on the EM-5 four arrow key rear buttons controls only the focus point, which basically means you are not taking advantage of 3 out of 4 buttons! You can customize 2 of the buttons instead to gain quick, one-touch access to important features.
Custom Menu -> B: Button/ Dial -> Button Function -> Key Function (option with the four arrow key icon) -> Direct Function -> OK
Now you have access to change the right and down arrow key controls on the back of the camera. (Up gives control of Aperture / Shutter Speed without the dials and Left gives control over the focus point, these are NOT customizable). You have the same options for both customizable buttons, I suggest reviewing each and picking the ones that best suit your needs. For example, I set my camera to have direct access to the flash mode via the right arrow key and direct access to the sequential shot/ timer mode for the down key. (The sequential shot is not something used much underwater but I find I use it alot topside, so it was important to have direct access for me.)
6) Rec View - this sets the length of time an image review is displayed after taking the picture. Default is 0.5 seconds. For underwater use, 2 seconds is usually recommended so you have a chance to quickly gauge that exposure and focus look good before taking another picture. If 2 seconds is too long, set it to what you desire, or simply press the shutter halfway down to cancel the review.
Set Up Menu -> Rec View
7) Picture Mode - the default is natural, but jpeg shooters may prefer Vivid
NOTE: this does not affect RAW files
Accessible through the SCP / Quick Menu or Shooting Menu 1
A Note About Handling the E-M5 Mark II
Never, never hold or carry your E-M5 Mark II camera by the flash. I have found that the connection with this new style flash is finicky, and it must be fully installed to send the correct signal to the camera and allow the flash to fire. There were several dives when I was testing this camera where the flash was greyed out because the camera could not send the signal to the flash. If you lift up, or pull out the camera by the flash you will weaken the connection point between the camera and flash and it may result in your flash not functioning. Always grasp the camera by the body only.
If you do install the flash on the camera, switch on and the flash icon on the screen is still greyed out, please simply press gently on the flash like you are trying to push it further into its slot. This worked for me to get the flash to activate when this would occur. Once in the camera and on, be careful not to jostle the camera / housing too much to prevent the flash from disengaging.
OM-D E-M5 Mark II Set Up For an Olympus Housing:
The Olympus housing is a great option if you are on a budget and don't want to spend the money on one of the more expensive aluminum housings. There are a few limitations, but for the most part set up is the same as other housings.
Important Olympus Housing Information:
Before taking your rig underwater these things MUST be completed to ensure proper functionality and minimize the risk of a housing flood.
1) Remove the rubber grommet from around the Electronic Viewfinder, also called the “Eyecup”.
To do this make sure the accessory flash is off the camera, and then simply slide the piece up and off the camera. Remember to replace the flash before putting the camera in the housing.
2) Remove any straps, filters or lens caps.
To insert the E-M5 Mark II into the Olympus housing you should follow these steps:
1) Turn camera OFF
2) Keep LCD closed (not pulled open on its hinge)
3) Check that the ON/OFF lever on the housing is raised up and in the OFF position, if not, gently push up on the lever.
4) Set the 1:2 Switch lever to 1 on the housing (make sure its also set to 1 on the camera)
5) Gently slide the camera into the housing
Once the camera is in place you can close the housing and the 1:2 Switch will connect correctly. Then press down on the ON/OFF switch so that it lines up correctly (you can do this before closing the housing to confirm correct placement).
Always test your housing underwater without the camera installed for the first dive. This will ensure there are no manufacturing defects.
Olympus Housing Menu & Button Configuration:
Like all cameras, the OM-D E-M5 Mark II focus set up comes default with auto focus occurring after a half press of the shutter button. This works fine in most situations, so if you are happy with the half press focus, then nothing needs to be changed.
With the PT-EP13 housing there is not an ideal button configuration to use the more advanced option of splitting out the focus. Typically you want a button that would be activated by your thumb, so if needed you can quickly focus (with thumb) then take the photo (with your pointer finger).
If you would like to have the ability to split out the focus, it can be done, just keep in mind that you will be focusing and taking the photo with your pointer finger, so it may be a little slower.
Please remember this set up is an advanced option and is not required to use the camera underwater. Please only change out your focus set up if you understand the steps. Otherwise leave at default, and use a half shutter press to focus with a full shutter press to capture the image.
Button Configuration for Split out Focus
Button Functions ( Custom Menu -> B: Button/Dial -> Button Function)
Fn1 - MF - this will allow you to switch between the Manual Focus and S-AF focus on the camera with one press.
Fn2 - AEL/AFL, this will become the button you press to focus the camera.
Rec - Leave as Record for Movies.
Set Up When Using AFL Focus with Fn1 & Fn2 Buttons:
AEL/AFL Settings (Custom Menu -> A: AF/MF -> AEL/AFL)
Use these settings if you've assigned MF to the Fn1 button.
S-AF - Mode 1 - this will basically keep the camera as default, where a half shutter press focuses, and a full shutter press takes the picture, which is how most folks shoot topside, for wide angle underwater where focusing is not a touchy as macro and for subjects underwater where you want to re-focus each shot.
C-AF - leave at Mode 1 - i try not to use C-AF on the E-M5 as it can be slow, and will refocus your image automatically. Often it focuses different then where you want.
MF - Mode 3 - this separates the shutter release from the auto focus, so you can lock focus and then take as many images as you like without affecting your focus. In addition to this, Manual Focus is active so if you have a focus gear on the lens you can use both MF and AF quickly and easily without changing any modes.
Shutter Release (Custom Menu -> C: Release -> Rls Priority S)
Rls Priority S - OFF - this prevents the camera from taking a photo unless it is in focus in S-AF mode. If you want to be able to take a photo even if the camera has not locked focus then turn this function ON. (Release Priority C is the same only for the C-AF Mode).
Now once you have set all of these, you can shoot a picture as standard (half shutter to focus) when in S-AF mode. Simply press the Fn1 button to switch to Manual Mode and now the Fn2 button controls auto focus and the shutter release only takes the picture. This makes it very easy to have both topside settings and underwater settings created without having to change things in the menus every time you use the camera, so you do not forget to reset anything for the next trip.
NOTE: I use all of these settings with the camera in Manual Mode, so I have full control over my exposure settings.
OM-D E-M5 Mark II Set Up For a Nauticam Housing:
The E-M5 Mark II camera and Nauticam housing require no changes to the camera, you can leave the Eyecup in place and there is plenty of space for the little triangular strap attachment pieces. It is important to note that any camera strap, lens cap and lens filters need to be removed before you install the camera into the housing.
The OM-D E-M5 Mark II comes set up with defaults that work well on land, but might not give you the best possible results underwater. If you have set the primary settings as outlined in the beginning, this section will help you streamline the camera for quick and accurate auto focus underwater when using a Nauticam Housing.
The Nauticam Housing does not include any tray or handles, though it does come with the silver brackets that add support when using the Nauticam Flexitray system. I highly recommend this tray as it is very adjustable, allows the housing to stand flat on a table and is very secure. One downside is that if you do need to adjust something, there are at least four, sometimes more, screws that have to be loosened, then retightened so it can be a pain.
I prefer to move the tray (any tray) further to the right, to allow a space large enough for my hand to fit between the housing and the handle. This way I am gripping the housing directly. I find it positions my fingers much better for accessing all the controls and buttons.
Advanced Focus Set Up in the Nauticam Housing:
One of the biggest benefits to the Nauticam housing over the Olympus is that they set the rear of the housing up differently than the camera. The record button on the camera is actually a small lever on the housing, set right by your thumb. With the advance customization available on the E-M5 Mark II you can easily reassign the Record Button to be something different. I prefer to set it as the AEL/AFL setting.
AEL/AFL - You can assign this option to one of the Fn buttons or even the record button. This can be helpful to separate the focus lock from the Shutter Release. Often underwater it is hard to focus exactly where you want with the camera re-focusing every time you press the shutter half way it down, especially when shooting macro. Separating these allows you to focus the camera, then take the picture and take multiple pictures without the camera refocusing. This is very helpful for lenses like the 60mm and 45mm Macro that tend to focus hunt often.
Please remember this set up is an advanced option and is not required to use the camera underwater. Please only change out your focus set up if you understand the steps. Otherwise leave at default, and use a half shutter press to focus with a full shutter press to capture the image.
Here is how I have my OM-D E-M5 Mark II buttons assigned when shooting in the Nauticam housing, I find this the best set up for quick changes to focus mode, so that focus can be achieved quickly, easily and accurately.
Button Functions ( Custom Menu -> B: Button/Dial -> Button Function)
Fn1 - One Touch White Balance
Alternately - if you want to be able to record video at the touch of a button (vs changing the actual mode) you can assign the video record to the Fn1 button.
Fn2 - MF - this allows you to switch quickly between MF and your default focus mode (S-AF is recommended). This is great for using the AEL/AFL feature. (Note: this comes into play with the AEL/AFL settings so you can switch quickly between two options). This button is a bit difficult to reach on the Nauticam housing, especially when using the Flexitray with brackets attached. However, switching the focus mode is something that is typically done before putting the camera into the housing, or very rarely during the dive, so its ok if its not quick and simple.
Rec - AEL/AFL
Configure the AEL/AFL Settings:
AEL/AFL Settings (Custom Menu -> A: AF/MF -> AEL/AFL)
S-AF - Mode 1 - this will basically keep the camera as standard, half shutter focuses, full shutter takes the picture
C-AF - Mode 3 - this will separate the shutter release from the auto focus, so you can re-focus the camera from the Rec button and not risk taking a picture
MF - Mode 3 - this separates the shutter release from the auto focus, so you can lock focus and then take as many images as you like without affecting your focus. When you assign AEL/AFL you get an autofocus option while in manual focus mode, so if you have a focus gear on the lens you can use both manual focus or auto focus quickly and easily without changing any modes.
Shutter Release (Custom Menu -> C: Release -> Rls Priority S)
Rls Priority S - OFF - this prevents the camera from taking a photo unless it is in focus in S-AF mode. If you want to be able to take a photo even if the camera has not locked focus then turn this function ON. (Release Priority C is the same only for the C-AF Mode). Note in MF mode the shutter will always release regardless of focus.
Now once you have set all of these, you can shoot a picture as standard (half shutter to focus) when in S-AF mode. Simply press the Fn2 button to switch to Manual Mode and now the Rec button controls auto focus and the shutter release takes the picture. This makes it very easy to have both topside settings and underwater settings created without having to change things in the menus every time you use the camera. This simplifies the process so you do not forget to reset anything for the next trip.
NOTE: I use all of these settings with the camera in Manual Mode, so I have full control over my exposure settings. You can also set the AFL/AEL to the Fn1 button, its not as nice as using the REC lever, but will allow you to keep REC as the Record function for one step movie recording if you prefer.
OM-D E-M5 Mark II Specific Menu Settings
This info is helpful for fine tuning your camera for the best underwater settings. If a menu item is not listed that is because it does either does not affect shooting pictures or does not affect a setting that would be used underwater.
Shooting Menus
These set your cameras defaults, general settings that it will revert to after shutoff.

Shooting Menu #1
Picture Mode - This menu sets the look of your pictures, it is completely a personal choice to change, I prefer Vivid, because it enhances reds & oranges. NOTE: this only affects photos shot as .JPG, RAW images will not be affected.
Picture Quality (pixel icon) - Sets the default quality mode for the camera. Set this to RAW for still images, default for video is FullHD Fine, leave it there unless you know you want a lower quality.
*Note: if you do not have software on your computer that can read and edit RAW files then leave it set to .jpg (LF). I highly recommend shooting RAW for the most flexibility with in computer editing.
Image Aspect - Leave at the default standard image aspect ratio of 4:3 unless otherwise desired.
Digital Teleconverter - Leave at default of OFF.
Burst/ Time Mode - Leave at default of Single Shot Mode, you can change this from the quick menu later for specific shooting instances.
Shooting Menu #2
Bracketing / HDR / Keystone Comp - Leave at default (OFF)
Anti-Shock / Silent - Leave at Default
High Res Shot - This allows you to change the post-shutter release delay before the image begins. Since this is not used much underwater, you can leave a default. If you use this mode, and have any wobble or are not on a steady tripod, selecting a delay time will help improve the overall image.
Flash RC Mode - Leave at default of OFF
** NOTE - If you are using the Olympus UFL-2 strobes, you can increase your shutter sync speed with the PEN and OMD cameras to 1/500 using the RC feature of the camera and strobes. Check out the strobe manual for this, but it can be very useful for getting great sunbursts in wide angle shots.
Custom Menu Options
The custom menu offers more detailed camera adjustments, however, these can get overwhelming. When in doubt leave it at the default, unless otherwise noted in the Important Settings section above.
Menu A: AF/MF
AF Mode - I recommend setting this to S-AF (single AF). This is default for still images but not for video. C-AF, continuous auto focus, I find is too slow to accurately catch moving subjects and often hunts more frequently in the low light underwater conditions. You can halfway press the shutter during video to refocus when needed.
Full-time AF - OFF
AEL/AFL - This is a very handy feature, especially for underwater as it allows you to set focus lock separately from the shutter button, so that you can lock focus and then take several images without refocusing. The set up will vary depending on which housing you use, so please see the Housing Settings section above for specific details.
Reset Lens - OFF - leaving this ON resets the lens focus of the lens to infinity after the camera is powered off. For most shooting situations this is not a big deal, though when using specific lenses, like the 60mm macro, it can cause initial focus hunting in the beginning. Turning it off will save the last focus distance used in the camera.
MF Assist - ON - very useful with macro - magnifies center of image 10x to aid in manual focusing
AF Set Home - SINGLE- this sets the "home" position for the AF target for each AF mode. It will return to the position selected after power down. Default is full matrix, change this to Single Auto Focus Point for more control.
AF Illuminator - OFF - this is the small red AF assist light on the camera. It won't shine through the housing so turn it off to save battery life. If you use the camera both topside and underwater and don't want to hassle with constantly changing it then leave it on, it will not affect picture taking.
Face Priority - OFF - this automatically focuses the camera when it detects a "face" however underwater it can mis-detect and cause issues, and the camera will not detect faces in masks so it is not needed.
Menu B: Button / Dial
Button Function - There are 4 Fn buttons on the E-M5 and each has a variety of functions you can set. You can also customize the Rec button and the Preview button on the front of the camera to assign its own function. Other settings in the Button Function menu allow you to modify the action of that key listed. To gain customization of the up and down arrows you need to change the setting of the four arrows option just below them. I recommend:
Arrow Keys - Direct Function
Right Arrow - Flash Mode*
Down Arrow - ISO*
*Feel Free to choose whichever settings work best for you!
For customization of other buttons, check out the specific Housing Set Up informations sections above for more detailed information on why I've set these options and how to use them.
Dial Function - This menu allows you to set the functions of the control dials for the camera. Functions are set per shooting mode indivually.
This is the two control wheels on the top of the camera. For the E-M5 in manual mode you can select which button controls Aperature and which controls Shutter Speed, set to your preference for ease of use.
Dial Direction - can be set to change which way you turn the dial to increase shutter or F stop. Set to personal preference or leave at default
Lever Function - This allows you to set the function of the 1:2 Lever.
Some folks may ignore this completely. Some may use it in Mode 1 (default) which changes the two top dials from Aperture / Shutter Speed (1) to ISO / White Balance (2). Since I don’t change my ISO too often, and I can access White Balance quickly through other buttons I chose to use Mode 6, which automatically changes your shooting mode. Position 1 = whatever mode the Mode Dial is set to … so Manual for taking photos. Position 2 = Movie Mode. I found this very useful to switch to the dedicated movie mode, where I could preset my desired settings. Once done shooting video, flip the lever back to 1 and you’re back in your photo shooting mode with all settings still the same.
Menu C: Release
Rls Priority S / C - this option allows you to set whether the shutter can be released even when the camera is not in focus. I recommend leaving it at the default of OFF for S-AF to help limit out of focus pictures. (can be set individually for S-AF and C-AF modes)
Burst FPS H / L - leave a default - this sets the frame rate for each burst mode option
Burst + IS Off - OFF - allows for image stabilization during sequential shooting when turned OFF
Halfway Rls with IS - ON - this allows for Image Stabilization to begin when the shutter is pressed halfway.
Menu D: Disp / Beep / PC
This menu customizes display and sound options. Set these to your preference, they don't affect picture taking, except for a select few.
Camera Control Settings - this gives you options for the display of the quick menus. When the EVF Auto switch is turned off you can only access one of these. Default is the Live Control, Olympus' standard type menu. The other option is the Super Control Panel, the new style for the OM-D that mimics many dSLR cameras. To activate the SCP, turn off the LC and turn on the Live SCP for the mode you plan to shoot in.
Info Settings - Under this menu is LV-Info. These options allow you to streamline your LCD view information. By turning each on or off you choose which viewing modes you would like to be able to see when you press the INFO button on the camera.
Live View Boost - This must be turned on to aid in viewing the LCD underwater in dark shooting conditions.
I would also set the SLEEP mode and Auto Power Off modes as desired to save battery life.
Menu E: Exp / Metering / ISO
EV Step - leave at Default 1/3EV - this gives access to all "in between" stops, for more fine tuning your picture settings. It controls the size of the increments for shutter speed, aperture, etc.
NOISE / NOISE FILTER / ISO - leave at defaults
ISO / ISO Step / ISO Auto-Set / ISO-Auto - leave options at default.
Metering - Default (Digital ESP Metering) - this evaluates the entire image for the best overall exposure. For more specific metering you can choose center weighted or spot.
AEL Metering - Default (AUTO) - if you use the AEL function leave this at the default and it will automatically choose the same metering you are currently using.
Bulb / Time Timer, Live Bulb, Live Time - default (this won't be used underwater)
F: Flash Custom
X-Sync - Default (1/250 for E-M5) this sets the fastest default Shutter Speed at which the flash can fire.
Slow Limit - Default (1/60) - You can adjust this lower as desired.
NOTE: These flash settings do not matter for Manual Mode, the flash fires based on the shutter speed selected when in Manual Mode. However 1/250 is the highest option available for the OM-D E-M5 Mark II
G: Pixels / Color / WB
WB - Auto (default) - this sets the default WB mode, you can adjust for certain instances through the quick menu
All WB Evaluation - default - this changes the overall WB compensation for all modes except custom WB
WB-Auto Keep Warm Color - default - keeps colors warm for Auto WB mode.
Flash + WB - default (auto)
Color Space - default sRGB (unless you specifically know you want a different color space)
H: Record / Erase
Set these to your preference, they do not affect picture taking
I: Movie
Movie Mode - Default - P - this sets the default mode for movie capture (unless you are doing more video and want a specific mode, such as Manual, Aperture or Shutter to be the default)
Movie Mic - Default - ON - turns mic on or off. Turn off if you do not want to record any sound.
Recording Volume - Default - Standard
Mic Limiter - Default - ON - this automatically limits the input volume if the sound exceeds a certain level.
Wind Noise Reduction - Default - OFF - reduces wind noise
Movie Effect - OFF - this disables the camera adds any movie effects
Movie Shutter Button - This controls what the shutter button does while in the dedicated movie mode. I set it to Mode 2 which uses the Shutter Button to control the movie recording Start / Stop. Mode 1 allows the shutter button to take a photo during movie recording.
If you take a photo during movie recording it will stop the record, capture the photo, then resume recording automatically but you will end up with two separate video files. I find I often want to use the Shutter Button to control my video start / stop so this feature is great.
J: Built in EVF
These do not affect picture setting, adjust as you prefer. The only important setting in this menu is:
EVF Auto Switch - OFF - this disables the automatic switch between the LCD and EVF. This is important for underwater use because the housing will always block the sensor and it will be stuck on the EVF only.
K: Camera Utility (OM-D Cameras)
Set as desired, these do not affect picture settings
Setup Menu

Set Date / Time, LCD brightness, upgrade your firmware, etc. The most important item on this menu is:
Rec View - this sets the amount of time an image is displayed for review after taking it. Default is .5 seconds, which is very fast. 2 seconds is a good average to set this to so that you can check exposure and focus on the LCD before taking another picture. If you need to take the next shot quickly this review disappears with a 1/2 shutter press.
RECOMMENDED ARTICLES


ABOUT THE AUTHOR

Kelli Dickinson is an avid diver and underwater photographer who shoots primarily on mirrorless cameras. Familiar with a variety of cameras and housings she tries to shoot on as many different options as possible to improve her overall knowledge of underwater camera systems. In addition she is Manager of Bluewater Photo. In her spare time she can be found running, hiking or underwater.
Connect with her on instagram @kelnkelp or at www.kelnkelp.com.
She can be reached via email at kelli@bluewaterphotostore.com.
ALSO BY KELLI DICKINSON


SUPPORT THE UNDERWATER PHOTOGRAPHY GUIDE:
The Best Service & Prices on u/w Photo Gear
 Visit Bluewater Photo & Video for all your underwater photography and video gear. Click, or call the team at (310) 633-5052 for expert advice!
The Best Pricing, Service & Expert Advice to Book your Dive Trips
 Bluewater Travel is your full-service scuba travel agency. Let our expert advisers plan and book your next dive vacation. Run by divers, for divers.