How to Shoot Stills with a Video Light

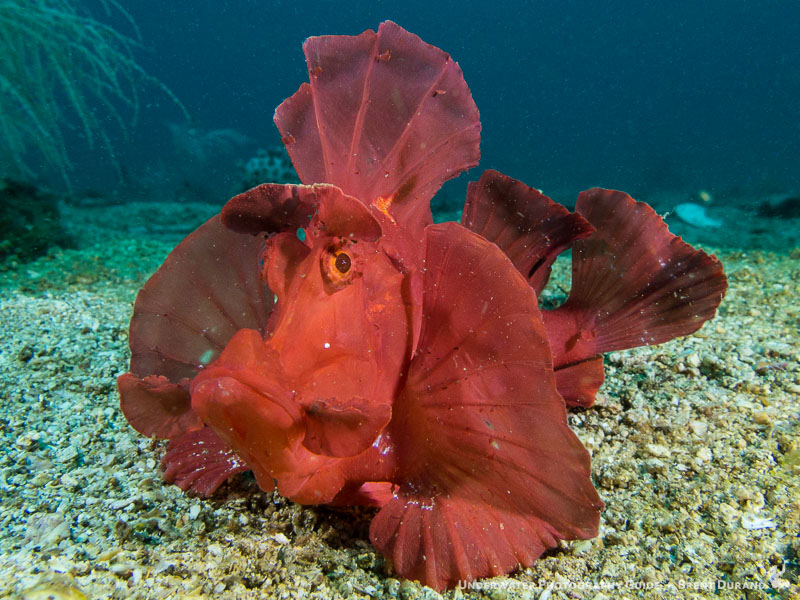
The rare red rhinopias rocked forward through the perfect photo composition, greeted with a muffled “clack clack clack” as I fired off three shots at just the right moment. All three frames had excellent exposure, as there was no dark frame indicative of a strobe recycling to full power. There were also no flashes; these photos were shot using just my underwater video lights.
Most underwater photography instruction points towards using strobes. But if you listen carefully, you’ll hear murmurs of shooting still photos with video lights from the kelp forests of California to the reefs of Anilao. There are pros and cons to using strobes versus video lights, so we’ll take a look at those before exploring the techniques required to capture great still shots with your video or dive lights.
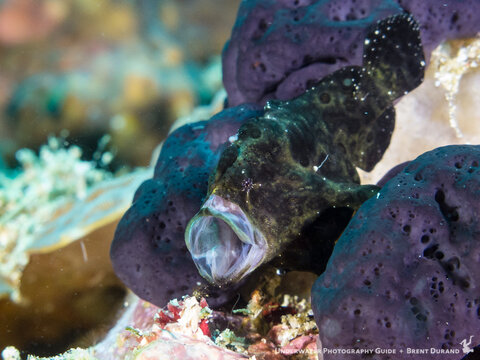
The photos below were shot in Anilao, Philippines with a Canon G16 compact camera in a Fantasea FG16 housing, using either one or two I-Torch Venom38 video lights.

More info and purchase the Fantasea FG16 Housing Bundle
More info and purchase the I-Torch Venom38 Video Light
Pros to Shooting with Strobes
-
Speed of 1/10,000 of a second freezes any fast action
-
High power (guide number) results in vibrant color that easily overpowers ambient light (that green/blue tint)
-
No constant light that may stress out a photo subject
Pros to Shooting with Dive or Video Lights
-
Ability to shoot fast action – shoot with multiple fps burst – no waiting for strobe or pop-up flash to recycle
-
Ability to see exposure and color on camera LCD screen before shooting
-
Ambient light shooters can reduce harsh shadows without sacrificing the ambient light look
-
A kit with a video light(s) is ready to shoot well-lit video on any dive
-
Video lights are (generally) cheaper, more compact and easier to maintain than strobes
Camera Settings
The light from your dive or video lights is considered ambient light, which means that we can adjust our exposure and light positioning even before firing the first frame. There are two important tools for this:
1) Camera metering: This is generally represented by a line graphic showing +/- 2 stops of exposure. When the little line is in the center (at the 0), then the exposure is right on.
2) Histogram: Everyone who has joined me on a workshop knows how much importance I place in the histogram. You can cycle through the “info” (or “disp”) button to display the histogram on your screen while adjusting camera settings, light intensity and beam angle. When all the information falls within the histogram, then you will not lose any picture data through under or overexposure.
Compact Camera Settings
Shooting in manual seems intimidating at first, but is very simple once you take the first step. It also provides the ability to capture the exact photo you envision.
ISO: Keep this low on your compact camera. ISO 100 to 160 will work well if you have a strong dive or video light.
Aperture: This controls the depth of field in your image, and how much of the subject is in focus. F5 is a great starting point for macro on a compact camera.
Shutter speed: This should be fast enough to avoid motion blur but not so fast that it cancels ambient light (from your video light). Set this between 1/100 and 1/160 (provided a strong video light). This is my most variable setting, since ISO and aperture get locked down early in creating the composition.
Video light: Depending on the strength of your video light, you may not need to set it to full power. The goal is to properly expose your image (using the histogram and/or metering graph) and make sure that the lit part of the frame does not have a green/blue tint to it. We want the video light to be strong enough that it overpowers that ocean-ambient light tint.
That said, ambient light shooters who use manual white balance will notice that using a light in dark situations will help them lower the ISO and stop down to achieve enough depth of field. In this situation, the light intensity should be enough that you can work down into the proper settings without the light becoming too strong and taking away from the ambient light styling of the image.
Video Light Positioning
There are several ways to mount and position a video light on your compact camera housing. You can mount it via the the coldshoe mount on top of the housing, attach a tray and handles with arms/clamps or flexconnect, or simply hand hold your video light. Ultralight Control Systems makes a wide range of accessories for getting your light(s) into any position.
In Anilao, I used all three of these methods depending on whether I was shooting with one or two lights. The goal with light positioning is to angle the light so that your subject is well lit, the shadows fall naturally, and there is minimum backscatter. Below are a few tips.
1) Shoot with the light facing your subject. This fills in shadows that might otherwise fall on the face of the subject, which is the most important feature in connecting the viewer to the image. Leaving the light straight over the top of the subject will result in harsh, linear shadows.
2) Never light from below. We are used to seeing shadows below features of everything lit by the sun: people, trees, pure white seagulls flying over aqua water in the Sea of Cortez… If you light your underwater subject from below, it might look like a Halloween jack-o-lantern! Let’s avoid this.
3) Watch the highlights. Keep a careful eye on the white highlights of your subjects. If you position the light too closely, these highlights will get blown out with no way to recover them during post-processing, especially if your ISO is above 100.
4) Use the edge of the light beam. By using the edge of the cone of light to illuminate the subject without illuminating any extra water, we minimize backscatter in our shots. This is a technique I cover in-depth during workshops, as it is fundamental for shooting anytime you have open water above and/or behind your subject.
Conclusion
Video lights are a fantastic way to bring some vivid color into your underwater photos without breaking the bank on strobes. People who choose to shoot with ambient light will also find that using a video light as “fill light” will help get rid of shadows around ledges, crevices or holes, making many more shots possible.
So try it out! Break away from the standard photo instruction and shoot some still photos in a whole new light!
