Panasonic GH6 Underwater Settings
The Panasonic GH6 micro four thirds mirrorless camera is an exciting update to the extremely popular Pansonic GH5 and the GH5s. For a while the GH5 was the most popular underwater video camera on the market. With an influx of new Panasonic GH6 housings, it's a great option for people looking for an underwater video camera with an incredible specs sheet including 4K/120p and 5.7K/60p video recording. The Panasonic GH6 accepts micro four lenses which means there are lots of great affordable underwater lens options including the Olympus 60mm macro, the Olympus 7-14mm wide angle, and the Panasonic 8mm fisheye lens.
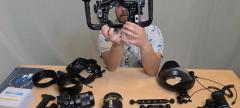
But most importantly, the Panasonic GH6 is designed unlike any camera from compete brands with ergonomics that really reflect a video shooter's needs. With so many buttons, dials, and switches it can be a daunting camera to wrap your head around. This guide to the best Panasonic GH6 settings will help you get started taking underwater video and point out the most important features to consider as an underwater video (and photo) shooter.
Panasonic GH6 Dials, Buttons, and Joysticks
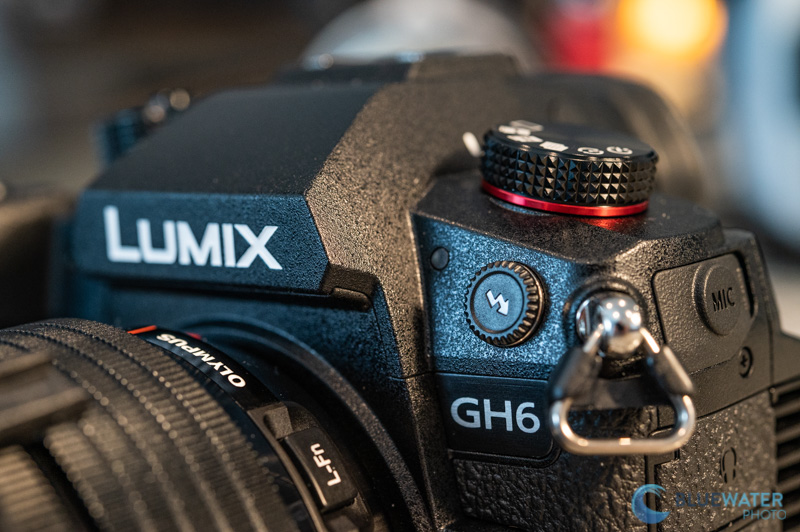
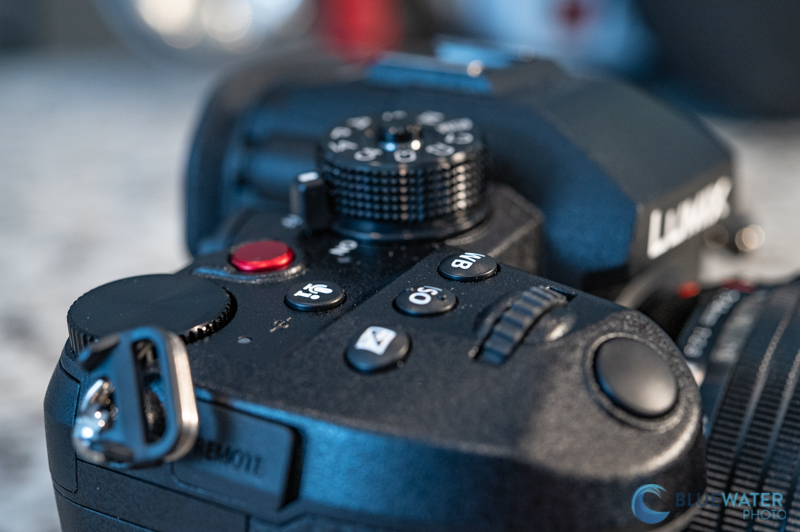
The Panasonic GH6 is a unique masterpiece of buttons, dials, and switches. The body is designed to be as ergonomic as possible for shooting topside video, but it can be a little confusing to use in an underwater housing. The menu system, however, is quite easy to use and navigate. The camera itself is equipped with a front and rear dial for controlling shutter speed and apertures. Adjacent to the rear dial, three buttons are very useful for video shooters - ISO, white balance, and exposure compensation. I found it very easy to use the white balance buttons to set a manual white balance underwater rather than going into the Q menu.
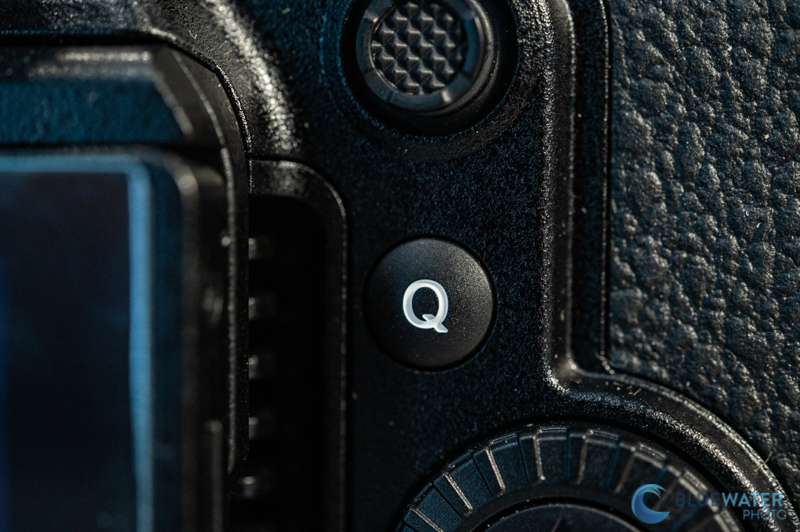
Speaking of the Q menu, the "Q" button on the back of the camera should be the button you press the most. It represents a menu of your most important underwater settings on the GH6 that you need quick access to. This menu can be customized, as we will discuss below.
Recording a video is very easy on the GH6. There is a bright red record button on the top of the camera and on the front of the camera next to the lens release. When you are in movie mode, you can also use the shutter button to start and stop recording - which is what we often did.
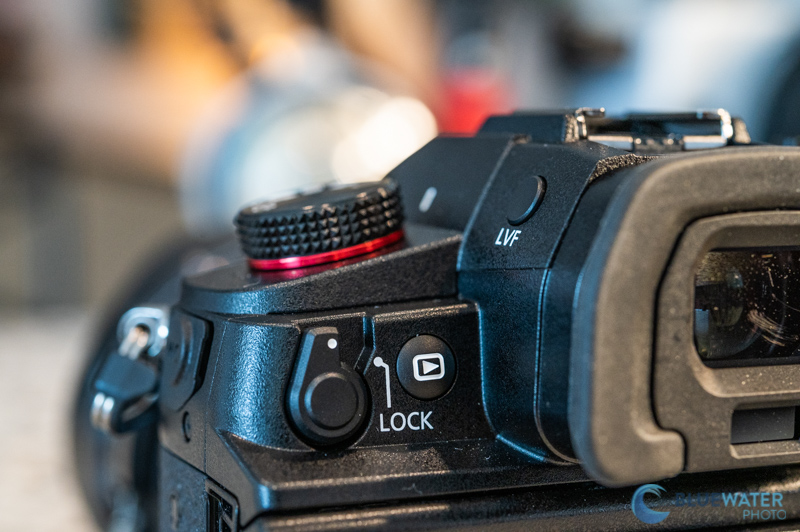
On the top left of the camera, adjacent to the EVF, there is a lock switch which allows you to lock in your settings while you are filming. What settings are locked can be customized by hitting your menu button -> blue gear menu -> operation panel 1 -> Lock lever setting.
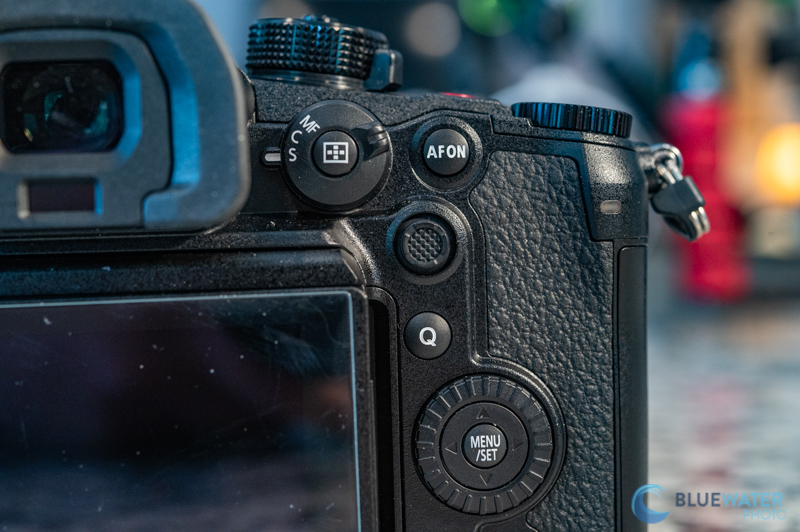
On the right side of the EVF, there is a focus button and switch. This allows you to switch from manual focus to single autofocus to continuous autofocus. If you press the button in the center of the switch you can set your AF area mode or you can zoom into your focus area if you are in manual focus mode.
The disp. button on the bottom right of the back panel is a display button that allows you to flip through different layouts on your LCD.
For the photographers out there, your drive mode (i.e., burst shooting mode) can be changed with the drive dial on the top left of the camera. This dial also allows you to set timers when you are taking photos.
Finally, the joystick under the AF-ON button is used to move your focus points. Some housings may not have compatibility with the joystick which can make AF point selection more difficult. Feel free to contact us to find out if any controls are not compatible with the housing that you are looking at.
Breaking Down the Mode Dial
The mode dial on the GH6 is a little more photo-oriented than we would have liked to see. That being said, there are plenty of options for customization. The C1-C4 modes on the dial allow you to register a custom setting in the menu that can be quickly accessed by rotating the dial. To register your current settings as a custom mode, hit "menu" -> "blue wrench" -> "setting menu" -> "save to custom mode."
The video icon is your movie mode on the mode dial. We recommend using this mode only when you want to shoot video. In order to switch between manual movie mode, aperture priority movie mode, shutter priority movie mode, and program movie mode, you need to select the "Q" button and the exposure mode will be the top left icon.
M, S, A, P, and iA are photo modes. M allows you to take manual photos. S is shutter priority which allows you to set a defined shutter speed and the camera will set the rest of your settings. A is aperture priority which allows you to set a defined aperture and the camera will set the rest of your settings. P mode is program mode and A mode is automatic - both allow the camera to set all your exposure settings. Underwater, we recommend you use M for photography and move mode for video.
Considerations for Underwater Housings
The Joystick and AF Point Selection
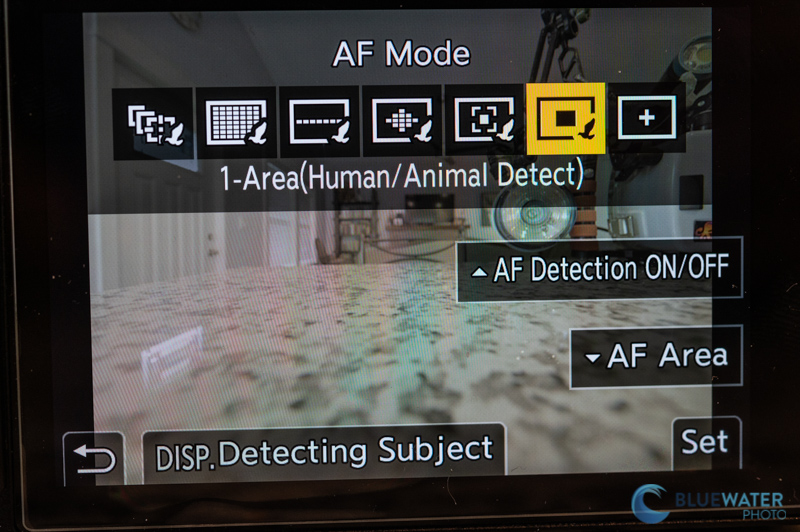
AF point selection with the GH6 is easy with the joystick or touch screen. Unfortunately, no underwater housings currently have support for the touch screen and some don't have support for the joystick. It's important to assign a custom setting to the AF mode button that allows for autofocus point selection. To do this hit the menu button and go to the blue wrench menu. Then go to -> operation 1 -> Fn button set. Select the focus mode button on the focus switch. Change the setting to select the AF point selector when you hit the button.
In video mode, sometimes we recommend using the "Full Area" AF area mode, but we found it was not it is not accurate at selecting an AF point in macro situations or situations with low light. For macro shooting, we recommend using the autofocus single mode to lock your focus on your subject before hitting record.
The Q Menu
The Q menu, or "Q" button, is the most important button you are going to be pressing on the GH6. It provides you with a single button access to your most used settings. We don't like the default Q menu settings for photo and video, but thankfully this menu is easily customizable. In fact, there are more options for the Q menu on the GH6 than any camera we have used thus far. To customize the Q menu hit your "menu" button -> blue gear menu -> operations panel (1) -> Q.Menu Settings -> "Item Customize (Photo/Video). We recommend flipping through all your customization options because there are so many. These are our top recommended custom settings that we used in our Q menu, but choose your own based on your workflow.
Recommended Q Menu Photo Settings
- Photo style - we only have this set in case we need to quickly change our photo style after switching to photo from video. So this is a setting that you could choose to customize as something else. We recommend leaving this in standard
- White Balance - auto (with strobes)
- ISO - keep it close to your base
- Metering Mode - spot with strobes
- AF mode - 1-area (for AF-S), zone or tracking (for AF-C)
- Picture Quality - RAW
- Focus Peaking - on
- Detecting Subject - Animal + human
- Live View Boost - On (mode 1), allows you to see more detail on your subjects in darker environments
- Flash mode - Forced flash on
- Silent mode - Off; only use without strobes
- Drive mode - Single
Recommended Q Menu Video Settings
- Exposure mode - this is where you can set manual or automatic video modes
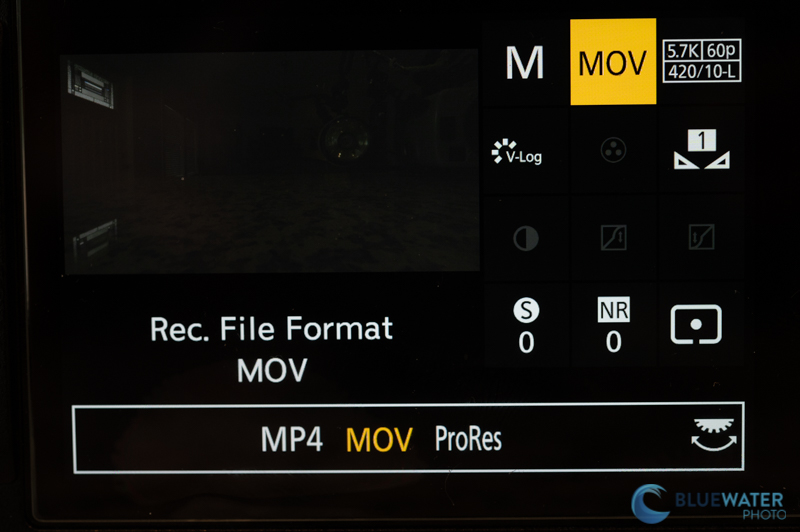
- Recording file format - usually set to MOV or ProRes if you want to edit in prores
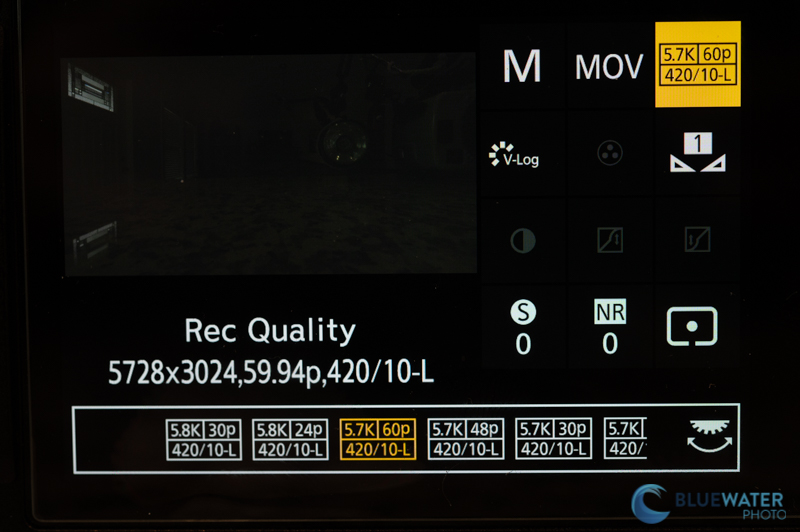
- Recording quality - Recommended: 5728 x 3024, 59.94p, 4:2:0/10-L for macro if you want to crop in post processing; 3840 x 2160, 59.94p, 4:2:2/10-I for standard underwater video; 3840 x 2160, 119.88p, 4:2:0/10-L for slow motion video
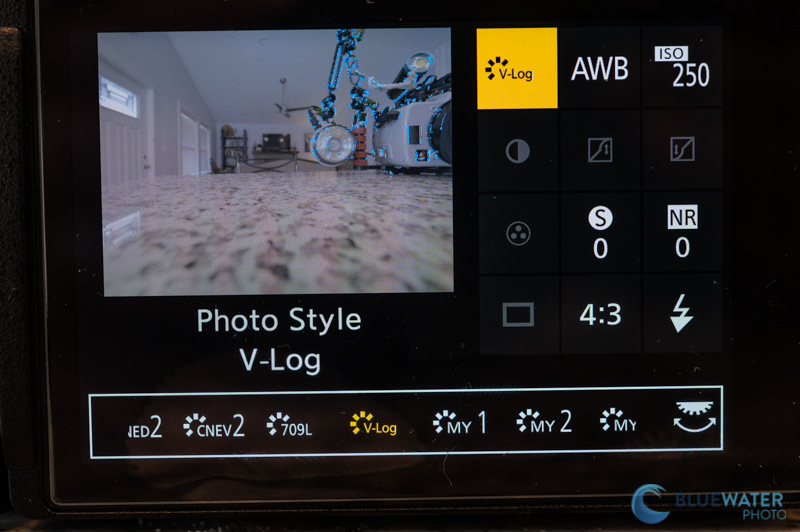
- Photo style - Recommended: V-Log, or standard
- Image stabilizer - normal
- White balance - auto with video lights, "white set 1" to set manual white balance
- LUT view assist (monitor) - this allows you to view LUTs if you are using them with Log profiles to view your correct exposures
- Metering mode - spot with video lights, multi metering for normal video, or center weighted for shooting into the sun
- histogram - on
- Fan mode - auto2 (default)
Important Main Menu Settings
To access the main menu on the GH6, hit the menu/set button on the back panel. The main menu on the GH6 is extensive and loaded with features. Many of these features you won't need to use right off the bat and can be left on default. Of course, some features that we don't talk about in this article might be important from your workflow. So don't shy away from doing a deep dive into the menu when you first get the camera. Here are a few important main menu setting that we think you should consider:
Red Camera Menu
Image Quality 1
- Picture quality should be set in "RAW" for the best results when you are editing photos. You can also choose to set this in RAW+FINE which allows you to shoot JPEG and RAW.
- Long Exposure NR should be set to OFF. You can denoise your image in post processing
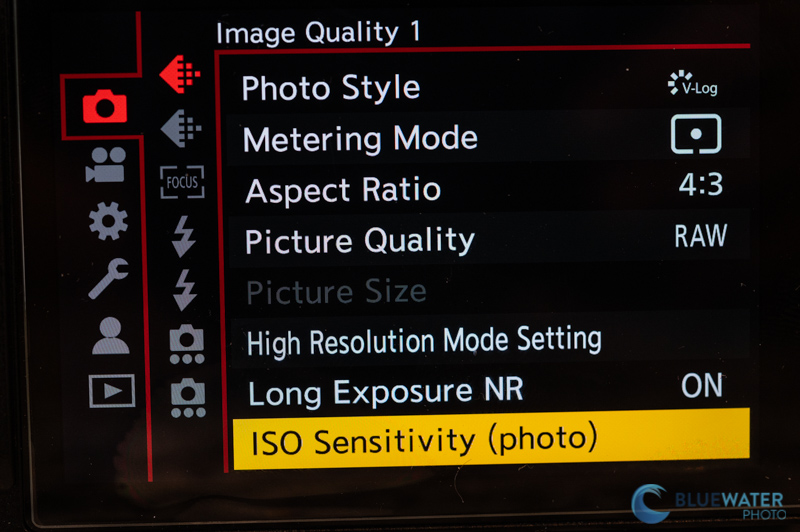
Image Quality 2
Leave all these setting in "OFF"
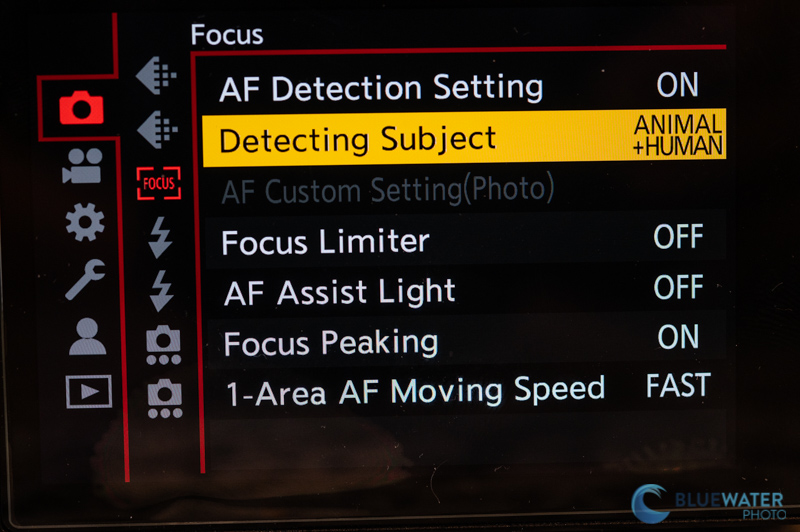
Focus
- AF Dection Setting - On
- Detecting Subject - Animal + Human. It actually does a good job of identifying some animals underwater and I found it useful
- Focus Limiter - off
- AF assist Light - off
- Focus peaking - on
- 1- area AF moving speed - fast
Flash 1
- Flash mode - force flash on
- Firing mode - TTL if using a TTL converter, manual if not
- Flash adj - +- 0
- Flash synchro - 1st
- Auto exposure comp - off
- wireless - off
Flash 2
Leave this in default.
Others (1 + 2)
Leave this in default
Red Movie Menu
Image Quality 1
- Exposure Mode - M if you want to shoot manual
- Photo style - V-Log for Log shooting or stnd if you don't want to do much color grading
- Metering mode - spot with video lights, multi metering for normal video, or center weighted for shooting into the sun
- Dynamic Range Boost - this setting allows you to increase your dynamic range but requires a higher base ISO
- ISO Sensitivity - allows you to set your ISO limits when shooting in Auto ISO

Image Quality 2
Leave this in default
Image Format
- Recording file format - usually set to MOV or ProRes if you want to edit in prores
- Recording quality - Recommended: 5728 x 3024, 59.94p, 4:2:0/10-L for macro if you want to crop in post processing; 3840 x 2160, 59.94p, 4:2:2/10-I for standad underwater video; 3840 x 2160, 119.88p, 4:2:0/10-L for slow motion video
Focus
- AF Detection Setting - turn this on if you are able to in your chosen recording format
- Detecting Subject - Animal + Human
- Continuous AF - Mode 1
- AF Assist Light - Off
- Focus Peaking - On
- 1-Area AF Moving Speed - Fast
Audio 1
Leave this as default - we usually remove audio from clips underwater.
Audio 2
Leave this as default - we usually remove audio from clips underwater.
Others
We leave the Image stabilizer setting in normal with E-stabilization, Boost IS, and Anamorphic off.
Blue Gear Menu
Image Quality
We leave this in default
Focus/Shutter (Panel 1, 2, & 3).
We leave these three panels in their default settings. However, it's important to note that these settings are still important for every day function. In these panels you can set if your camera takes a photo when the focus is locked, if you can half press the shutter to focus, if your shutter button will record in movie mode, and more.
Operation 1
- Q. Menu Settings - This allows you to customize the Q menu
- Touch settings - turn the touch screen on and off (we recommend off when shooting underwater)
- Lock lever settings - determines what settings are locked when you switch the lock lever on
- Fn Button Set - allows you to change button operations and custom set buttons. We liked the default settings
- WB/ISO/Expo. Button - leave on after pressing 2
- ISO Displayed Setting - default
- Exposure Comp. Disp. Setting - default
- Dial set. - default
Operation 2
Leave this in default.
Monitor/Display (Photo) (1+2)
- Auto review - this setting allows you to automatically review photos after you take them. I leave it on 2 seconds
- Live view boost - keep this off to save battery or keep it in Mode 1 if you want to see the screen and your subjects better in low light situations.
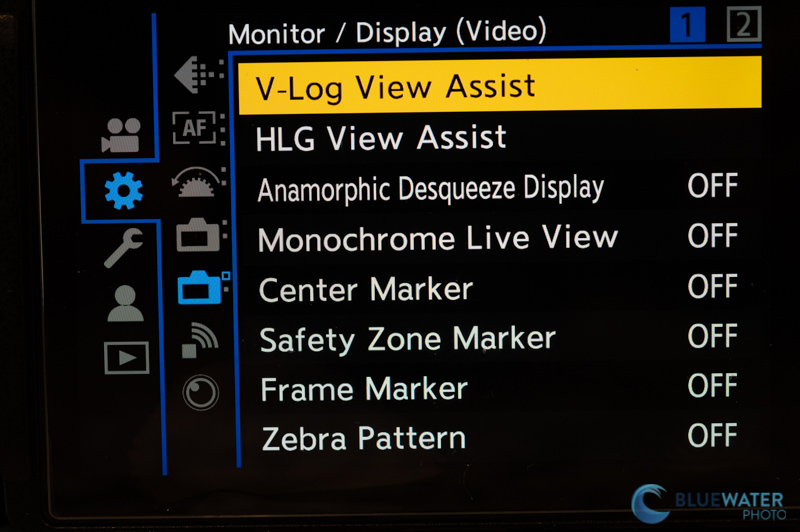
Monitor/Display (Video) (1+2)
- V-Log view assist - allows you to apply a LUT while shooting V-Log. A LUT makes V-Log look like it would after color grading while you are recording so you can have an idea what the final video clip will look like. To turn this on, LUT select should be VLog_709 and LUT View Assist (Monitor) should be set to ON if you are using the LCD to view your video.
- HLG View Assist - this LUT allows you to view HLG as one would see the final color graded product while recording. Leave this on the default - Monitor, mode 2.
- Zebra patterns - Zebra patterns show you where your video is overexposed by overlaying it with zebra patterns
In/Out
- If you are using an external monitor or recorder, you can set your HDMI output recording settings here.
- Fan Mode - Auto2. This allows you to control when your fan is in use to cool down your camera.
- Tally Lamp - you can set which tally lights are on to show you when you're recording. We turn them both off as they are tough to see in the housing.
Lens/Others
Leave this in default
Blue Wrench Menu
Card/File
- Card format - this allows you to format your card and delete everything on it.
- Double card slot function - this allows you to assign which card you want to record to

Monitor/Display
- Power save mode - you can adjust when your camera goes to sleep. To conserve battery, we often just turned the camera off when we weren't using it as the GH6 is quick to start up upon being turned on
- Thermal management - you can set this to high if your camera is overheating in order to film longer
- Monitor frame rate - you can reduce this to 30 fps if you need to conserve power
- Monitor backlight - auto
- Eye Sensor - This setting allows you to set whether your EVF or LCD is on in the housing. Go to EVF/Monitor switch and then select MON for your LCD to display underwater
In/Out
Leave in default
Setting
- Save to custom mode - this setting allows you to save your current settings into one of the custom modes (C1-C4) on your mode dial
Others
- Clock set - allows you to set the time
- Time Zone - allows you to set the time zone
- Sensor cleaning - shakes the sensor to remove sensor dust
- Firmware version - you can check your firmware here to see if you need a firmware update
Purple Person and Green "Play" Icon
Leave these settings in default.
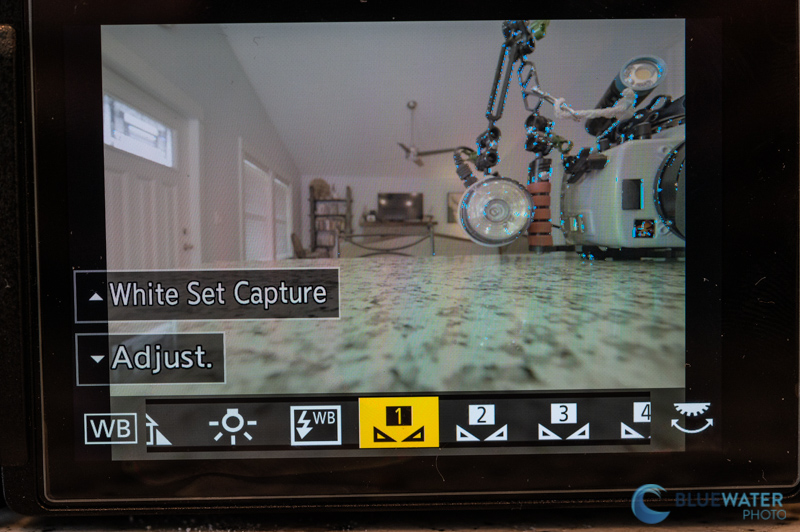
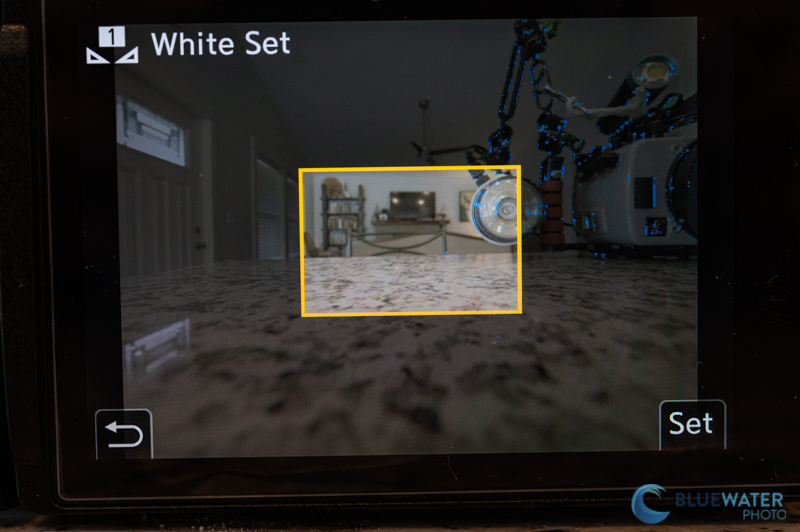
Setting A Custom White Balance
If you are shooting without video lights underwater, you'll want to set a manual or custom white balance. Setting a manual white balance with the GH6 is easy. To do this, click the white balance button on the top panel of the camera. Then you scroll to the custom white balance setting ("white set 1"). Click the up button on the D-pad and then the "ok" button in the center. This will bring up a box. Line the box up with your grayscale card underwater and click "ok" to set the white balance.
Underwater Video Jump-To Settings
If you are new to shooting underwater video, it can be a daunting task. Here are a few quick "jump to settings to get you started taking video.
Wide Angle Video
- 5.7K/60p
- shutter speed: 1/125
- aperture: f/9
- ISO: adjust to proper exposure
- White balance: auto with a video light and custom white balance without
- Metering: spot with a video light or multi metering without a video light
Macro Video
- 4K/120p for stabilization or 5.7K/60p for cropping. Or 4K/60p to save space on your card
- shutter speed: 1/250 for 4K/120p and 1/125 if filming at 60p
- aperture: f/13 or higher
- ISO: adjust to proper exposure
- White balance: auto - we recommend using a video light
- Metering: spot with a video light
Underwater Photo Jump-To Settings
Here are some quick jump-to settings for underwater photography with the Panasonic GH6.
Wide Angle Photography
- Shutter speed: 1/125
- Aperture: f/8
- ISO: 200
- Metering: spot with strobes
- White balance: auto
- RAW
Macro Photography
- Shutter speed: 1/160
- Aperture: f/13 or higher for more detail; f/3.5-6.3 for bokeh
- ISO: 200
- Metering: spot with strobes
- White balance: auto
- RAW
Conclusions
The Panasonic GH6 is loaded with setting, options, and customization. We hope this settings guide helps you learn your camera. But ultimately, the settings you choose will come down to the work flow that works for you.
![]()
Support our content and get your Panasonic GH6 underwater housing at Bluewater Photo! Feel free to email us at sales@bluewaterphotostore.com to get set up with what you need.
Ikelite Panasonic GH6 Underwater Housing
Nauticam Panasonic GH6 Underwater Housing
Aquatica Panasonic GH6 Underwater Housing
Isotta Panasonic GH6 Underwater Housing
Panasonic GH6 Underwater Housing Guide
RECOMMENDED ARTICLES


ABOUT THE AUTHOR

Nirupam Nigam is the Editor-in-Chief of the Underwater Photography Guide and the President of Bluewater Photo - the world's top underwater photo & video retailer. While growing up in Los Angeles he fell in love with the ocean and pursued underwater photography in the local Channel Islands. After receiving degrees in Aquatic and Fisheries Science and General Biology, as well as a minor in Arctic Studies, Nirupam worked as a fisheries observer on vessels in the Bering Sea and North Pacific. Since then, Nirupam has been a full time underwater photographer and photo gear head. Check out more of his photography at www.photosfromthesea.com!
ALSO BY NIRUPAM NIGAM


SUPPORT THE UNDERWATER PHOTOGRAPHY GUIDE:
The Best Service & Prices on u/w Photo Gear
 Visit Bluewater Photo & Video for all your underwater photography and video gear. Click, or call the team at (310) 633-5052 for expert advice!
The Best Pricing, Service & Expert Advice to Book your Dive Trips
 Bluewater Travel is your full-service scuba travel agency. Let our expert advisers plan and book your next dive vacation. Run by divers, for divers.