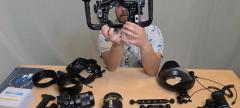
Guide to underwater video with the Canon 7D
Guide to Shooting Underwater Video with Canon 7D
Exposure, settings, white balance and focusing tips
by Todd Winner
Canon's video has been embraced by cinematographers and filmmakers. Never before have you been able to produce this type of quality with such a compact and affordable package. At the heart of Canon's video is the much larger chip size of full frame on the 5D Mark II and the cropped sensor on the 7D. These larger sensor's perform much better in low light than the smaller sensor's on most consumer and even professional camcorders. Add to this the creative shallow depth of field possibilities and the huge range of quality glass you can put on these cameras, it is no wonder why these camera's have been so excepted by Hollywood.

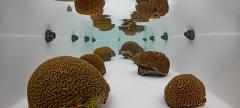
This would be a great scene to capture on video! Read on to find out how...
Not all video is created equal
Without getting to technical with this, it is important to know that not all video is the same. There are the obvious frame size differences, the most common in HD being 720 and 1080, and different frame rates 23.98, 24, 25, 29.97, 50 and 60, etc. But more importantly, is how your video is compressed. All video camera's use compressed video except the most high end digital cinematography cameras. The easiest way I think to explain this to a photographer is to think of a JPEG file. You can have the same file size, but you can save it as a quality of 10 or 5. The image would look very similar, but if you started heavy corrections on the smaller file it would fall apart much quicker. The same is true with compressed video. It is very important to expose it correctly so you don't have to do a lot of corrections in post.
Setting Exposure for video with the Canon 7D
If you set the 7D to anything other than manual it will function in full auto in the video mode. It will choose the ISO, shutter speed and aperture for you. I would suggest using manual. First, start with your shutter speed. You have a very limited range of shutter speeds in most cases. If you want to create smooth motion it is best to start with a speed that doubles your frame rate. This will give you smooth motion blur from frame to frame. You can slow it down or speed it up by one stop but any faster and you risk getting a strobing effect. This fast shutter speed effect is often used in war and action movies to freeze debris from mortar’s and explosions.
Next, choose an aperture that will give you your desired depth of field. With the extreme wide-angle lenses that many of us use underwater, these lenses produce a very large depth of field even at their widest aperture. For more creative depth of field on land, the use of neutral density filters is often required.
Third, there is your ISO. This is going to be your main control for setting exposure in video mode. Simply choose your shutter speed and aperture for your desired look and dial in your exposure using the ISO dial.
Hybrid Mode: If you want the convenience of auto exposure, but want the control of setting your own shutter speed and aperture, you can set your ISO to auto (aka Hybrid Mode). Again this only works when you are manual mode otherwise all 3 controls will be chosen for you. This setting actually works very well but your ISO will change if your scene changes from dark to bright. These changes can be abrupt and not what you usually want in a continuous shot.
White Balance for video
Getting your white balance correct when you shoot video is extremely important. Unlike RAW files, the color information is burned into the video. If you use auto white balance, it will change depending on what is in the scene. Although this may seem like a good thing, it makes it very difficult to cut together in post production. The more common approach is to bring down a white balance card and set a custom white balance under the given lighting conditions. I prefer to simply look at my LCD screen and dial in a color temperature that looks good to my eye using the Kelvin dial.
Focusing
There is no auto focus in the video mode on a 7D so you must either manual focus or pre-focus before you start shooting. For wide-angle, I usually pre-focus on my fin before shooting.
Using the Canon T2i & T3i
The Canon T2i and T3i can also take great underwater video, and most of this article will apply to those cameras also.
Some final tips
I find it difficult to switch back and forth between shooting stills and video underwater. I suggest dedicating a few dives just to video if you want to get the most out of your camera. It is extremely versatile to have the option to shoot both with a single camera and has opened my eyes to new creative possibilities.
Underwater Video of Sea Lions
Underwater video of a swimmer shot with the Canon 7D. Videos by Todd Winner
Where to Buy
The friendly team at Bluewater Photo & Video can assist you with Canon 7D settings, and help you choose the right housing, video & focus lights, macro lens, and more.
![]()
Further Reading
Ultimate guide to Canon 7D underwater settings
Underwater Video Tips
Amazing video footage from Howard Hall
RECOMMENDED ARTICLES


SUPPORT THE UNDERWATER PHOTOGRAPHY GUIDE:
The Best Service & Prices on u/w Photo Gear
 Visit Bluewater Photo & Video for all your underwater photography and video gear. Click, or call the team at (310) 633-5052 for expert advice!
The Best Pricing, Service & Expert Advice to Book your Dive Trips
 Bluewater Travel is your full-service scuba travel agency. Let our expert advisers plan and book your next dive vacation. Run by divers, for divers.