Nikon Z7, Z7II, Z6, Z6II Underwater Settings
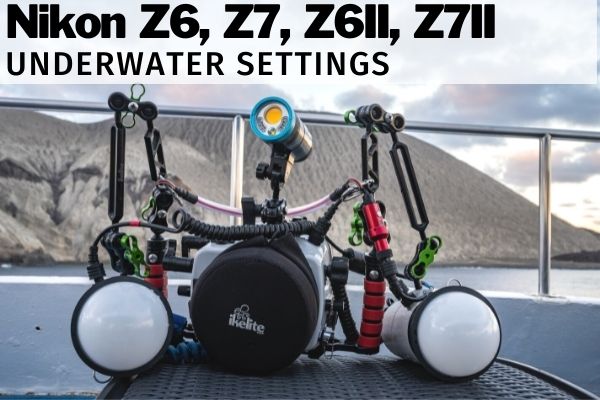
The Nikon Z7, Z6, Z7II, and Z6II are all excellent options for underwater photography. I should know - after every camera that I have had the pleasure of reviewing, my very own personal camera is still the Nikon Z6. So rest assured, these underwater settings are from personal experience. If you are a Nikon Z camera owner, no matter what camera you have, this underwater settings guide will be useful. All Nikon Z cameras have essentially the same controls and are built very similarly. Particularly, the Nikon Z6/Z7 & Z6II/Z7II are virtually identical from each other with very slight differences. With this in mind, these are some of my top insights on how to set up your Nikon Z camera for underwater photography and video.
![]()
Support our content and purchase a Nikon Z7II/Z6II underwater housing at Bluewater Photo:
Nauticam Nikon Z7II, Z6II Underwater Housing
Ikelite Nikon Z 7II, Z 6II, Z7, Z6 Underwater Housing
Sea & Sea Nikon Z7II, Z6II Underwater Housing
Aquatica Nikon Z7II, Z6II Underwater Housing
Isotta Nikon Z7II, Z6II, Z7, Z6 Underwater Housing
Need help choosing a housing? Check out our Nikon Z7II and Z6II Underwater Housing Buyer's Guide
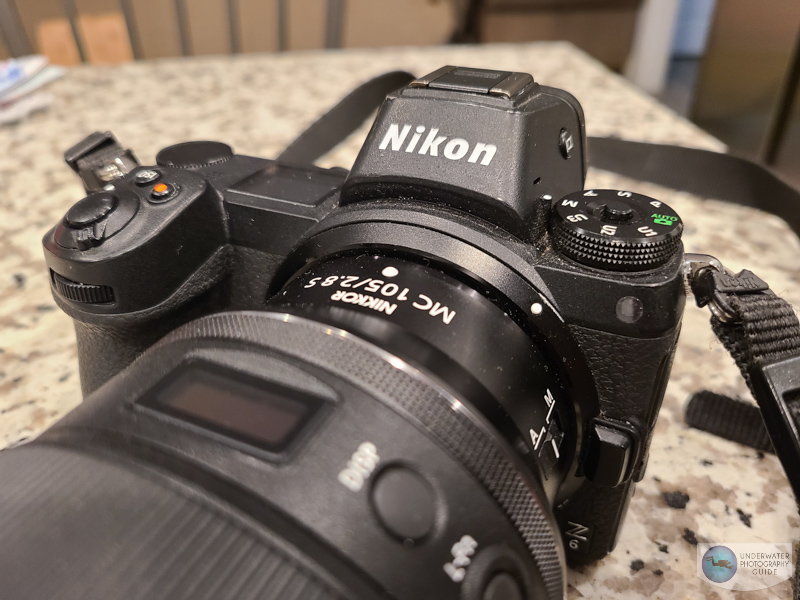
Buttons, Dials, and Ergonomics
Nikon Z series cameras are very simple and ergonomic. This makes them among the easiest to use full frame cameras on the market. However, because of this simplicity, there is not much room for customization. I generally leave my camera in the default settings when it comes to button customization, as the Fn1 and Fn2 buttons tend not be very useful underwater, due to being positioned on the front of the camera.
One of my favorite features on Z series camera is that you can switch between photo and movie mode with a dedicated switch. The camera will save your settings in either mode, making it easy to switch between photo and video. Another great feature is that you can switch through your viewfinder and lcd options with the button on the left side of the EVF.
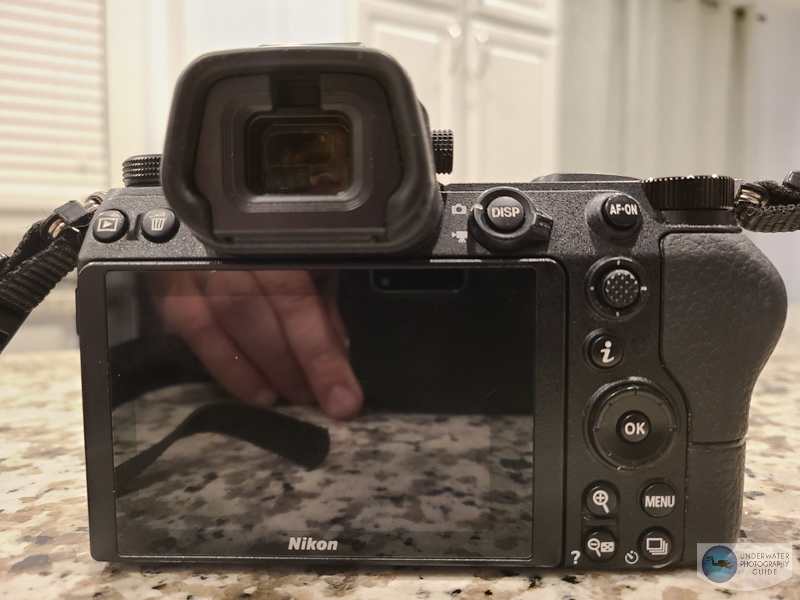
The d-pad on the back of the camera can be used to move your autofocus point. This is what I use to move my autofocus point underwater. There is also a joystick that can move the AF point quicker, topside. Because there are only two dials, I keep them in their default shutter speed and aperture controls and adjust ISO using the "i" menu. If you are shooting video, you may want to assign you shutter speed dial as your ISO and adjust shutter speed from your "i" menu.
And this brings us to a good segway.... most important controls should be stored and customized in your "i" menu.
The "i" Menu
The "i" menu button is a clear, easy-to-access button on the back of the camera. This is where all your important settings that need to be accessed with one push can be stored. To customize your "i" menu > click menu > go to the pencil symbol > go to "f controls" > go to f1 "customize i menu." In my "i" menu for photography I have the following settings:
- ISO
- Focus mode
- Silent photography (only for topside shooting)
- AF-area mode
- flash mode - keep this on fill flash when using strobes
- metering mode - keep this on spot metering when using strobes
- peaking highlights (for manual focus peaking)
- apply settings to live view - turn this off with strobes and on without strobes
- release mode (drive mode/timer) - keep this on S (single) or continuous L for bursts with strobes
- vibration reduction (this is your in-body image-stabilization)
- white balance
- Image quality
The nice thing about Z series cameras is that they can be customized and set separately in movie mode. To customize your movie mode "i" menu > go to menu > pencil icon > g Movie > g1 customize i menu. I have the following settings in my "i" menu for movie mode:
- set picture control - allows you to set your color profile
- white balance
- frame size and rate/image quality
- microphone sensitivity
- metering
- choose image area
- highlight display - this sets you zebra stripes
- ISO
- electronic VR (electronic stabilization)
- vibration reduction - in body image stabilization
- fous mode
- af-area mode

The Main Menu
The main menu on Z series camera is extensive, but it's unusual that you will need to set something in there on day-to-day shooting operations. There isn't much we needed to change from default settings, but here are a few important changes to make. To access the main menu, click "menu."
Playback Menu
This is the top menu. Here you can choose what your camera will show you when you hit the play button. Go to your "playback display options" if you want to be able to see your focus point, histograms, or any other info.
Photo Shooting Menu
Image Quality - NEF (RAW)
Image Size - RAW (L)
NEF (RAW) Recording - you can choose your compression here. We don't want to lose data so we chose uncompressed, 14-bit
Color space - sRGB
Active D-Lighting - off
Long exposure NR - off
High ISO NR - off
Vignette control - off
Diffraction compensation - on
Auto distortion control - off
Flicker reduction shooting - off
Movie Shooting Menu
Frame size/frame rate - 2160p*30 (or 60p with the Z6 II and Z7II) for high quality footage with little room to slow down for stabilization. Otherwise shooting 1080p at a higher frame rate for stabilization
Movie file type - MOV
Set picture control - vivid if you don't want to do much processing. Flat if you want the best results, but only after post processing
Active D-Lighting - off
High ISO NR - off
Vignette control - L
Diffraction compensation - on
Auto distortion control - on
Flicker reduction - auto
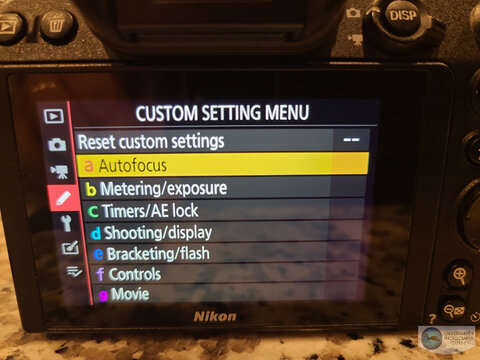
Custom Settings Menu
Most of your adjustments will be made in your custom settings menu (the menu with the pencil icon) after your "i" menu. Get familiar with it over time and you'll be happy you did.
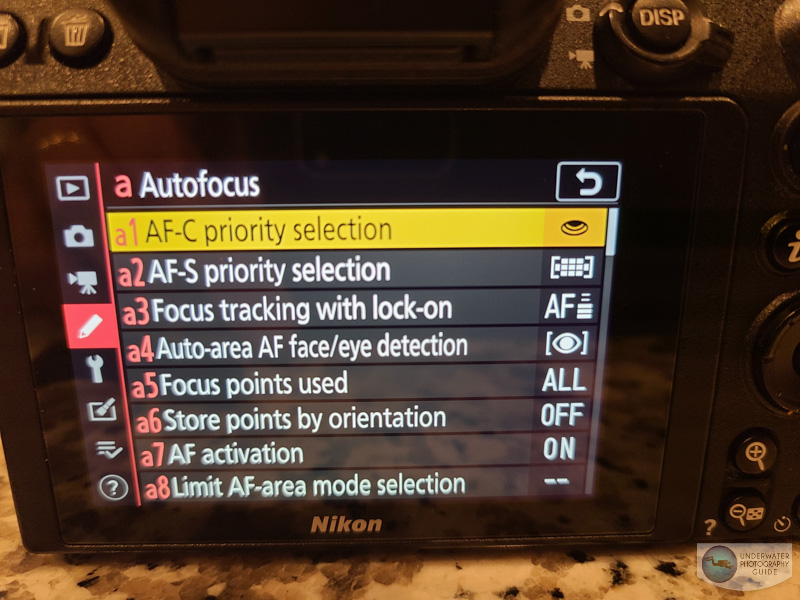
A - Autofocus
AF-C Priority Selection - Release (will take photo when you press shutter in AF-C mode)
AF-S Priority Selection - Focus (will take photo only if photo is in focus in AF-S mode)
A4 Auto-are AF face/eye detection - you can set what your camera will detect in your auto-area AF mode. Animal eye AF does not work on fish currently
A9 Focus point wrap around - turning this on will move your focus point to the other side of the screen when you reach the end
a11 Low-Light AF - off - will slow down your AF overall
a12 Built-in AF-assist illuminator - off (waste of battery underwater)
B - Metering/Exposure
Leave in default
C - Timers/AE Lock
Leave in default
D - Shooting/display
D1 CL mode shooting speed - set the shooting speed when in continuous low burst shooting (we do 3 fps for strobes)
d8 Apply settings to live view - turn this off with strobes and on without strobes
E - Braketing/Flash
Leave in default
F - Controls
f1 Customize "i" menu
f2 customize control assignments - if you do want to customize buttons, this is where you do it
f5 Customize command dials - this is where you customize aperture and shutterspeed dials
G - Movie
g1 Customize "i" menu
g2 Customize control assignment - customize buttons in movie mode
g4 AF speed - +2 seems to work well
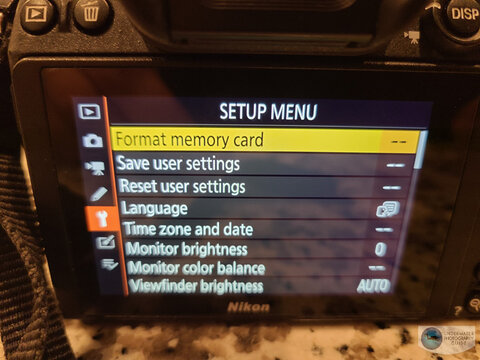
Setup Menu
Format memory card - wipes all data from your card
Clean image sensor - doesn't work very well
Battery info - a good measuring stick if you need to know exactly how much battery you have
Firmware version - make sure you update your firmware. The original Nikon Z6 and Z7 performed much better after firmware updates.
Retouch Menu
Leave in default
My Menu
You can use this menu to add quick access items. The i menu is still better for this though.
Understanding Your Autofocus Modes
The Nikon Z6 through Z7II are all notoriously bad when it comes to autofocus - especially when compared to the Canon R5 and any equivalent Sony camera. That being said, they are all still on the professional side of cameras. If you understand how to use their autofocus modes, you'll be in much better shape.
Macro Autofocus Settings
Set this in your "i" menu
Focus mode - AF-S
AF-area mode - Single-point AF
Move the focusing point with your d-pad as needed. Continuous autofocus with the Nikon Z series cameras is not quite good enough for macro. Click "ok" to move the focus point back to center.
Wide Angle Autofocus Settings
You can set this in your "i" menu. For wide angle, autofocus tracking, though not as good as its competitors, is still my preferred method of shooting wide angle photos. It is a two-step process so it can be clunky until you get used to it.
Focus mode - AF-C
AF-area mode - Auto-area AF
To activate autofocus tracking click "ok." Line the box up with your subject and press the AF-on button to track. When you release the AF-on button the AF box will go back to the center. If you switch to AF-S, the camera will continue to track your subject after you release the AF-on button. For topside photography, your eye autofocus tracking will be automatically activated in the auto-area AF mode.
Recommended Nikon Z6, Z7, Z 6II, Z 7II Manual Mode Starting Points
It's always great to start your dive with a good starting point. Here are some recommendations that we have for both the Nikon Z series cameras. They may not work in every situation, but they are a good place to start for general underwater photo and video.
Underwater Wide Angle Photos in Clear, Tropical Water
- Shutter Speed - 1/160
- Aperture - f/13
- ISO - 200
- Metering Mode (strobes) - spot
- Metering Mode (no strobes) -evaluative (or center weighted with backlighting)
- AF mode - AF-C, auto-area AF
- White Balance (for JPEG shooting) - auto
- File Format - RAW
Underwater Wide Angle Photos in Dark, Cold Water
- Shutter Speed - 1/60-1/160
- Aperture - f/13
- ISO - 400-640
- Metering Mode (strobes) - spot
- Metering Mode (no strobes) - evaluative (or center weighted for backlighting)
- AF mode - AF-C, auto-area AF
- White Balance (for JPEG shooting) - auto
- File Format - RAW
Underwater Macro Photography
- Shutter Speed - 1/160
- Aperture - f/5.6 for bokeh, f/22 for detail
- ISO - 200
- Metering Mode (strobes) - spot
- AF mode - AF-S, Single AF point
- White Balance (for JPEG shooting) - auto
- File Format - RAW
Underwater Video (4K)
- Movie Rec Size - 4K @ 30p MOV
- Shutter Speed - 1/60
- Aperture - f/13 or smaller for wide angle, f/5.6-f/10 for macro bokeh, f/22 for detailed macro
- ISO - adjust to correct exposure; anything over 6400 might be too much noise
- Metering Mode (video light) - spot
- Metering Mode (no video light) - evaluative (or center weighted with backlighting)
- AF mode - AF-F (unless your lens has a lot of focus breathing - then AF-S)
- White Balance - custom white balance without strobes, or match the temperature of your video lights
- Vivd color profile or flat profile if you want to do a lot of editing
- Zebra stripes - enable if you are shooting in an area with a lot of dynamic range (e.g., sun lit kelp scene)
Conclusions
Perhaps one of our favorite aspects of Nikon Z series cameras is that they are so easy to use. They are by far the least complicated of all full-frame mirrorless brands - which has it's benefits and drawbacks. But overall, Nikon has created some excellent tools for underwater photography, and with this guide, you should be able to reach your maximum potential.
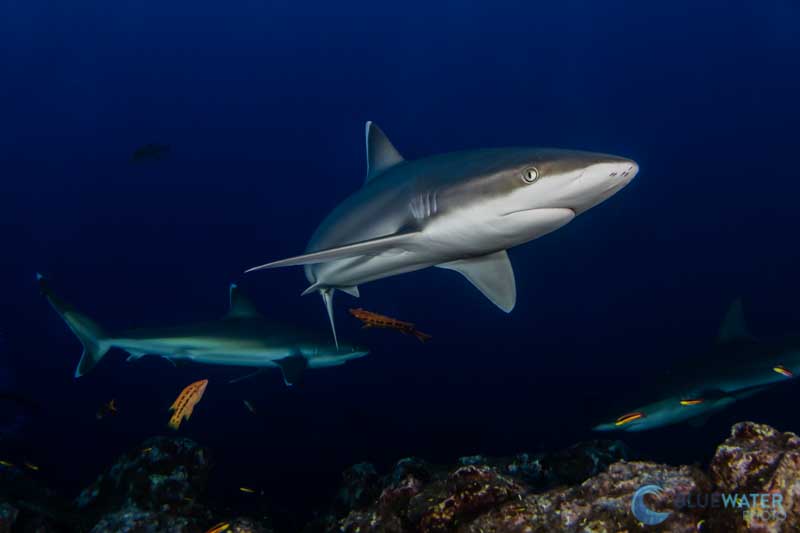
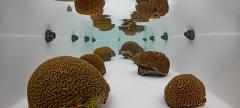
A photo of fast moving reefsharks would not have been possible without a highly functioning autofocus system with autofocus tracking. 1/160, ISO 640, f/13
RECOMMENDED ARTICLES


ABOUT THE AUTHOR

Nirupam Nigam is the Editor-in-Chief of the Underwater Photography Guide and the President of Bluewater Photo - the world's top underwater photo & video retailer. While growing up in Los Angeles he fell in love with the ocean and pursued underwater photography in the local Channel Islands. After receiving degrees in Aquatic and Fisheries Science and General Biology, as well as a minor in Arctic Studies, Nirupam worked as a fisheries observer on vessels in the Bering Sea and North Pacific. Since then, Nirupam has been a full time underwater photographer and photo gear head. Check out more of his photography at www.photosfromthesea.com!
ALSO BY NIRUPAM NIGAM


SUPPORT THE UNDERWATER PHOTOGRAPHY GUIDE:
The Best Service & Prices on u/w Photo Gear
 Visit Bluewater Photo & Video for all your underwater photography and video gear. Click, or call the team at (310) 633-5052 for expert advice!
The Best Pricing, Service & Expert Advice to Book your Dive Trips
 Bluewater Travel is your full-service scuba travel agency. Let our expert advisers plan and book your next dive vacation. Run by divers, for divers.