Lightroom for the Rest of Us
I like to get my photos out there as quickly as possible. In fact, I try to be done with processing my photos within a day of returning from a trip.
Not everyone wants to sort through thousands of photos after a trip and spend hours editing them, so I've developed a system that everyone can use to make the process as easy as possible. I am using Adobe Lightroom 5, but these tips can be used with any of the recent versions.

My process is summed up with 4 simple words:
IMPORT -> EDIT -> EXPORE -> SHARE

Click Image to Enlarge
#1 - Shoot in RAW + Jpeg
This way you can save a RAW file to edit, but immediately post the jpg online. Many new cameras have wifi so that you can post to Facebook as soon as you surface.
#2 - Quickly scan the jpegs on your laptop, jot down the 10 - 30 best photos
I like to quickly view a slideshow of my JPEG files, and then make a list of my favorite photos on a piece of paper or a notepad to keep track of the best ones. Although many photographers import all of their RAW files into lightroom, comparing them and deleting them, I find it faster to just import your best ones.
#3 - Copy those RAW files to a new directory
Put these best photos in their own directory so that they're very easy to find and import once you open Lightroom.
#4 - Open lightroom, import those 20 RAW files
Once Lightroom is open, simply click File and then Import and select the directory where you saved the 20 (or more, or less) of your best photos.

#5 - Edit each one in the develop tool
Click on the Develop module to begin editing your photos. I spend a minute or two editing each photo.

5A - Crop as needed
Cropping is quick and easy in Lightroom's Develop module. Each photo should be cropped if needed to achieve the optimal composition.

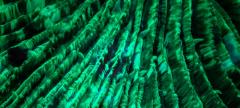
5B - Increase contrast, clarity, blacks, highlights, shadows
Underwater photos often can use a contrast boost, which can be achieved by adjusting the sliders for contrast, clarity, blacks, highlights and shadows.

5C - Use healing tool and adjustment brush as needed
If you have backscatter or other elements in your photo by accident, you can remove them with the healing tool. The healing tool can also remove distracting elements from the photo.
The adjustment brush can also be used to paint an area to make changes. In the screenshot below I've reduced the exposure by 4 stops and drawn different shapes to show how you have full freedom to paint in areas needing to be adjusted.


5D - Set star rating for each photo after editing
Lightroom allows you to rate your images to help find your favorites later on.
#6 - Export photos
Once done editing, it's time to export our photos as .jpg files. I like to save them in the same directory the RAW files are.

6A - Set dimensions (e.g. - 1024 x 1024)
Make sure to set your photo dimensions for the size you will want to share. I usually export them at 2000 pixels wide for slideshows, or 1024 for facebook uploads or web sharing.
6B - Create watermark, use ALT 0169 for the copyright symbol; create left and right versions
If you're putting photos online, you may want to include a watermark. You can add the copyright symbol by holding down the alt key and typing 0169.

#7 - Upload to smugmug/flickr/facebook, etc...
Once your photos are exported with watermarks it's time to share! Time to let your friends know what you saw underwater. Facebook, smugmug.com, instagram and flickr are popular places for people to share their photos with others.
Want to learn lightroom?
Contact Scott Gietler by emailing scott@bluewaterphotostore.com for info on taking a lightroom class, either remotely, on a dive trip, or at Bluewater Photo in sunny Los Angeles, California.
About the Author
Scott Gietler is the owner of Bluewater Photo, Bluewater Travel and the Underwater Photography Guide. He enjoys helping others learn underwater photography online, in the store and during international photo trips he attends with customers.
Further Reading
RECOMMENDED ARTICLES


ABOUT THE AUTHOR

Scott Gietler is the owner of Bluewater Photo, Bluewater Travel, and the Underwater Photography Guide. Bluewater Photo, based in Culver City, CA is one of the world’s largest and most prestigious underwater camera stores, serving many thousands of customers each year, where nothing is more important than customer service. The Underwater Photography Guide is the world’s first website to feature free tutorials on underwater photography, and has become the most trafficked resource on underwater photography worldwide. Bluewater Travel is a full-service dive travel wholesaler sending groups and individuals on the world’s best dive vacations.
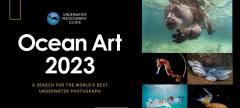
Scott is also an avid diver, underwater photographer, and budding marine biologist, having created the online guide to the underwater flora and fauna of Southern California. He is the past vice-president of the Los Angeles Underwater Photographic Society, has volunteered extensively at the Santa Monica aquarium, and is the creator of the Ocean Art underwater photo competition, one of the largest underwater international photo competitions ever held in terms of value of prizes. He lives in California with his wife, newborn girl and scuba-diving, photo taking 4 year old son.
ALSO BY SCOTT GIETLER


SUPPORT THE UNDERWATER PHOTOGRAPHY GUIDE:
The Best Service & Prices on u/w Photo Gear
 Visit Bluewater Photo & Video for all your underwater photography and video gear. Click, or call the team at (310) 633-5052 for expert advice!
The Best Pricing, Service & Expert Advice to Book your Dive Trips
 Bluewater Travel is your full-service scuba travel agency. Let our expert advisers plan and book your next dive vacation. Run by divers, for divers.