Selling Your Photos: Art Shows and Printing
Growing up, I found myself wandering local art shows in awe of the inspiring artists, each in their own colorful booth. It was at one of these local shows where I discovered that underwater photography even existed! Every year from then on, I would return and pester the artist with questions about his work, and the various ins and outs of taking photographs underwater.
Many years later, after I finally became SCUBA certified, I found an older used camera for sale in my local dive shop. The owners helped me get set up with the camera, housing, wide angle lens, a single strobe, and a mount. Soon after, I was on my first dive trip ever, travelling on a live-aboard in the Maldives, diving with giant oceanic manta rays and whale sharks. This was where I started teaching myself how to shoot quick-moving fish and how to use proper lighting. But my first photos were terrible.
I pored over books and articles online because I wanted to be like the artist I met as a child. Finally, after a few years of practicing and studying, I decided that I was ready to put my own photography out into the world. I did as much research as I could online, not knowing too many artists personally.
While that was helpful for getting started, it was the actual experience that (as usual) gave me the most knowledge. Art shows can be an excellent way for artists to get their work and name out into their community and beyond, so here are some of the main things I have learned from my own experiences.

Finding and Applying to Art Shows
There is no shortage of art shows available throughout the United States, each with their own unique experience. Where an artist is located can have an impact as an underwater photographer. For example, being in the Midwest as I am, many people have never seen the creatures or scenes that I display. Alternatively, underwater photography can be a staple of art shows in areas near large bodies of water.
Furthermore, the resources and accessibility for each individual artist should be a major consideration when deciding to apply. I only do local shows, for now, because it is not economically feasible at this point in my career to travel, ship all of my artwork (or rent a large vehicle), get a hotel for a few days, and take time from my day job.
Read the Rules
Different shows have various types of rules for what can be displayed or sold. It is very important to read and understand these rules before applying or accepting an invitation, otherwise you may have a late night switching all the stock around before a show, like me! It was not a fun night, and not one of my best shows.
One of the largest differing rule specifications for photography is limiting a display to a special ‘Limited Edition’ category, usually up to 250 replications per photo. These are often the more expensive and potentially competitive shows. If an artist has a large body of work, and access to building that body, limited edition rules can give a unique opportunity to curate a special collection, raising your own brand to higher levels in the eyes of customers. I personally like Open Edition shows because I am able to display some of my photographs that are very special to me without limiting their availability.
Application Process
Applying to shows involves a selection of an artist’s work going through a jury process. Generally, this involves submitting 3 to 5 photographs, along with a booth shot. Applications also include writing a short artist statement, and can involve writing a more in-depth description of the medium. During the jury process, your images will be displayed all at the same time, on a large screen in front of the jury panel. The jurors will score the artwork, tally those scores, and rank the artists within the mediums.

One very important realization is that every jury and every artist and every person is different in their likes and dislikes. Everything about an artist’s work can be technically correct, and it may not strike the juror as being right for that specific show. Different shows have different personalities, just as different jurors have different tastes.
For example, I applied to a show called “Funky Ferndale” with a normal selection of my photography and was not accepted to this particular show. The next year, I selected photos that showed the strangest creatures I’d ever photographed, and I was accepted that year. It turned out to be one of my favorite shows. Remember to keep in mind the individual show while picking application photographs.
Most of these applications are submitted through either zapplication.org or juriedartservices.com, though some shows will require an email application. Often, along with acceptances and rejections, there will be a waitlist to fill in spots that become available as accepted artists decline or cancel. I was able to get into a very competitive show off the waitlist, this past year, though it does depend on where you are ranked within your medium (photography, in this case).

What to Actually Sell?
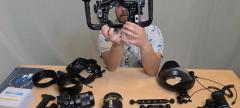
For my underwater photography, I focus on selling fine art pieces. There are many different substrates on which to print or transfer photography, the most popular being photo paper, canvas, metals, and glass. Some photographers will have companies print their photographs, while others will do all of their own printing.
In my personal experience, having my own printer allows me to control the color, the contrast, the brightness, as well as having access to print whenever I need. I have checked comparisons between my printer’s output and other print shops in my area, and based on what I’ve seen, I would not trade my printer for anything. For my paper and canvas prints, I own a Canon Imageprograf 2000, which is a 24-inch wide, large format printer. There are other large format printers available, usually up to 48 in wide or more. I always print on an archival quality paper, for long lasting pieces.

Photo Paper
After printing, photo paper prints should be mounted on a mat board and backing, as a way to frame the photograph as well as to keep them from bending. I get my matting materials from Mat Boards Plus, in the form of ‘Show Kits’, which include the matboard front, the backing, and a protective bag. I use linen hinge tape (Amazon), and archival quality double-sided photo tape. The hinge tape is used to attach the mat to the backing, while the photo tape is used to tape the borders of my print to the back of the mat, keeping the print from sliding.
Other photographers will have other options, but I found this method to work the best for myself. I always sign the print itself (using an archival quality pen!), because mats are removable and any information on them could be lost. I also include a business card and a ‘Take a Look’ postcard in the photo package, directing people to my website, both to get them to my gallery and to give them more information on their chosen picture.
Canvas
For canvas prints, I print my “softer” photos (usually the ones taken on my old compact camera), because the clarity and vibrancy on canvas prints is not the same that might be found on regular photo prints or glass/metal. I print on satin canvas and personally stretch the piece over medium sized stretcher bars from Blick. Having tried less expensive stretcher bar sources, I found I was not happy with the quality, and ended up throwing half of my order away.
After printing a canvas piece, it should be sprayed with a UV archival varnish. For stretching, I use a T-frame ruler to ensure that my bars are perfectly rectangular. A rubber mallet is useful for tapping on the edges if any adjustments need to be made. I then use canvas stretching pliers along with an automatic stapler to attach the canvas to the stretcher bars.
If there is ever damage to a canvas, such as a corner of something poking and causing a dent, lay the piece face down on a flat surface, spray a very small amount of water over the spot, and wait about 20 minutes. The canvas will retighten, however the ink may not be as perfect as the original printed surface.

Glass/Metal Sublimation
Glass and metal prints require heat transfers using a heat press to fuse the ink with the chosen material. A sublimation printer is a must for this process, such as a Sawgrass or Epson printer, due to the specific ink needed. I chose the Sawgrass Virtuoso VJ628 because of the 8 color option. When sublimation printing for photography, a higher number of inks in the printer leads to a more perfect color representation.
After printing the image backwards, it is then pressed onto a coated substrate in a heat press. Heat presses come in many forms, and I recommend a higher quality machine due to the often uneven temperature gradient found in the cheaper options. Furthermore, a swing-away press is what I’ve found to be the best option for versatility, given that a clamshell press will crack glass and will heat from back to front, again leading to an uneven image transfer. One thing to remember is that there is no white ink in sublimation, and the substrate must be white in order to show that color in the photography. There are also many online options for ordering sublimated prints instead of using personal machinery.
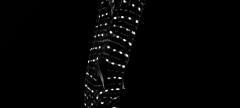
. I took this during an engagement photoshoot, and it’s nice to have a truly Michigan photo for my local customers. Olympus OMD EM1 Mk II")
I Need a Booth!
Designing a booth can be one of the most exciting parts of becoming an exhibiting artist. I chose a nautical theme, as I'm an underwater photographer. I wanted customers to feel as though they were on a wooden ship, looking at a gallery of scenes from the underwater world. I did a lot of research online and on Pinterest for some visual ideas and came up with a design to suit myself. This is a highly individualized process. However, there are some general guidelines for setting up a booth.
- Traffic Flow - What do you want people to look at first? How can you make people feel comfortable enough to come into the booth? It's an interesting lesson in human behavior! I will often put different photos, or baskets of photos, at the front of my booth, and am able to predict the exact reaction/behavior of anyone walking by. These photos are my most attention-grabbing photos, and usually cause people to stop and do a double take. They then realize that there are more interesting art pieces inside, which gives them reason to stop and take a look around. Aisles or a large empty space in the booth can give customers space to walk around the art without feeling trapped inside.
- Tent and Art Panels - Each booth usually requires a tent, often 10ft x 10ft. Height will vary, depending on the type of tent. I bought mine on Amazon for about $200. There are certainly better quality tents, though higher quality means higher cost and not as easy/quick to assemble. My tent has served me well so far, and I haven’t needed to upgrade. Often photographers will use Pro Panels to display their artwork. These are six foot tall, carpeted panels that cost about $100 each. They come in several colors and make for a very nice way to hang art. However, these panels are quite an investment. My solution was to buy grid walls on Amazon - 6 for $100. I ran a satin ribbon through each grid to give them color, and create a solid background. I have gotten a lot of compliments and questions about these covered grid walls, and I am happy with them at this point. Online searching can offer other solutions to artwork displays, and as with many other design elements, it is up to the individual artist. However, having a clean background that helps the art to pop will help during both the jury process and the art show itself.
- Tent Weights - Another necessary item is tent weights. I recommend a minimum of 50 lbs. per leg on the tent. This past year, I was in a show with wind gusts up to 40 miles an hour, and I spent most of the show holding on to my tent. Due to its structure, while I was not afraid of it blowing away (200 lbs. of weight!), I was afraid of the metal legs bending. Again, more expensive tents will be sturdier during hazardous weather. Tent collapses or damaged art can devastate an artist during a show.
- Decoration - Signage, decorations, tables, tablecloths, hanging mechanisms, and photo buckets are all materials to take into consideration when designing an art show booth. However, booths should complement the artwork and allow the art to shine.
- Extras - Another strategy I employ is to have a very comfortable foam floor (that looks like wood!) People find the floor novel and comfortable, and automatically want to stand on it, which draws them into my booth. (On areas with thick grass, I use a carpet instead). I also have had some success using fans, especially in the middle of summer. They cool the booth for me and give people a nice breeze and another reason to step inside. And finally, I have a giveaway next to a bowl of candy on the table in the back of my booth. (Don’t give away chocolate, it will melt!) This allows me to collect contact information, and draw people to the very back. I plan to add a ‘What is your favorite photo?’ question on this year’s drawing slips, in order to get a larger percentage of people to automatically look around.

Transporting art show materials is best done with dollies or rolling carts. The transportation vehicle is not always close to the booth spot. Keep duct tape, zip ties, pliers, scissors and anything else you might need for securing items on hand.
Also necessary for a booth is the state's sales tax license for whichever state an artist’s business is registered. Officials don’t normally ask for it, but are well within their rights to do so. I have been able to set up my booth by myself in about three and a half hours. With an experienced helper, I have been able to get down to 50 minutes of setup time and 30 minutes of tear down time.
I Have to Talk to People?
Being incredibly introverted, I have had to learn to smile and say “hello there” to everyone walking by. Sometimes it gets them to stop, and sometimes it doesn't, but it is nice to connect with people even just for a split second. I also have attention grabbing photos out front that help bring people to me. But what happens when passers-by come into an artist’s booth and start asking questions? For one, it is good practice to know the identification and some behaviors of the species or subject pictured. People also love hearing the stories behind capturing each photograph.
Every single one of my photos has a very particular story - what happened, what I was feeling, what the environment was like, and where I was in the world. I have been able to gather a crowd around my booth by telling animated stories that drew people in. I love telling stories because I get to talk about my vacation photos and people actually want to listen!

Every now and then, people will also ask about the photographic techniques used, and this can be interesting discussion too! It allows people to get a glimpse into what it takes to do this sort of artwork and conveys knowledge and competence to be able to discuss the technical aspects of underwater photography. Realize, however, that not everyone understands the technical concepts, so it’s useful to have higher level descriptions available as well. I have found success with having an extroverted helper entice people into my booth. I have my helper direct people to my giveaway and that gets them to my back of my booth, often causing them to look around.
Sales, Sales, Sales
Sales can be a very difficult part of being an artist. I have trouble bothering people because I do not generally like to have things pushed at me. However, there are many ways to be a good salesperson without being too pushy or overbearing.
One technique I employ is offering an art show “Deal”. It is human nature to want to get a good deal; therefore, I always have several "Sales” in the vein of “2 for X” or “3 for X”. The number of times that I've sold two photographs using this technique vs just one photograph is too numerous to count. Another strategy I employ is to ask people questions about the person they're shopping for, or the type of room they're looking to decorate. Recommendations color-wise or style-wise can be very helpful when getting people to consider my photographs.

I also have a few framed photographs as well because that can be very useful for people who have a particular room in mind, helping them to visualize and clinch the decision to buy. It also is helpful to employ a “close the deal” technique, which involves straight up asking the person if they’re ready to buy. This helps to create an action in the minds of the customer and can lead to them making a split second decision to buy an art piece. Sales are an area where I am constantly searching for information to gather new, non-pushy sales techniques, and overcome my fear of interacting with people.
Pricing for Art
When pricing photographs or other artwork, add together ALL of the costs, including the little things:
- Website
- Marketing Materials
- Art Show – Application Fees, Booth Fees, Transportation, Art Materials, Booth Materials, Taxes
- Photography - I don't necessarily add in all my vacation expenditures, though often underwater photography does require massive travel costs.
After dividing the overhead rate by the number of pieces that I’ve made, I add in the cost of materials, my time to get these photographs, and I multiply that by a factor of 4 to 6 to get the final price. A quick tip – customers will often go for the lowest priced item in a booth. An artist can sell a lot of small pieces, that don’t cost very much, but in the end, barely break even with the show fees. Keep this in mind when deciding pricing and what to sell.
Life at an Art Show
Art shows are a lot of work, but are also incredibly fun and exciting! I get to talk to people about one of my passions – underwater photography! Because of this, I strive to make those attending just as excited, and work to connect with them as much as I can. While attending art shows in the past, I recall some artists that did not seem particularly interested in talking to me, which made me avoid them. I think that is one of the impacts that the underwater photographer had on me as a child - he was so excited and willing to share that it made me feel important and valued, which made me want to support him as an artist.
I have found that the more passionate I am, the more eager people are going to be to talk with me. I even plan how I dress! I often will wear navy to match my booth along with my name tag, a belt purse and my shark tooth necklace, which all helps me convey that this is a large part of my life.

On a more objective note, there are a few things an artist can do to make their experience smoother and more comfortable. For example, it is important to be able to both make change and to take credit cards. Many people only carry credit cards, and will not buy anything if you can’t accommodate them.
I also carry receipt pads and write a receipt for every person. This is usually for my own benefit so that I know what to replace if anything is sold out, or if I had any orders and need to send them later. I also carry a counterfeit pen, a regular pen, one of my archival pens, phone charger, and cord, just in case I need them. And I’ve needed all of them at one point or another!
Under one of my tables, I have plenty of water and caffeine. I do not like to eat in front of people, so despite having a few snacks, I will often personally go without food for an entire show day. I can't necessarily recommend that anyone else do that, as the days are long. By the end of each day, I will have tired feet and an aching body. Some artists will have a chair in their booth and sit in their chair all day. I personally do not like to sit in a chair, but sometimes I'll lean on one of my tables if my feet need a break.

Online Presence
Having a website is incredibly important, as it is a virtual gallery for potential customers to look through. A website can also be used as a central location for any information an artist may wish to share. I also keep all of my photo descriptions on my website, so that visitors can learn about the subjects or places captured in my photography. Eventually, I also plan to capture dive trip reports, in order to give a more in depth look at what it takes to capture underwater photography.
A website can also be used as a way for people to buy art online. Personal websites can be easily created through sites such as Wix, Weebly, Squarespace, and others. For a more in-depth website, experienced artists can create Wordpress websites, or hire a company to create a website for them.
Other valuable tools to connect with the general public are social media sites, such as Facebook, Instagram, and Youtube. Due to the visual nature of photography, artists can use these sites to push their work further into the public’s eye. As of 2019, there are 3.5 billion users of social media in the world (Emarsys, 2019). Included in this staggering number are potential customers, who may be interested in buying what an artist has to sell.
Social media is a way to connect with those potential customers and give glimpses into an artist’s creative process. Engagement is what drives social media connections (hence the title ‘Social’ Media!), and consistent, kind, and supportive engagement between an artist, their followers, and other artists will go a long way toward building a large support base.
Once again, self-promotion can be very difficult, (I personally find it to be one of the hardest things I've ever done; I'd rather swim with sharks, that’s easy!), but for the most part people aren't out there wishing for someone to fail. No one else is going to promote me, so it’s something I have learned to do myself. I recommend researching further online or learning from someone savvy, if an artist is having trouble building their fan base. This is something I do constantly!
Conclusion
Art shows allow me to bring my passion for underwater photography to the general public, and to show people the beauty of the underwater world. They are a lot of hard work, and certainly an investment, but an activity that I recommend to any artist who would like to put their work out there and make some money from their favorite pasttime.
RECOMMENDED ARTICLES
ABOUT THE AUTHOR

Christine Labaza is a materials engineer in the automotive industry and uses her vacation days to travel the world and practice underwater photography. She is based in Southeast Michigan, and trained to become a scuba diver through her local dive shop.
Frequent childhood visits to a yearly art show revealed the adventure and beauty that underwater photography can offer, so she now spends her summer weekends as an exhibiting artist for juried art shows in Michigan. She loves exploring the stunning and strange world below the surface as well as the opportunity to display her photography to anyone who visits her booth.
See her collection of photographs at www.thecphotography.com and follow the journey on Instagram @the.c.photo.
SUPPORT THE UNDERWATER PHOTOGRAPHY GUIDE:
The Best Service & Prices on u/w Photo Gear
 Visit Bluewater Photo & Video for all your underwater photography and video gear. Click, or call the team at (310) 633-5052 for expert advice!
The Best Pricing, Service & Expert Advice to Book your Dive Trips
 Bluewater Travel is your full-service scuba travel agency. Let our expert advisers plan and book your next dive vacation. Run by divers, for divers.