When Auto is Better than Manual - S and A Modes
One of the most important steps to improving your underwater photography is shooting in manual mode. When I'm helping people, it is one of the first things I get new photographers to try. Manual really opens up a new world of creative control. I'm sure every experienced underwater photographer remembers making the plunge...how intimidating it was, how much thinking it took, but also how much benefit it has provided them over the years.
With that said, shooting in auto modes still has its uses, even for highly experienced underwater photographers. I like to think of it as another tool in the toolkit; not one that gets used all the time, but one that is very useful for specific situations.
Auto Modes Explained
First, let's talk about what auto modes are standard on cameras. In manual mode, of course, you control everything - shutter speed, aperture and ISO - however you like. Each auto mode gives some of that control over to the camera, to simplify things for the user.
- Full auto mode: The camera controls everything, and you cannot make any adjustments
- Program mode (P): You can adjust the exposure compensation and ISO, but the camera sets the aperture and shutter speed.
- Shutter priority mode (S): You set the shutter speed, exposure compensation and ISO you want, and the camera sets the aperture accordingly.
- Aperture priority mode (A): You set the aperture, exposure compensation and ISO you want, and the camera sets the shutter speed accordingly.
- Manual mode (M) with auto ISO: Yes this is manual mode, but if your camera allows it, you can use this mode to set your aperture and shutter speed, keep your ISO on auto, and then your camera will vary your ISO based on your exposure compensation setting.

One Auto Mode to Rule Them All
Unless you are taking your camera in the water for the first time, I would never use full auto mode. Actually I wouldn't even use it the first time. Learning semi-manual and manual is so important for underwater photography that I would just skip full auto mode all together. Same goes from Program Mode, though at least you can control your ISO and exposure compensation - the only exception is for cameras which don't have a full auto mode, such as the TG-5 or TG-6. Then, P can work.
How about aperture priority vs shutter priority? I think a lot of people gravitate towards aperture priority, as that is very commonly used for land photography (indeed, that is my go-to mode when shooting topside, unless I'm using a telephoto lens). However, there are almost no situations where I would ever recommend using aperture priority for underwater photography. Shutter priority is far superior in any situation where you need auto - I never use aperture priority mode underwater, ever. (I did at one point, and I ended up with some messed-up photos, which I am still bitter about even a couple of years later!)
To understand the advantage of shutter priority over aperture, we need to break things down into macro vs wide angle photography. For macro photography, I would always recommend shooting in manual, following the tried-and-true underwater settings formula. Set the aperture to control your depth of field. Set the shutter to control your background exposure and freeze the action. Adjust your strobe power to control your foreground exposure. If you want to shoot a great macro photo you need to have precisely the right shutter speed and aperture, and manual is by far the best way to do this. Using auto modes for macro shooting will only get in the way of creating great macro images.
For wide angle photography though, things are very different. Wide angle lenses, especially fisheye lenses, give very deep depths of field for any subject that is not right on your dome port (unless you are doing a split shot). So although it is very challenging to shoot f/2.8 on a macro lens and get the key part of your subject in focus, you can shoot f/2.8 on a fisheye lens with a subject a few feet away, and your subject should be nice and sharp (minus softness around the edges of the photo, depending on lens). On the other end of the spectrum, yes shooting at f/22 (mirrorless) or f/29 (dSLR) will cause a loss of image quality due to lens diffraction, but you will still get a very useable image. So with wide angle, aperture is pretty forgiving.
Meanwhile, shutter speed is very unforgiving - if you have too slow of a shutter speed for whatever motion you are trying to freeze, your photo will be ruined due to motion blur. There's no way around that. High shutter speed, doesn't have any issues, although if you go very high you will need to open up your aperture and bump up your ISO to compensate. And that is why shutter priority is way better than aperture priority - it lets you set in stone the more important of the two variables, the one variable which is most likely to ruin your shot if it's wrong.
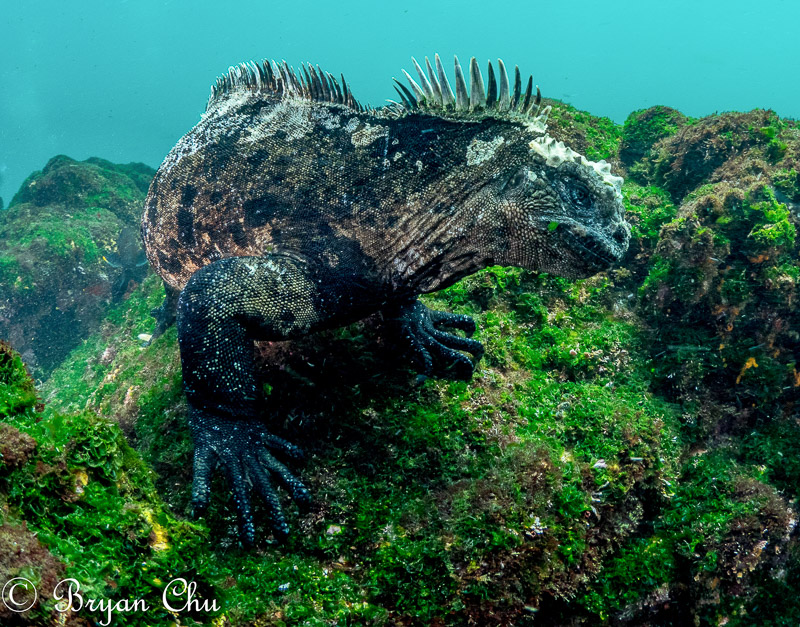
A Marine Iguana Cautionary Tale
This is the experience I had when shooting marine iguanas in the Galapagos. As the water was really full of particulates, I used my strobes more as fill flash than to fully illuminate my subject. And since the surge was so crazy and I wanted to be able to adapt quickly to changing light conditions (iguana on the rocks vs iguana swimming towards the surface), while holding onto something with one hand, I knew I needed to use A or S mode.
Since I was used to using A mode on land, I turned my mode dial to A, dialing it in around f/6.3 to f/8. I adjusted my exposure compensation down about -0.7 to -1.7 so as not to blow out the surface, and set my ISO to 200 to keep noise levels down (shooting with an OM-D E-M1, I don't have a ton of room to bump up ISO, so I try to keep it at 200 if I can). I then spent two dives getting smashed all over the rocks and getting lots of cool photos. In particular, I really wanted to get a shot right up beside a marine iguana as it swam among the rocks, kind of an iguana's eye view, and I got it! I was very excited.
Then, as I sat down to review my photos that evening, I got a sinking feeling in the pit of my stomach. Something was wrong. Photos were blurry. Not all of them - any shots up towards the bright surface had ample shutter speed, and were fine. But many of my eye-level type shots were blurry - unless the iguana was sitting still, I was getting motion blur. And that iguana's eye view I was really excited about? Here's how it turned out:

Not good. And I had lots of photos like this. 1/30 sec, 1/40 sec, 1/50 sec, with some motion...blurry, blurry, blurry. I had a decent amount of successful photos as well, but I should have had many more. It was very disappointing!
So what happened? Well in aperture priority mode, my first upwards shots worked great, with decent shutter speeds and good mid-range aperture values. But when the lighting changed and I was shooting any darker scene, since I had set my aperture around f/8, the camera adjusted the shutter speed for the right exposure by slowing it down. Among all the chaos, I didn't notice that I was getting into motion blur shutter speed range, and my photos were ruined.
Now if I had instead shot in shutter priority mode, I could have dialed things in around 1/160 sec, 1/125 sec, maybe pushed it to 1/100 sec (marine iguanas aren't that fast). Then my aperture would have automatically ranged around...so the above ruined photo, instead of being f/8 and 1/40 sec, could have been 1/125 sec and f/4.5, and that would have been a cool image!
When to Use Shutter Priority
Now that I've hopefully convinced you that Shutter priority is the best priority, let's talk about when you should use it. There are three situations where I would recommend considering S over M:
- Shooting with ambient light
- Shooting fast subjects (with strobes)
- Shooting in challenging/fast-moving conditions
1. Shooting with Ambient Light
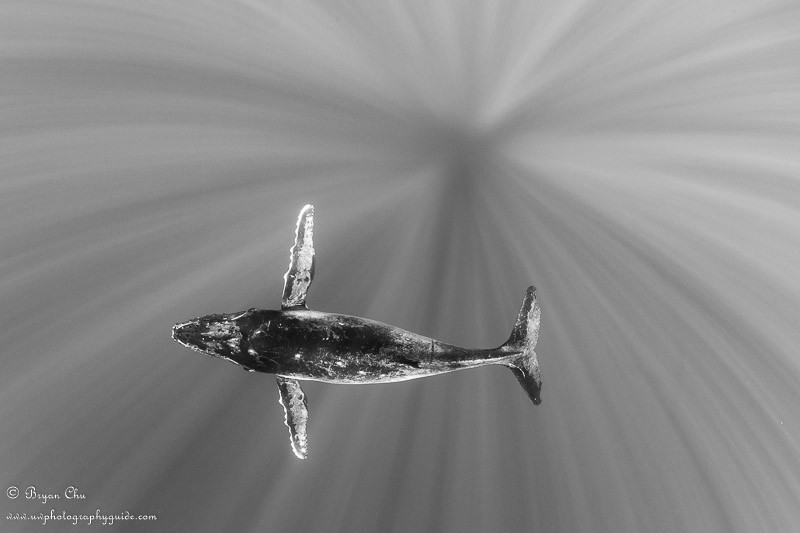
This is the most obvious scenario, and also the most important. When shooting with just ambient light (for me this is only when I'm snorkelling with something fast like a whale shark, humpback or pod of dolphins), shutter priority will make sure you never have to worry about motion blur ruining your shots, and will allow you to concentrate on swimming and getting yourself to the right position for the shot.
No adjusting your exposure every time the lighting on the subject changes (which happens very quickly if the sun is out and you are moving!) - all you have to do is dial in your exposure compensation (typically -0.3 to -1.0, depending on the situation) and check your settings from time to time. If it's darker out and your aperture is going precipitously low, then bump that ISO up to 320 or 400...but if you miss doing that in the heat of the moment, and take a photo of a humpback at 1/125 sec and f/2.8, it will definitely be a lot better than taking your shot at f/5.6 and 1/30 sec!
After switching over the shutter priority when shooting ambient light, I don't see myself ever going back to manual for this situation - it is so much easier.
2. Shooting Fast Subjects
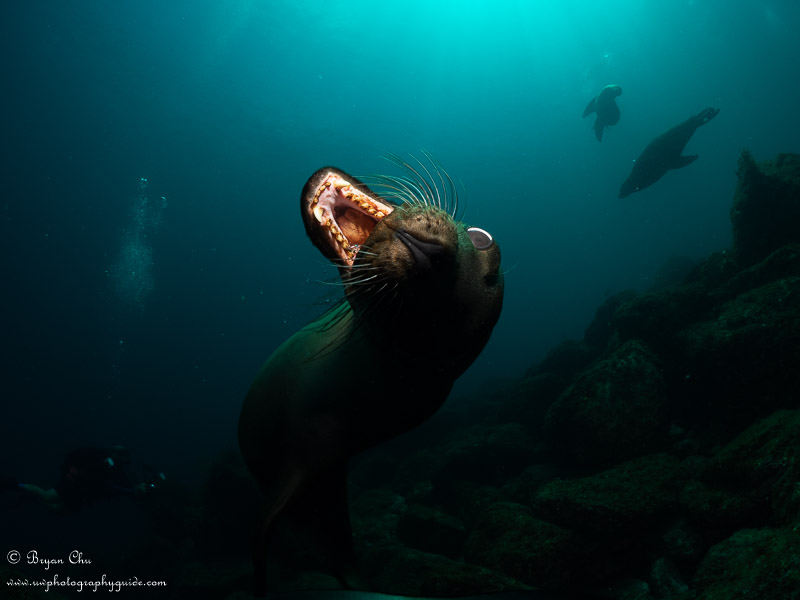
When photographing things like sea lions, before deciding on your camera mode you have to decide on your photography strategy. Sea lions love dive bombing and coming in from the surface, then posing and playing in front of you. If you want to be able to catch them on the way down without blowing out the surface, and then shoot them on the bottom blowing bubbles without a super dark background, shutter priority is exactly what the doctor ordered. The camera will make those adjustments for you so you don't mess up your background, and you can now spend all your time adjusting your strobes and making sure you get your sea lions in focus. This will greatly increase your chances of capturing some cool action photos.
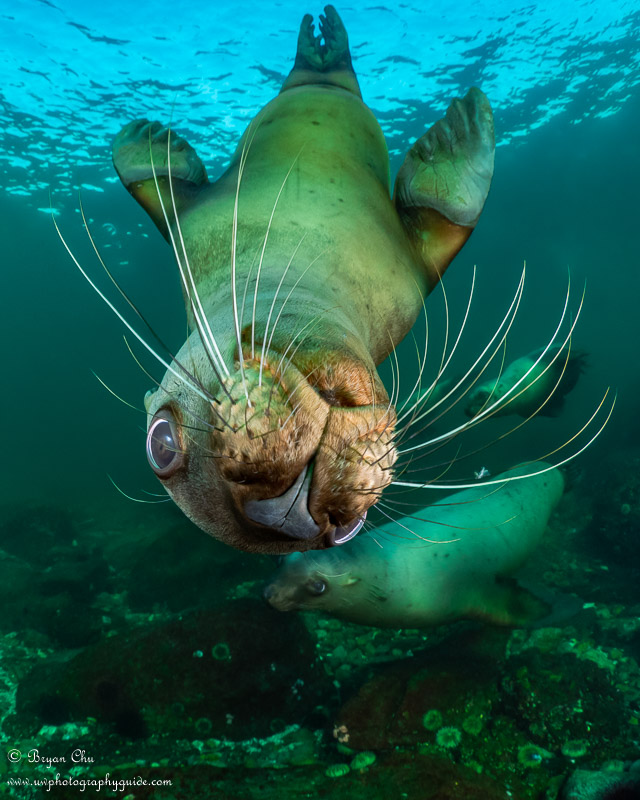
However, if you have lots of experience shooting sea lions, and you just have a handful of key compositions you want to do (for example, a sea lion dive bombing you from the surface, with its whiskers just off your dome port), then manual mode is still the best. Just be prepared to ignore the playful antics on the bottom, as you wait for the next dive bombing run, or expect to get some really dark shots if you try to snap the lower down shots.
3. Shooting in Challenging/Fast-Moving Conditions
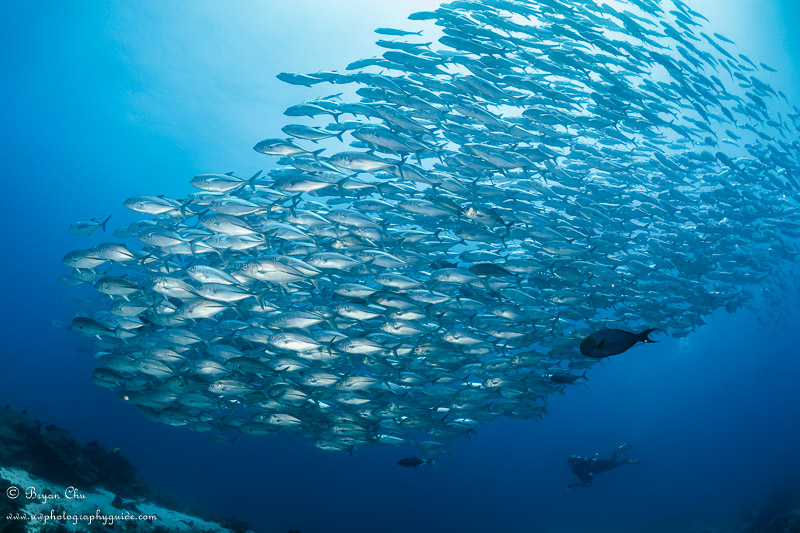
Earlier this year, I was diving at Apo Island, just off Dumaguete. Apo Island is famous for a school of jacks which hangs out on one side of the island. This dive involves a pretty robust current, and since jacks like swimming into the current, to get in front of them you have to swim into the current too. I was with a group of photographers, and things were pretty hectic when we found the jacks. The current was sweeping, people were getting in front for their shots, and the jacks were swimming away from us and into the current.
So now we're talking heavy task loading - swimming against the current, finding rocks to hold onto to rest without touching or hurting the reef, trying to get in the right position without getting in other peoples' shots, and swimming around in different directions as the school of jacks twists and turns. Some directions you're shooting into the sun, others with the sun at your back, sometimes you can shoot at a nice upwards angle, sometimes you can't. And then you have to be cognizant of what your strobes are set to and how close you are to the jacks, to make sure you light them up but don't blow them out (and they are very reflective)!
Now if you're shooting manual mode, add to that adjusting your shutter and/or aperture to fine-tune your background exposure. It's just too much. As soon as I heard the trip organizer mention shutter priority as a way to get better images in these conditions, I knew it was the right choice for me. My plan was: shoot in shutter priority at 1/160 seconds, set my strobes at full power minus 3 clicks, and focus on getting myself exactly where I wanted to be: ~1.5 metres from the jacks, right in front of the school, shooting up towards the surface, and with another diver near the school to show the scale.
I knew at that distance and strobe power, even if my aperture changed up or down a bit with lighting, I would be close enough on the foreground lighting. And if it was way off, I could adjust my positioning a bit to get the right lighting, without having to stop swimming to adjust both strobes and my camera settings.
With the reduced task loading, I was able to get a number of shots I was quite happy with, including a pretty decent version of the one I had in mind. If I had tried this in manual, perhaps I would have gotten it, but I was just as likely to either blow out the sky, or make the blue water too dark.
Bonus Scenario - Shooting in Really Dark Conditions
If you find yourself trying to shoot fast action in really dark conditions, for example northern Norway in January with the orcas, and you want to get a nice background exposure then there is a better option than shutter priority. That is the 5th option I listed above: shooting in manual mode but using auto ISO and exposure compensation (if your camera allows this). This allows you to set the minimum shutter speed and widest aperture (lowest f-stop) you are comfortable using, and then the camera will move the ISO to hit your desired exposure (taking into account your exposure compensation).
Conclusion
Semi-automatic camera modes can help improve your underwater photography by taking away some of the task loading, while still providing you with the core essential creative control. When shooting ambient light, Shutter Priority for me is a no-brainer. When it comes to situations with very fast subjects/changing light conditions, or complex/challenging dive conditions, then it becomes a question of how well I know the subject and environment, and what I'm trying to accomplish.
If I'm new to the situation or subject, only have a couple of dives to come away with something good, or want to be ready for the perfect composition or split second action shot no matter how/where it happens, then Shutter priority is my go to. Once I have scouted things out and gotten a good understanding of subject and environment, and there are specific shots I want to try to perfect, then I will go to Manual mode. And there are no circumstances I will ever use Aperture priority underwater!
So, if that's too much too remember, just keep this simple saying in mind. A is for Awful, S is for Simplicity, M is for Maximum risk & reward.
RECOMMENDED ARTICLES
SUPPORT THE UNDERWATER PHOTOGRAPHY GUIDE:
The Best Service & Prices on u/w Photo Gear
 Visit Bluewater Photo & Video for all your underwater photography and video gear. Click, or call the team at (310) 633-5052 for expert advice!
The Best Pricing, Service & Expert Advice to Book your Dive Trips
 Bluewater Travel is your full-service scuba travel agency. Let our expert advisers plan and book your next dive vacation. Run by divers, for divers.


