3 Tips for Underwater Macro Video
3 Tips for Underwater Macro Video
Bring your macro video to the next level with these simple tips
By Sascha Janson
Most cameras nowadays are able to capture HD video (some even do 4K), and more and more underwater photographers want to take advantage of that movie feature to take home some video of the amazing macro life seen while diving. It can be tricky at first, but don’t give up after one dive. Here are three tips that will help you get better results.
Use a Lot of Light
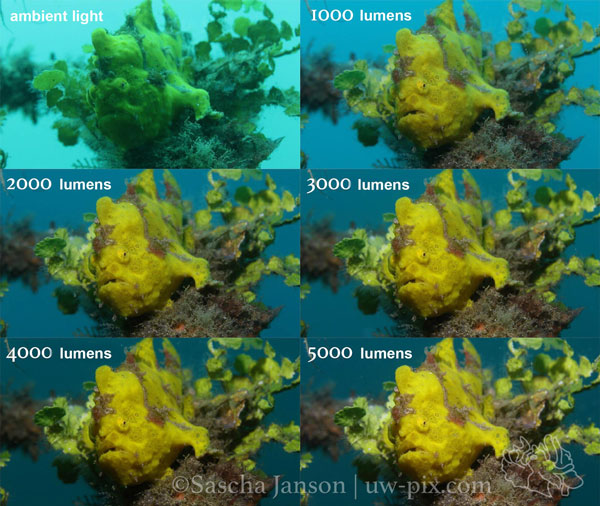
When shooting macro video, we want to overpower the ambient light whenever possible to get the most vibrant colors.
In the image below (screenshots from video) you can see the difference between footage filmed with only ambient light and with a high power underwater LED video light – the colors get more vibrant with the more light we put on the subject.
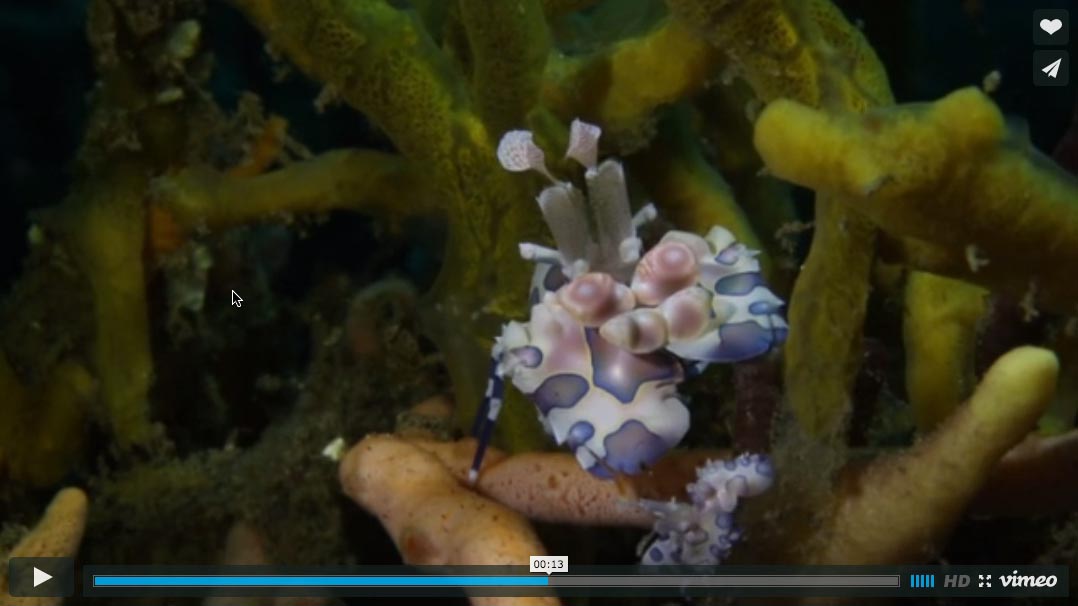
You can also watch the video here:
This video was shot with a Canon 7D Mark II, 60mm macro lens. 1/60sec, f13, (ISO was set to AUTO to show the different results best)
For shooting macro video with DSLRs I recommend using two LED video lights with a wide, even beam and at least 2000 lumens. Using more powerful lights will let you close the aperture on your camera further, which gives you more depth of field. If the lights are too powerful for some scenes, you can always choose a weaker power output. It’s not impossible to get good footage with a weaker light (below 2000 lumens), but the more power you have on a light, the easier it will be.
Use the Magnify Button
Of course shooting macro video with a DSLR is more challenging than wide angle, because most DSLRs generally don’t autofocus well in video mode (some of them only focus manually). Judging the focus in the Live View on the camera’s LCD (or even on a larger monitor) is sometimes very tricky. Using the “Magnify” function and manual focus helps to fine tune the focus.
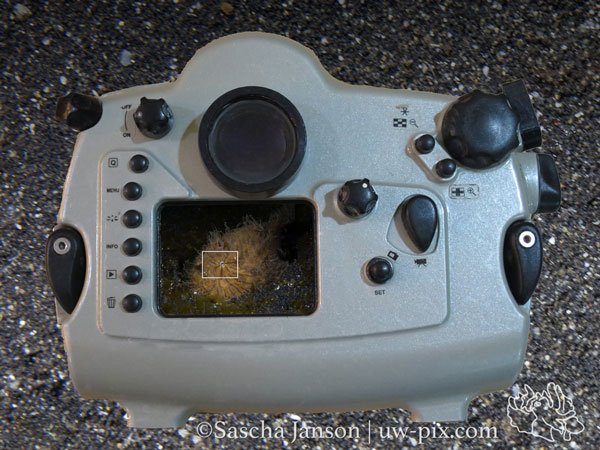
In this example of a hairy frogfish it is very difficult to see if the eye is actually in focus or not, because the whole subject is on the LCD and the eye itself is tiny.
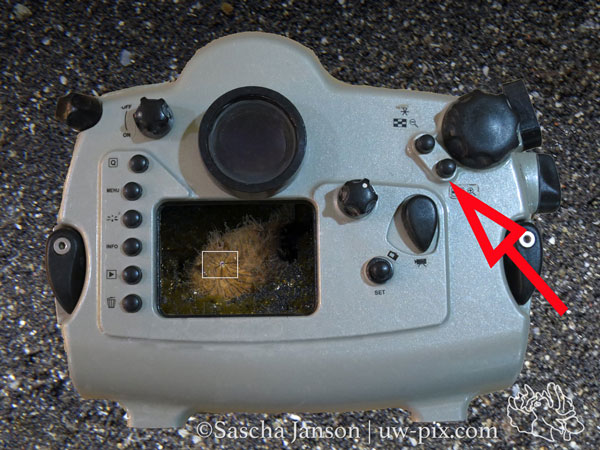
By moving the little white square to the point of interest (here the eye) and then pressing the magnify button (red arrow) we are able to fine tune the focus.
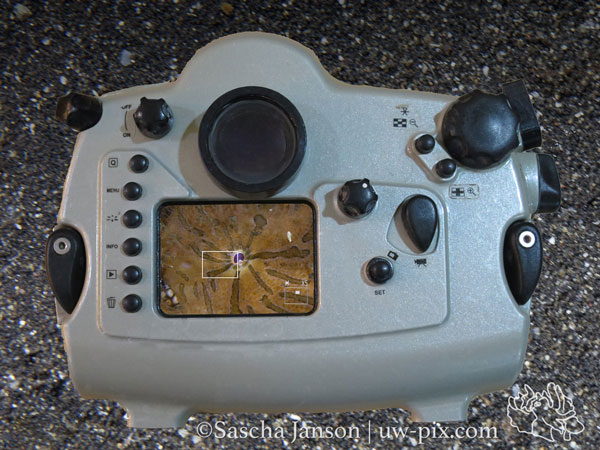
Now we have a 5x magnification preview, which is enough most of the time to be able to judge the focus (by pressing the magnify button again, we can even have 10x magnification) and we can easily fine tune the focus manually. When the eye is in focus we can start our recording. Unfortunately, this only works before we hit the record button, we cannot do this while recording. This works best with stationary subjects or at least subjects that don’t move fast.
I used a Canon 7D in a Subal CD7 housing for this tutorial, so note that the buttons are in different positions on other housings. Newer DSLRs like the Canon 7D Mark II actually do a pretty good job with continuous auto focus, but for really small subjects, camouflaged subjects or when shooting at larger apertures the magnify button and manual focus are still essential.
Use a Tripod
It is very important for macro videography to be steady. Even super sharp focus, perfect light and composition will fail if your audience gets seasick. Use a tripod to get steady footage!
Example video of handheld vs. tripod underwater macro video.
There are many different models of tripods available – you have to choose which one is the right one for you. I prefer a tripod which doesn’t add extra height to the the housing so I’m able to shoot with the port down as low as possible, but this would not be my tripod of choice for shooting pygmy seahorses.
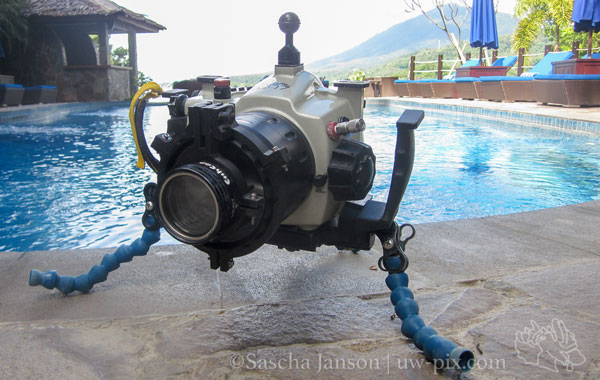
DIY locline elements tripod.
Further Reading
-
10 Tips for Shooting Underwater Video
-
5 Best Underwater Video Editing Tips
-
Creating Videos with GoPro Studio 2.0
About the Author
 Sascha Janson is passionate about diving and photography and spends a couple hours underwater every day with his camera to capture special moments of the underwater world. When he’s not diving, he’s running the photo-center ‘Cameras@Lembeh Resort‘, where he helps fellow underwater photographers with camera problems, teaches courses and produces underwater videos (click here for the Lembeh Resort video gallery). You can see more of his work at uw-pix.com.
Support the Underwater Photography Guide:
The Best Service & Prices on u/w Photo Gear
 Visit Bluewater Photo & Video for all your underwater photography and video gear. Click, or call the team at (310) 633-5052 for expert advice!
The Best Pricing, Service & Expert Advice to Book your Dive Trips
 Bluewater Travel is your full-service scuba travel agency. Let our expert advisers plan and book your next dive vacation. Run by divers, for divers.


