Wide-Angle Snoot Photography: A Guide to Underwater Snoot Lighting
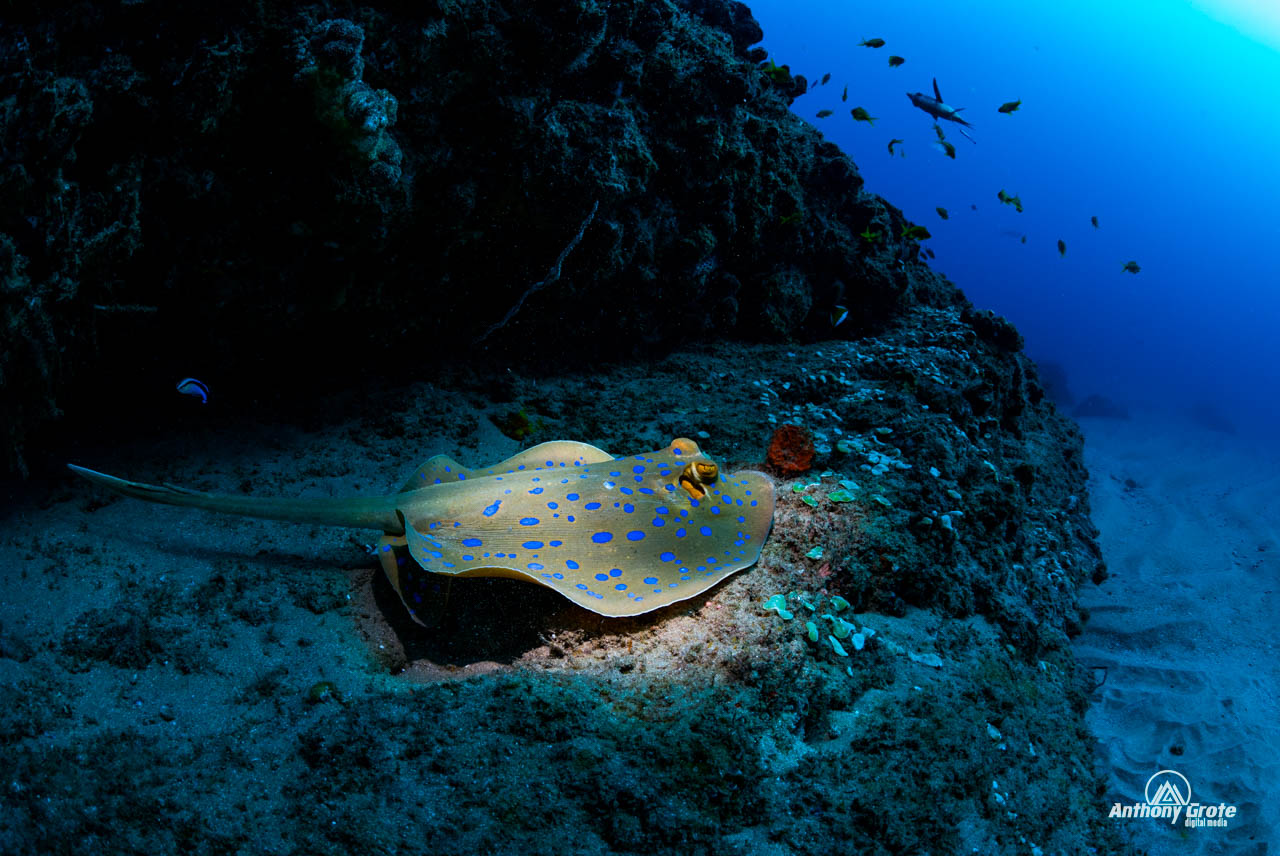
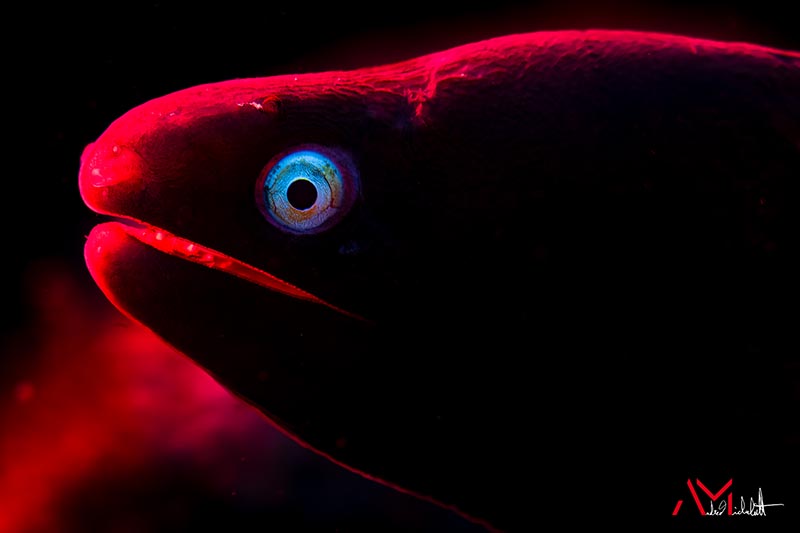
When underwater photographers think about snoots, they usually think about macro photography: a tiny subject isolated against a black background, with a narrow beam of light precisely placed on a nudibranch, shrimp, or other small critter.
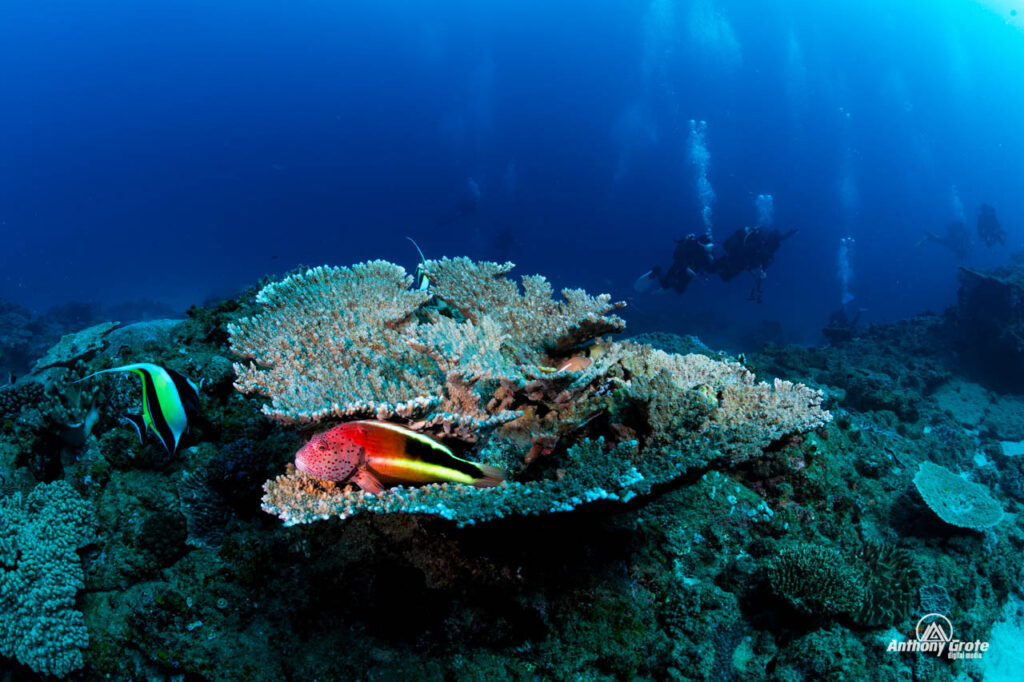
But a snoot can also be an incredibly creative tool for wide-angle underwater photography.
On a recent trip to Sodwana Bay, South Africa, I decided I wanted to try something different. A lover of all things wide, and also enjoy snooting while shooting macro, I figured marrying the two would be the best challenge. I also recently acquired the new Sea &Sea YS-D130r strobes, and got a snoot along with them, so this was perfect timing.
Why Use a Snoot for Wide Angle?
Most traditional wide-angle underwater photography is about spreading light as evenly as possible. We position our strobes wide, pull them back behind the dome port, and carefully angle them outward to illuminate the foreground without creating excessive backscatter. For subjects such as reef scenes, wrecks, sharks, or large marine animals, broad and even strobe coverage is usually exactly what we want.
A snoot does the opposite. Instead of illuminating everything, it deliberately restricts the strobe beam to a very small area.
That means the goal changes from: “How do I light this entire foreground?” to: “What part of this scene do I actually want the viewer to look at?”
This can be particularly effective in wide-angle photography because the small pool of artificial light contrasts strongly with the much larger ambient-light environment surrounding it. The difficult part was now finding the right scene, with the perfect subject, and at the same time, having the best background to compliment what was being highlighted by the artificial light from the snoot.
Combining Ambient Light and Snooted Strobe Light
The key to the technique is thinking about the image as two separate exposures.
The first is the ambient-light exposure – This controls the reef, water column, sun rays, background divers, and overall environment. The second is the strobe exposure – Because the snoot restricts the beam so dramatically, the strobe is only adding light to one small part of the image.
This gives you much more control over where artificial light appears in the photograph.
My Setup in Sodwana Bay
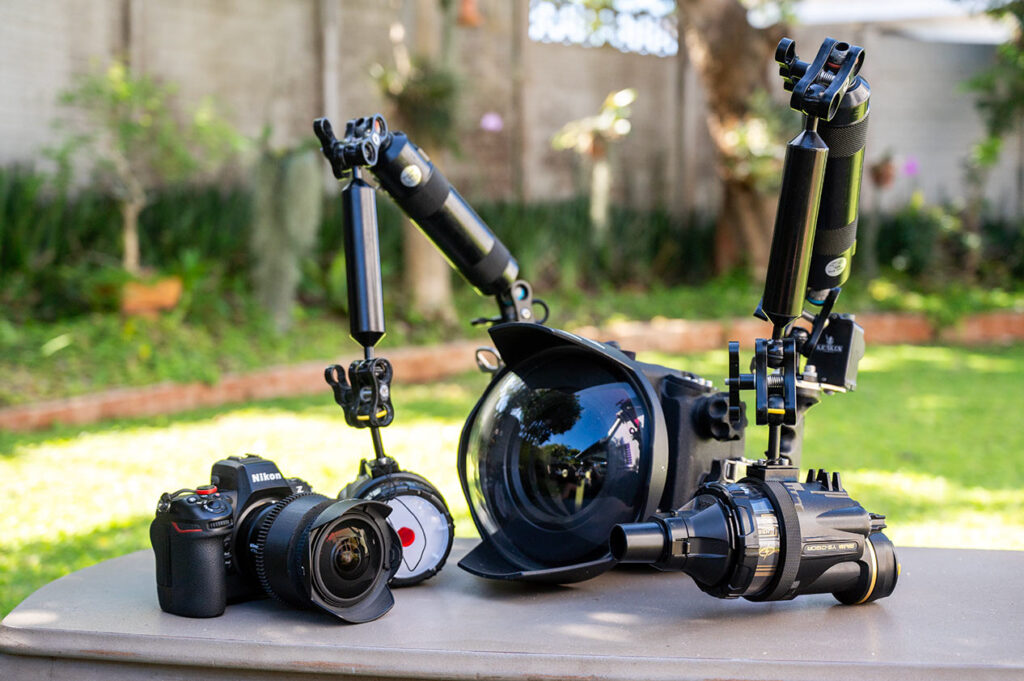
My camera bag has the following items in it for my trip to Sodwana:
The lens I used was the Nikon AF-S FISHEYE NIKKOR 8-15mm f/3.5-4.5E ED, with the Nikon FTZ adapter.
After several years if using my Inon Z240 strobes, I decided it was time to upgrade. After searching around, spec hunting I settled on the new YS-D130r strobes recently released from Sea & Sea. One can get the standalone strobe and use Eneloop batteries, and you can get the package that includes the SB-L01 Li-Ion battery & SC-L0D dual charger. I chose the latter for my purposes mainly for the ease of use, faster recycle times and longer usage in terms of number of strobe releases before having to charge. Sea & Sea also offers a fixed OEM Snoot for the YS-D130r which I got for these strobes.
Prior to diving I went through Nirupam’s setup guide for the YS-D130r’s in order to get the correct settings for my camera, fairly important so that you et the correct output for your setup. After a few test dives I was getting the hang of my new strobes and loving them. It was then that I decided I needed to do something different! The YS-D130R worked particularly well for this type of experimentation because I could use the snoot to tightly control where the strobe light was falling while still relying on the camera’s excellent dynamic range to retain detail throughout the surrounding wide-angle scene. The D130R is also equipped with a 300lm target light, which has a multi-step adjustable beam, and with the target light being positioned in the middle of the strobe, this works perfectly to allow you to know where your beam will light up when the strobe is fired. I was ready to experiment with my new strobes, doing some wide angle snooting!!
Composition Becomes Even More Important
Wide-angle snoot photography works best when there is a clear subject within the wider scene. Does not matter what the subject it, as long as it attracts the viewers attention and then hopefully you can work on composition once you have figured on the best angle.
My search was on, looking for scenes where there was:
- A strong foreground subject (preferably a fish or similar)
- Enough surrounding environment to provide context
- A clean background or open water behind the subject
- A natural line through the scene leading toward the snooted area
- Good ambient light that could still carry the rest of the photograph
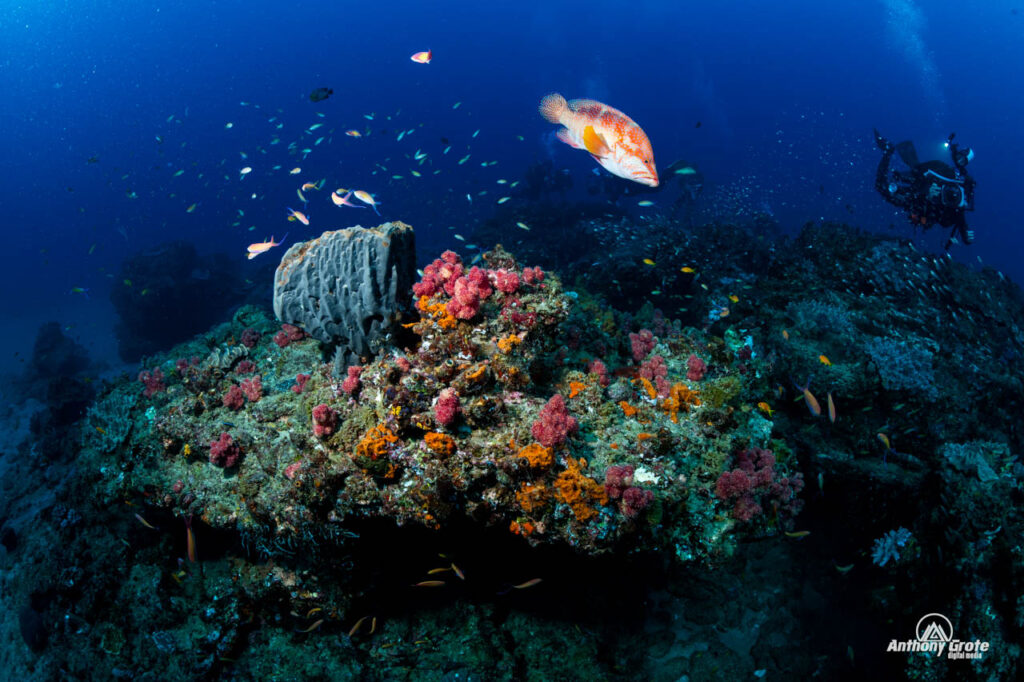
- If possible, adding a human element to the image (diver in the background)
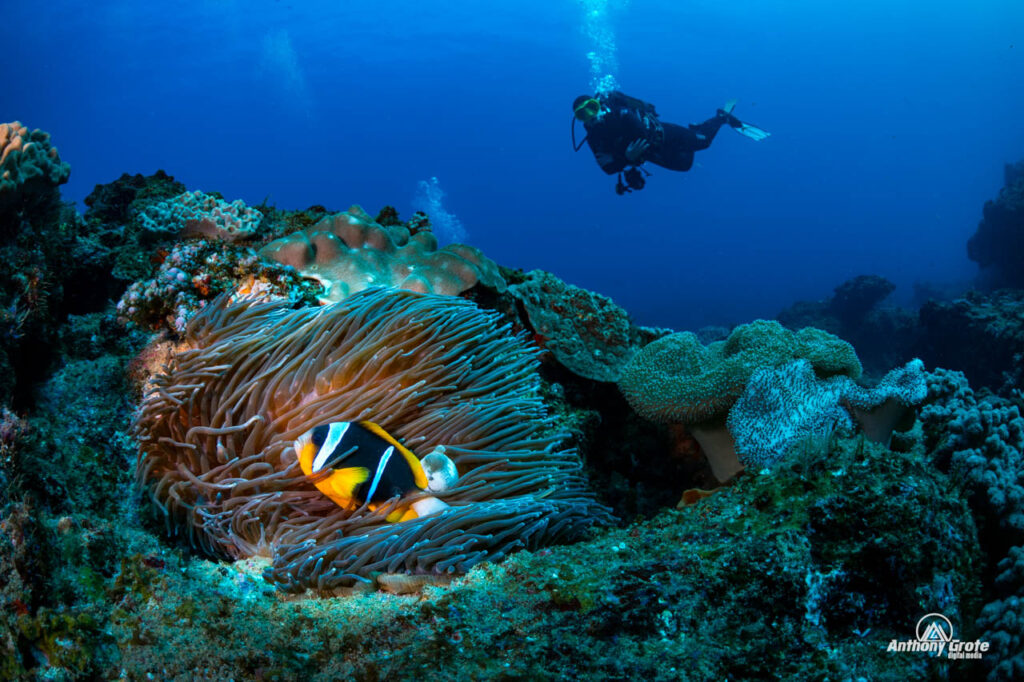
The strongest compositions weren’t necessarily the scenes with the most marine life. They were often relatively simple scenes where one foreground element could clearly become the focal point. The difficult part was now to work with the subject, ensure “eye” contact with the viewer, and not get the snoot in the frame, while still lighting the subject itself.
Some of my favourite, and the most common subjects, were clownfish and anemonefish. Other sea life were difficult to approach without scaring off. But the challenge is real and I will continue my quest on future dives.
Start With the Ambient Exposure
Your shutter speed, aperture, and ISO determine how bright or dark the environment appears. Depending on the conditions, I generally want the background slightly darker than I might expose a conventional wide-angle photograph.
That gives the snooted light somewhere to go. If the entire scene is already very bright, the small area illuminated by the snoot may not visually separate from the surroundings. So under-exposing the entire image by 1 stop or more is the best.
Once the ambient exposure looks right, introduce the snooted strobe and adjust its power independently. The goal isn’t necessarily to make the subject extremely bright, often it’s just a subtle increase in brightness is enough to separate it from the background.
Snoot Positioning Is the Hard Part
Anyone who has used a snoot for macro photography already knows the challenge: aiming a very narrow beam underwater can be frustrating.
Wide-angle photography introduces an additional complication because the subject may be farther from the camera. Even a small change in strobe angle can cause the beam to completely miss the intended subject. Then because you are further away from the subject, while using a snoot, you have to be careful not to get the strobe with snoot in the photo itself.
Rather than constantly moving the entire camera system, I found it more useful to get the composition where I wanted it first and then adjust the snooted strobe toward the subject. This is where the target light comes into play – it helps put a little beam of light on the subject, making the need for less trial and error shots and the possibility of chasing your subject in the process.
Don’t Overdo the Effect
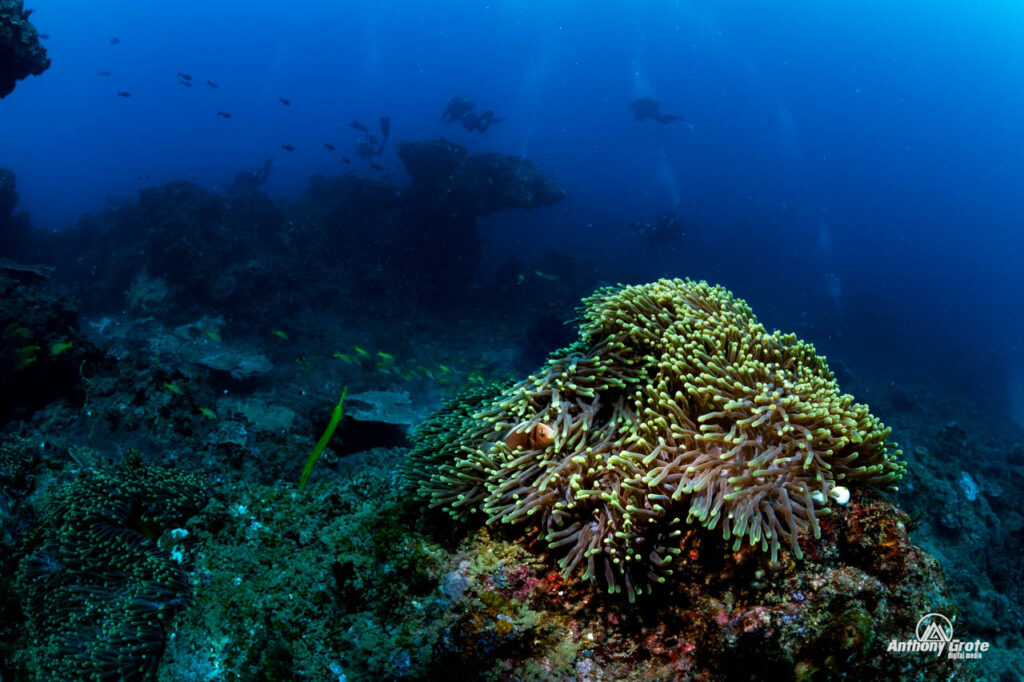
It is tempting when using a snoot to make the illuminated subject dramatically brighter than everything else in the frame. Sometimes that works. But for wide-angle photography, I generally prefer the effect when it is somewhat restrained. The ambient environment should still feel important.
You’re not trying to turn a wide-angle scene into a macro photograph with a black background. You’re simply controlling the viewer’s attention inside a much larger composition. Ideally, someone looking at the photograph first notices the illuminated subject and then begins exploring the surrounding reef.
The light should guide the viewer rather than completely overpower the photograph.
One Snoot or Two Strobes?
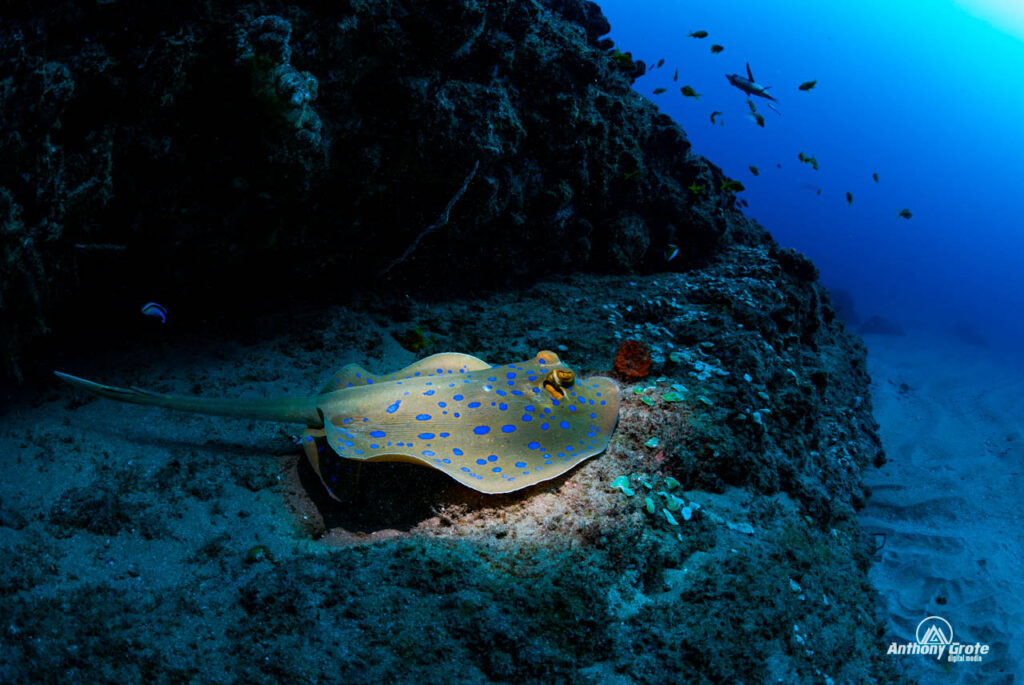
There are several ways to experiment with this technique. You can use a single snooted strobe and shoot almost entirely with ambient light outside the snooted area. You could also use one conventional strobe at relatively low power to gently illuminate part of the foreground while using the second strobe with a snoot as the primary accent light. Each approach produces a different look.
Using only the snooted strobe creates the most dramatic separation between artificial and ambient light. Adding some conventional fill makes the technique more subtle and can retain additional detail in the foreground.
There isn’t necessarily a correct solution. It depends on the scene and the photograph you’re trying to create.
Subjects That Work Well
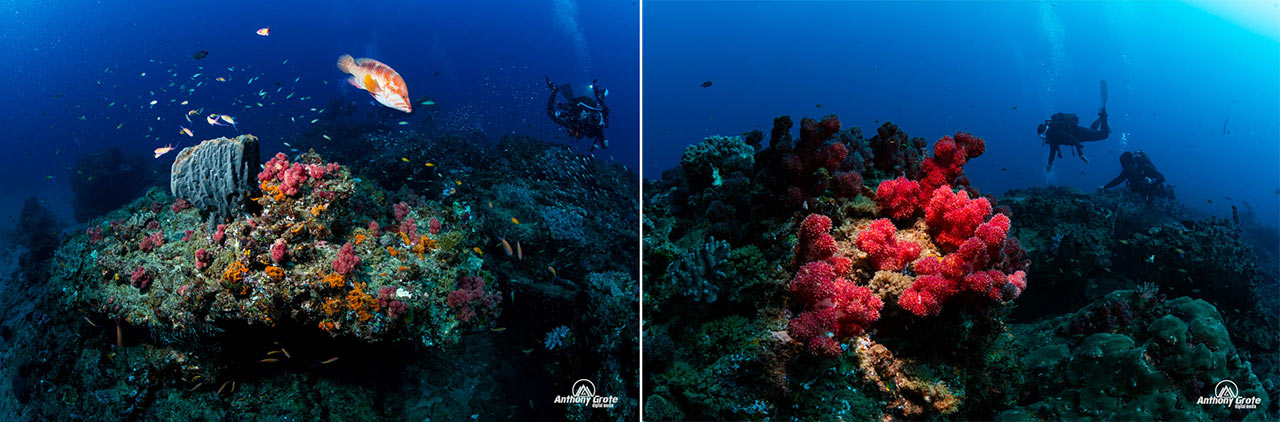
Although almost anything can potentially become the illuminated element, some subjects naturally lend themselves to this technique. Colorful soft corals, sponges, sea fans, small reef fish, anemones, and isolated coral heads can all work extremely well.
A brightly colored subject is particularly effective because the strobe restores colors that are otherwise lost with depth.
Challenges of Wide-Angle Snoot Photography
This isn’t necessarily an easy technique.
The first challenge is simply aiming the light accurately.
The second is finding the right balance between ambient and artificial light.
The third is subject distance.
Snoots are frequently used extremely close to macro subjects. In wide-angle photography, the snooted subject may be farther from both the camera and strobe, which makes beam positioning and strobe power more important.
Finally, you need patience. Approaching animals always takes finesse and calm/gentle movements. Watch their behaviour as all living animals have a personal space, but if approached in a slow and calm manner, they will allow you more freedom to penetrate that zone of comfort.
Tips for Trying Wide-Angle Snoot Photography
If you want to experiment with this technique yourself, start with a relatively simple scene and a stationary foreground subject. Set your ambient exposure first and get the background looking the way you want it. Then introduce the snooted strobe. Keep your camera position consistent while adjusting the strobe so you can see exactly how each change affects the light. Start with relatively modest strobe power and increase it gradually. Most importantly, don’t feel that the snooted subject has to dominate the entire photograph. Sometimes the most interesting result is simply a small patch of carefully placed light inside a much larger underwater landscape. Snoots are often thought of as specialized tools for macro photographers. They don’t have to be.
Used creatively, a snoot can also be a powerful wide-angle lighting tool—allowing you to combine natural light, artificial light, color, and shadow in ways that conventional wide-angle strobe positioning simply can’t reproduce.