Welcome to the Underwater Photography Guide. This online book and magazine is a complete underwater photography tutorial full of u/w photography tips and techniques. Our idea is simple - learn, shoot, explore. We hope you enjoy and come back often - Scott Gietler, Owner of UWPG and Bluewater Photo & Travel.
Port & Viewfinder Reviews
Detailed underwater port reviews and viewfinder reviews for a wide range of camera housings.
Using Filters for Underwater Video with the GoPro HERO5, Hero4, Hero3+ and 3
Underwater Video has been changing quickly with the Full HD recording capabilities of DSLR, mirrorless and compact cameras. 4K video is almost old news. The GoPro HERO5 is a serious player due to its small size, great video quality, features for underwater & topside use, low price point, and wide range of accessories. There is a growing number of photographers building amazing portfolios with nothing but GoPro cameras. In fact, it's the only underwater camera I used while leading our 2016 La Paz photo workshop.
There are many different filters available for the GoPro HERO5, Hero4, Hero 3+ and 3 that increase the camera’s versatility, allowing for more creative shots on land and underwater. Polar Pro makes an excellent range of glass filters for the HERO5 / Hero4 / Hero 3+ that we've used for the guide below. The filters snap onto the GoPro securely and easily, and the glass makes them very scratch resistant with higher optical properties than plastic. The range of filters includes:
Red Filter: Used in blue water
Magenta Filter: Used in green water
Macro Filter: Used to shoot small subjects
Switchblade 5 Filter: Flip between red filter for wide-angle and macro lens for small subjects
Polarizing Filter: Used topside to control reflected light
Neutral Density Filter: Used topside to slow the shutter speed
NOTE: This article has been updated for the HERO5 and Super Suit.
When to Use a GoPro Filter
GoPro filters are used to bring red color back into your underwater video, making that washed out blue or green footage pop with more accurate colors. Technically, the filter reintroduces the red color spectrum back into the picture, allowing the camera to select a more accurate white balance. The alternative to filters is to use video lights, which also bring vibrant color back into the picture, however their range is only a few feet (1m). Filters and lights should not be used at the same time, as the picture will look very red!
The GoPro HERO5 is waterproof itself, however we recommend using the Super Suit Dive Housing for freediving and scuba diving. This is important because it requires a new set of filters. If you are using the HERO5 without the super suit, then filters from the Hero 4 and 3+ should fit.
Red filters compensate for the lack of red light in underwater scenes (since red is the first color to be lost when descending in water). This shift in available light will often confuse the camera's white balance metering, so the red filter helps deliver accurate, vibrant color in your video, as well as much-needed contrast. A red filter is designed to be used in tropical and blue water, optimized for use between 10 and 80 feet.
Best Use: Ambient light (no video lights). Blue water.
More Info & Purchase:
FLIP5 3 Filter Kit, includes 3 filters for shallow, moderate, and deep water
Magenta filters also compensate for the lack of red light but are optimized for green water between 10 and 80 feet. Not only do the filters bring color back into the scene, but they also help bring back the contrast needed for interesting video.
Best Use: Ambient light (no video lights). Green water.
Polar Pro’s macro filter provides 2.2x magnification for capturing video & photos of small subjects from a close distance. The GoPro HERO 5 has a minimum focus distance of 12 inches (you must be 12” or further from your subject for sharp images). This macro filter has a focus range of 2-18 inches, which allows you to move the camera closer to the small subject to fill the frame with more detail.
Best Use 1: Shoot macro in combination with the Red filter (check out the Switchblade 5). No video lights are needed since the red filter brings the reds back into the scene. Or flip up the red filter and use only the macro filter with video lights. Or use just the red filter without the macro lens. The Switchblade is an ideal GoPro filter setup since you're prepared for anything.
Best Use 2: With video lights, add the macro filter to capture small details – just make sure the light isn’t too strong, which will overexpose the scene.
Polar Pro’s Switchblade filter combines their two most popular filters (red and macro) AND allows you to use them at the same time. As discussed above, red will correct the white balance of your shots while the macro filter will allow you to shoot subjects within 12 inches and help to fill the frame with the subject. With the Switchblade you can use red and macro at the same time!
Best Use 1: Shooting macro subjects without a video light (red filter flipped down).
Best Use 2: Shooting macro subjects with video lights (red filter flipped up).
Best Use 3: Red filter only for wide-angle shooting without video lights.
The Flip5 Pro package includes 3 red filters for shallow, moderate and deep depths, plus a macro lens, and is recommended for more serious underwater video.
Polarizing filters are a must in any landscape photographer’s bag, so it’s natural that you should have one for using the HERO5 topside during dive trips. The filter reduces glare (on the water, leaves, rocks, etc) and brings a bit of saturation and contrast into bright scenes (like sky and clouds). When out on location, you can hold this filter up to your eye to preview its effect and determine whether you’ll use it.
Neutral density (ND) filters are meant for topside use and are critical for certain video/photo situations. ND filters block light, making slower shutter speeds possible. The GoPro HERO5 uses a fast shutter speed by default, which freezes action very well. There are times, however, when some blur creates a sense of movement and enhances the action in the frame. The ND filter can be used to achieve this. Examples include moving pavement while driving and waves splashing against rocks.
ND filters are also very useful for timelapses, where slow shutter speeds (aka “dragging the shutter”) create slight blur, resulting in a smoother timelapse. Lastly, ND filters are very popular with drone operators, since they help reduce rolling shutter wobble.
Best Use 1: Video & photos where frames need to be blurred to show speed or the passage of time.
Best Use 2: Smooth video, especially for GoPro timelapses or when mounted on vibrating surfaces like a drone.
The Polar Pro filters provide many creative options for your GoPro HERO5 (as well as the Hero4, Hero 3+ and 3) underwater as well as topside. They will make all the difference in your underwater video and open creative possibilities for many unique shots.
Filters are best for large scenes that you cannot get close to, in shallow water. For dives below 40ft, or for subjects you can approach within 5ft / 2 meters, or coral reefs, we recommend getting one or two video lights.
Brent Durand is a weekend wanderer and story teller from California.
Brent is an avid diver and adventure photographer, and shoots underwater any time he can get hands on a camera system. He can be reached at brent@uwphotographyguide.com.
Looking for a dome port for your Tokina 10-17mm fisheye lens? I was too, and that's when I found out about the Precision 5" Dome. What's great about this dome port is that it's designed specifically for the Tokina 10-17mm lens, and my Ikelite housing.
I find that the Precision Dome attaches easily and securely to my housing via the four port-locks, and its small size makes packing easy. But more importantly, it allows me to take some great underwater photos.
The Precision 5" Dome with the Deluxe Dome Shade attached. And yes, if you look closely, you can see my bald "dome" in the dome.
The Precision 5" Dome on my Ikelite D90 housing.
Side view
The Precision Dome details
The Precision 5" Dome is manufactured based on calculations using the nodal point of the Tokina 10-17mm fisheye lens and the Ikelite dSLR housing. The calculations define the distance between the lens nodal point and the dome, resulting in sharper edge-to-edge focus when compared to other generic dome ports. A wider angle of view is achieved from the use of a half-sphere dome.
You will need the Ikelite 5510.11 or 5510.10 super-wide-angle port body with the dome. Another option is to use a 1.4 teleconverter (Kenko Teleplus Pro 1.4x) in conjunction with the Ikelite 5510.16 standard zoom port body.
Benefits of the Precision 5” Dome
Ultra sharp with the Tokina 10-17mm lens
Wider angle-of-view
Better edge-to-edge image sharpness than other generic domes
Absolutely no vignetting with the shade
Small size allows you to get closer to your subjects - great for CFWA shots!
Very small and light - makes packing and traveling with your equipment so much easier
Acrylic material means light scratches will generally not appear in photos. Deeper scratches can be "meshed out" with an acrylic mesh kit.
All domes are vacuum leak tested
Includes Port Lock (for the Ikelite port body), Deluxe Dome Shade, Dust Cover, and Dome port Cover
This Precision Dome is available through our sponsor, Bluewater Photo. Please call them at (310) 633-5052 or visit their website if you have any questions.
Underwater photos taken using a Nikon D90 in an Ikelite housing, Tokina 10-17mm fisheye lens, and the Precision 5" Dome
Wreck of a Piper Warrior off the coast of Catalina Island, CA. F3.5, 1/8th, ISO 800 at 10mm.
Sheepcrab at Catalina Island, CA. F5.6, 1/80th, ISO 200 at 17mm.
Garibaldi and kelp at Blue Cavern - Catalina Island, CA. F9, 1/25th, ISO 200 at 10mm.
About the Author
Michael Zeigler is editor-at-large for the Underwater Photography Guide, trip leader and instructor for Bluewater Photo, and is an AAUS Scientific Diver. Michael's underwater photography and blog can be seen at SeaInFocus.com.
Join Michael as he leads an amazing underwater photography workshop at the famous Wakatobi Dive Resort 11/21/13 - 12/2/13!
Special thanks to the captain and crew of Sundiver Charters in Long Beach, CA for the great dives and service. -Ed.
Support the Underwater Photography Guide
Please support the Underwater Photography Guide by purchasing your underwater photography gear through our sister site, Bluewater Photo & Video. Click, or call them at (310) 633-5052 for expert advice!
I have to admit over the past few years I have become increasingly jealous every time somebody showed up on a boat with one of those big expensive viewfinders on their housing. So when Dave Hinkel offered me an opportunity to try out the Nauticam 180 Viewfinder on the Nauticam Canon 7D housing, I jumped at the chance.
First Impression of the Nauticam viewfinder:
It's big and it's bright! The Nauticam 180 viewfinder gives you a much larger image of the camera's viewfinder giving you a greater advantage for critical focus and composition. The 180 viewfinder features a diopter adjustment knob that is large and easy to adjust even while wearing gloves underwater.
It does require a little practice to get used to the 180 viewfinder. I found that underwater, I had to be more precise and look directly inline thru the 180 viewfinder as oppose to still being able to focus thru the standard viewfinder at slight angles.
The LCD screen is still 100% visible even with the 180 viewfinder attached so you are still able to review your images and shoot video. Although if I was specifically doing video dives, I would leave it off just to give myself a more unrestrictive view of the LCD screen.
Installing the viewfinder:
Installing the 180 viewfinder couldn't be any simpler. The standard Nauticam viewfinder is easily removed by taking off the internal o-ring and sliding it out of the back of the housing. The 180 viewfinder has 2 pins to keep it from spinning and is held in place with an internal o-ring. Nauticam makes specially designed adapters so the viewfinder can also be used on Aquatica, Ikelite, Nexus and Sea & Sea Housings.
Now that I have had the opportunity to try one out, I'm hooked. The enhance viewfinders are an expensive accessory from any of the manufacterers, but if you can afford it, in my opinion it is worth the investment.
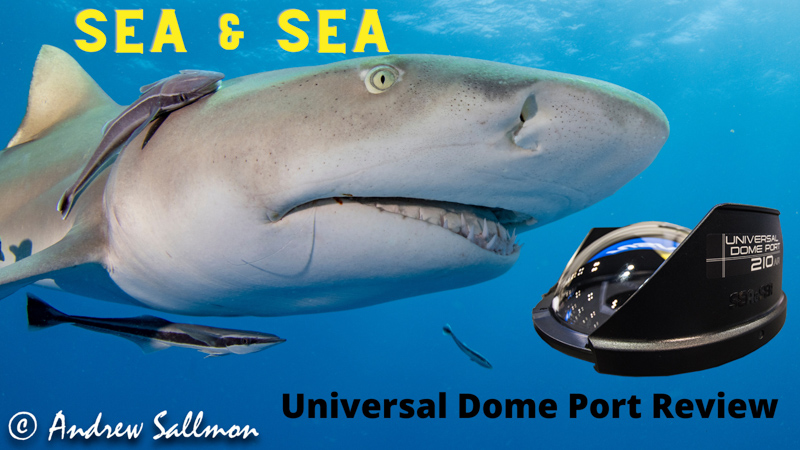
Sea & Sea fisheye, compact, acrylic and glass dome port review
In this review I tested 3 Sea and Sea dome ports with my Nikon D300 and Tokina 10-17mm lens in the swimming pool, checking sharpness, color and contrast.
Sea & Sea Compact dome port
The S&S compact dome port is a light-weight, 6 inch acrylic dome port. Total width is 6.5 inches including the outer plastic. 1lb 9oz with the cover and 20mm extension ring. $500 in the USA. The SX extension ring (20mm) is an additional $190.
Sea & Sea glass dome port
The S&S glass dome port is a compact 6 1/2 inch dome port made by Athena for Sea & Sea. 2lb 12oz with the cover and 20mm extension ring. $1250 in the USA.
Sea & Sea Fisheye dome port
The S&S fisheye dome port is a 8 inch acrylic dome port. Total width is 9.5 inches including the outer plastic. 2lb 9.7oz with the cover. $650 in the USA.
Dome port test methodology
I took hundreds of test shots, at focal lengths of 10mm, 14mm, and 17mm. I took shots at distances of 2ft and 4ft away. I also compared center areas, side areas, and corners of the photos. I took photos at apertures F5.6, F8, F11. I also had two experienced photographers independently compare 100% crops of the test photos.
Glass and Acrylic dome port test results
No difference between glass and compact dome ports
No difference between dome ports in center sharpness
All dome ports sharp in the center
All dome ports sharpest in the corners at F11, and usually fairly sharp at F8, and not too bad at F5.6
Large fisheye dome port (acrylic) was best of them all, but only by a small amount in the corners, if you look at 100% crops.
Dome port test conclusions
Compact dome port (acrylic) is best for close-focus wide angle (CFWA) shots, and for travel, and easiest on the pocketbook.
Fisheye dome port is slightly better in the corners at F5.6 and F8.
No need to spend the extra money on the glass dome port.
When using the Tokina 10-17mm fisheye lens, the fisheye dome port does not need the 20mm extension ring, but may benefit from it? (This will be my next test). Rotating the aperture dial is more difficult without the ring on.
The compact dome port definitely benefits from the 20mm extension ring.
The fisheye dome port will give better results for over and under shots.
Glass ports are heavier, more resistant to scratching, and shed water easier that acrylic ports. It's possible that other well-made large glass dome ports have optical advantages over acrylic ports (e.g. - Subal or Seacam ports), but I didn't find any with this particular port.
Disclaimer - these test results may not apply to other manufacturers of dome ports, or in the conditions you shoot in, you should always do your own port tests. Dome ports can vary in quality.
Scott Gietler is the owner of Bluewater Photo, Bluewater Travel, and the Underwater Photography Guide. Bluewater Photo, based in Santa Monica, CA is one of the world’s largest and most prestigious underwater camera stores, serving many thousands of customers each year, where nothing is more important than customer service. The Underwater Photography Guide is the world’s first website to feature free tutorials on underwater photography, and has become the most trafficked resource on underwater photography worldwide. Bluewater Travel is a full-service dive travel wholesaler sending groups and individuals on the world’s best dive vacations.
Scott is also an avid diver, underwater photographer, and budding marine biologist, having created the online guide to the underwater flora and fauna of Southern California. He is the past vice-president of the Los Angeles Underwater Photographic Society, has volunteered extensively at the Santa Monica aquarium, and is the creator of the Ocean Art underwater photo competition, one of the largest underwater international photo competitions ever held in terms of value of prizes. He lives in California with his wife, newborn girl and scuba-diving, photo taking 4 year old son.
Newly Updated! Features, Image Stabilization Tests, Hi Res Shot Mode, Underwater Photos, Videos, Lens Options, Housings and Comparisons to the Competition